• Pinterest
  • Facebook
  • Instagram

From Farmhouse to Florida

Bloom Where You Are Planted!

  • From Farmhouse to Florida
  • Home
  • About
  • Home Tour
  • Advertise
  • Blog
  • Recipes

We Added a Big Green Egg to Our Outdoor Addition!

March 19, 2022 by Kimberly Snyder 6 Comments

Spread the love
Jump to Recipe Print Recipe

Are you looking for a multi-functional appliance for your outdoor kitchen? Here is one piece that can do several cooking functions!

Large Big Green Egg in Acacia table

(this post first appeared 3/29/2021, I have updated it with new insights & more pictures)

Last Spring when we first began planning our outdoor addition, we had planned to purchase a gas grill and a portable pizza oven.  My husband loves to grill out and has been using a gas grill for years.  I really wanted an actual brick pizza oven but when I found out it would cost a minimum of $12,000, I started looking at alternatives.  I found a gas-powered tabletop unit that I thought would work.

That all changed when we walked into the local Ace Hardware store last Spring.  We were looking at gas grills and a salesman came up to see if he could help us.  Dave explained that we were looking for a gas grill and I mentioned that I was ordering a tabletop pizza oven.  The salesman asked if we had considered the Big Green Egg.  In all honesty, neither of us knew anything about the Big Green Egg except I thought they were ugly so I just wasn’t interested.  And I pretty much told the salesman that too.

To the salesman’s credit, he was not offended by my attitude.  He began to educate us.  He very patiently explained all the different types of cooking that the Big Green Egg could do.  When he got to “and you can cook pizza in it….”. I began to listen!  When we did the math and realized we would still be money ahead after purchasing the Large Big Green Egg and all the “toys” (as I call the accessories) we would need to get started, we were convinced!

The Outdoor Kitchen

As part of our outdoor addition (read more about it here …. and here….), we expanded the existing lanai and added a composite roof over the expanded area.  Below is the original 3D rendering of the area.

Lanai - over head view


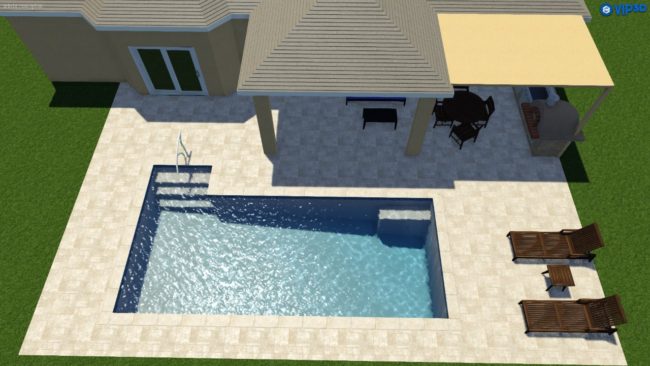
Technically, it isn’t a real outdoor kitchen because we don’t have a sink .  We will have a prep area as well as a dining table .  I am getting ready to order the prep table .  I am dying to set up the dining table as well as the rest of the furniture but we are waiting for the final power washing to be completed.

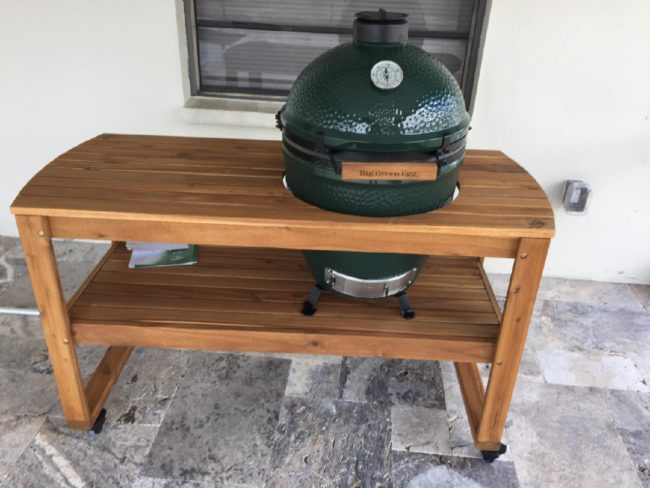
We were originally going to order the Big Green Egg with the metal stand on wheels called a nest.  We decided to go ahead and get the Acacia table as it would provide more work space and a bit of storage.  The table has casters so we can move it around the outdoor kitchen if we need to.  The Big Green Egg is nestled in the small nest to add stability.  The Egg and the table arrived on St Patrick’s Day while I was in Illinois.  I just realized that having the Big Green Egg delivered on St Patrick’s Day was kind of cool!  Green for St Patrick’s Day!

We really love the Acacia Table.  It not only keeps the Egg secure, it give us plenty of space to work.  I even use the table to sort craft supplies and silk flowers when Dave isn’t using it cooking!

Tussie Mussies in Fall hues

The lockable wheels allow us to move it around the lanai.  Dave prefers to do the actual cooking out in the “open” rather than under the composite roof area.

Our First “Cook”

This past weekend, we went to two different hardware stores and picked up a few of the “toys” that we would need.  The most important thing we needed before we could cook was the special charcoal and the fire starters.  I am extremely scared of fire and am hoping that I can get over my fear and light the Egg when Dave is busy on the golf course or in the pool! update: Just so you know, to date (3/19/2022), I still haven’t tried to light the Big Green Egg!

Since we have been talking about getting the Egg for almost a year, we have had plenty of time to watch You Tube videos, read articles and ask questions.

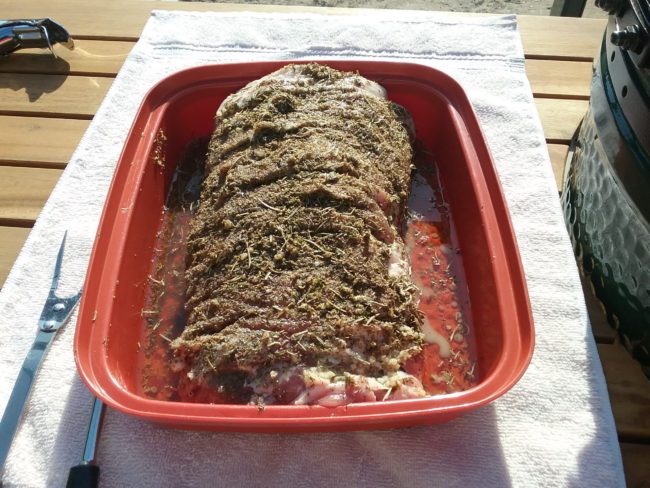
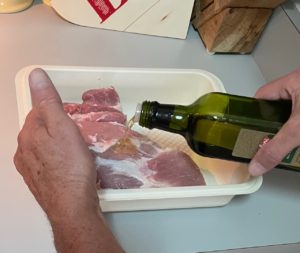
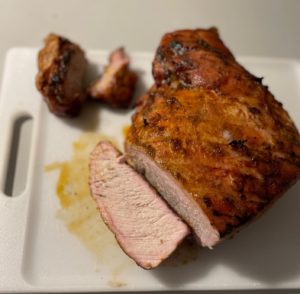
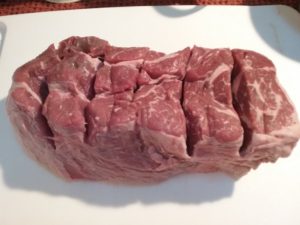
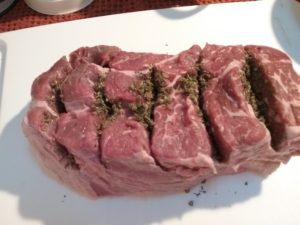
For our first attempt, we decided to roast a pork loin.  Dave does most of the grocery shopping for us.  He found the pork loin on special at the local Winn Dixie.  With a sharp knife, I made slits in the meat and stuffed minced garlic in the slits.  I then coated the top and sides with an herb blend.  I poured extra virgin olive oil over the meat and put it in the refrigerator to marinate for several hours.

Herb encrusted garlic stuffed pork loin

Transferring the pork loin

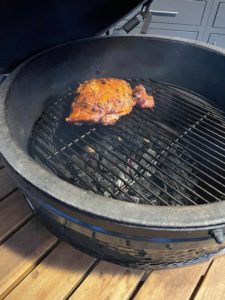
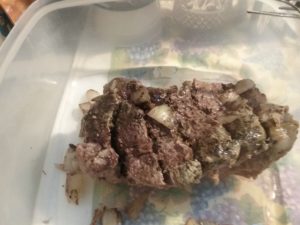
After the Egg was at 400 degrees, Dave was ready to burp the Egg.  You have to burp it before you open it as a safety precaution.

Dave getting ready to burp the Big Green Egg

The first "cook" on our Big Green Egg

The finished garlic stuffed pork loin

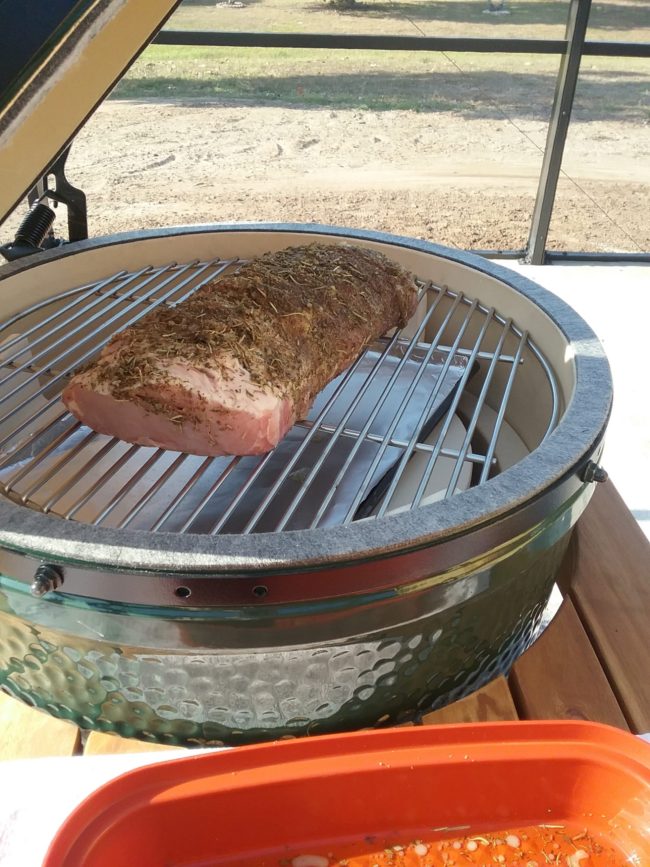
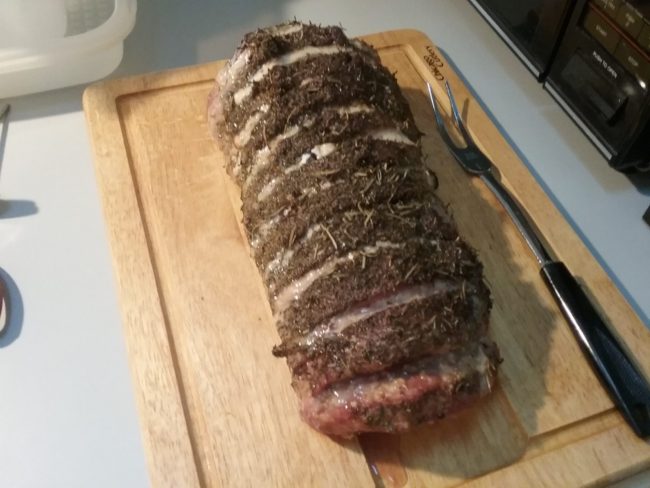
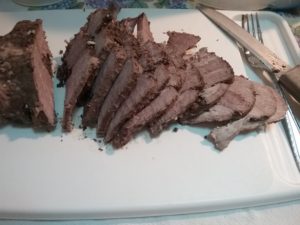
We grilled the meat for about an hour and a half until the internal temperature was 160 degrees.  The first attempt was a success!  The meat was moist and flavorful!  Can’t wait for the next time!

I don’t have a recipe for the herb encrusted pork roast that was our first cook on the grill.  Here is a recipe for another grilled pork entree.

All of the steps can be found here:Pork Roast with Texas BBQ Rub

rubbing seasoning on by hand

Pork Roast with Texas BBQ Rub

grilled pork roast with an olive oil and Texas BBQ seasoning rub
Print Recipe Pin Recipe
Prep Time 15 minutes mins
Cook Time 1 hour hr
marinate at room temperature 30 minutes mins
Total Time 1 hour hr 45 minutes mins
Course Main Course
Cuisine American
Servings 4 people

Equipment

  • 1 measuring spoons
  • 1 glass or plastic pan to marinate
  • charcoal or gas grill
  • cutting board

Ingredients
  

  • 2 tbsp Texas BBQ seasoning by Mad Dash Mixes
  • 2 tbsp olive oil extra virgin
  • 2 1/2 lb pork roast

Instructions
 

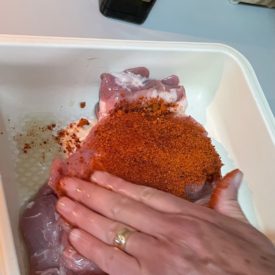
  • pour olive oil on one side of pork roast , covering the top and the sides
    pouring olive oil on roast
  • sprinkle at least 1 tablespoon Texas BBQ seasoning over the top of the meat, rub in
    rubbing seasoning on by hand
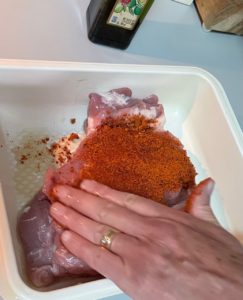
  • flip meat over and repeat the olive oil and Texas BBQ seasoning steps. Be sure to coat the sides of the meat also.
    prepared pork roast ready to rest
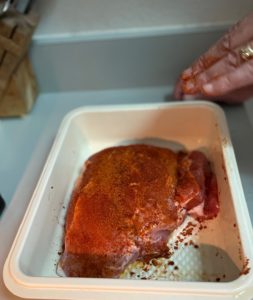
  • allow the meat to marinate at room temperature for at least 30 minutes or in the refrigerator for several hours.
  • place meat on grill, right over the flame and sear each side for 2 minutes. Then move meat farther away from the flames and continue to cook for approximately 1 hour.
  • Meat is cooked when the internal temperature reaches at least 170. Use a meat thermometer to check the temperature
    pork roast on grill
  • remove from heat and place on cutting board. Allow to cool slightly before slicing

Notes

Alternate Cooking Method: after roast has finished marinating, brown roast on each side in a hot skillet.  Transfer meat to a covered roasting pan and roast in an 325 degree oven for one hour or until the internal temperature of the roast reaches 170 degrees.  Use a meat thermometer to check the temperature. 
Keyword pork roast, Texas BBQ seasoning
Tried this recipe?Let us know how it was!

While this Italian Beef is prepared in the crock pot instead of on the grill, the “stuffing” technique I used is similar to the process I used on the grill pork.  Complete details can be found here: Italian Beef in the Crock Pot
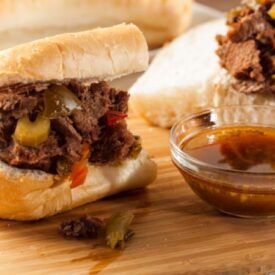
Italian Beef Sandwich on crusty bread, served with a cup of au jus

Italian Beef

My all-time favorite Italian Beef recipe!
5 from 1 vote
Print Recipe Pin Recipe
Course Main Course
Cuisine American

Equipment

  • Crock pot

Ingredients
  

  • 1 6 lb chuck roast
  • 3 large onions
  • 4 tsp Italian Seasoning
  • 1 tsp minced garlic
  • 2 cups water
  • 2 bottles beer any brand

Instructions
 

  • cut slits in the top of the chuck roast
    Roast with cuts
  • mix Italian Seasoning & minced garlic in a small bowl
    Italian Herb Seasoning with minced garlic
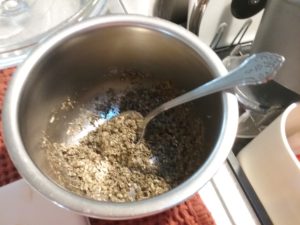
  • place Italian Seasoning/minced garlic in the slits
    Roast with Italian Seasoning/Minced Garlic Paste
  • chop onions
  • place roast & onions in crock pot, add the water & 1 of the bottles of beer
  • cook on low for 8 hours
  • after the meat has cooked for 8 hours, remove from crock pot
    Roast Beef ready to chill
  • chill the roast over night, the next morning the fat will be ready to be removed from the broth
    Roast Beef ready to slice
  • After removing the fat, pour the liquid into the crock pot
  • the roast can either be sliced or shredded. I sliced the roast for this recipe
    Italian Beef Sliced
  • Add the roast and the 2nd bottle of beer to liquid in the crock pot.
  • if desired, add extra Italian seasoning
  • cook the sliced or shredded meat in the liquid on low for at least 4 hours or until heated through. Serve on hoagie buns.
    Italian Beef Sandwich on crusty bread, served with a cup of au jus

Notes

If desired, serve pepperoncinis on the side.  Some people like their Italian Beef to have more of a "bite".  you can add pepperoncinis to the meat while it is cooking or add some of the pepperoncini juice to the liquid that you are cooking the meat in.
The Italian Beef sandwich can be served with extra au jus for dipping.  
If you don't want to use a crock pot, the meat can be cooked in a roaster in the oven.  If you use a roaster, make sure to fill the roaster 1/2 full with liquid and to cover the roast while it is cooking.  Set oven to 350.  cook until meat is tender
 
Tried this recipe?Let us know how it was!

Looks like we were very successful in finding the perfect multi-functional outdoor appliance to add to our outdoor addition!

Since purchasing the Big Green Egg, we have (ok Dave has) prepared brats, hamburgers, grilled salmon, steaks, Standing rib roast and salmon patties.  I have made pizza several times and Dave even cooked a frozen pizza one thyme when I was away.  We are really happy with our purchase!

If you would like to learn how I cooked pizza on the Big Green Egg, you can read about it here: How to Cook Pizza on The Big Green Egg

Pizza ready to be cooked on the Big Green Egg

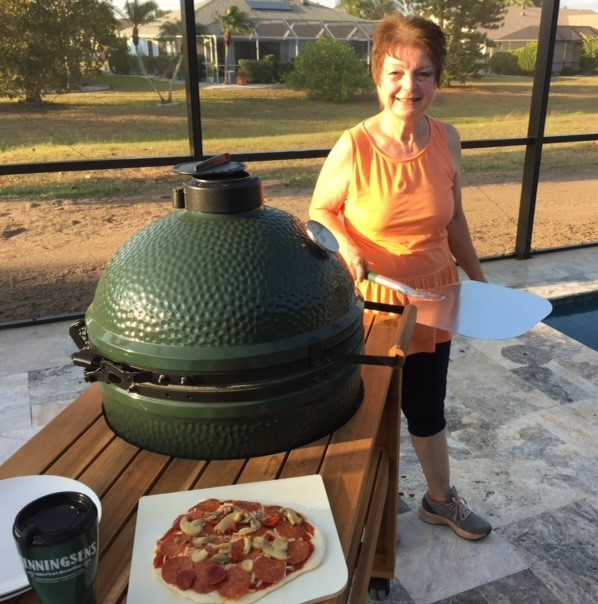
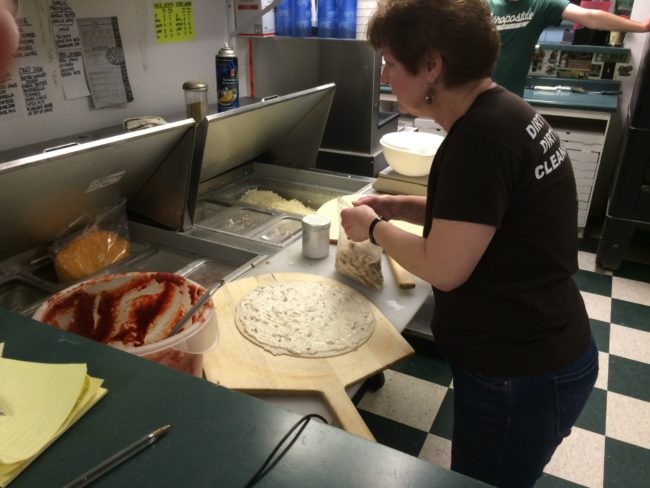
Speaking of pizza, below is a picture of me when I was in the kitchen at Makin’ Pizza!

In the Pizza Kitchen With Kim

As much as I was originally opposed to getting a Big Green Egg, because I thought they were ugly, I am certainly happy that I changed my mind!  We love cooking on it and I have decided it is really quite photogenic!

Early Spring outdoor breakfast place setting

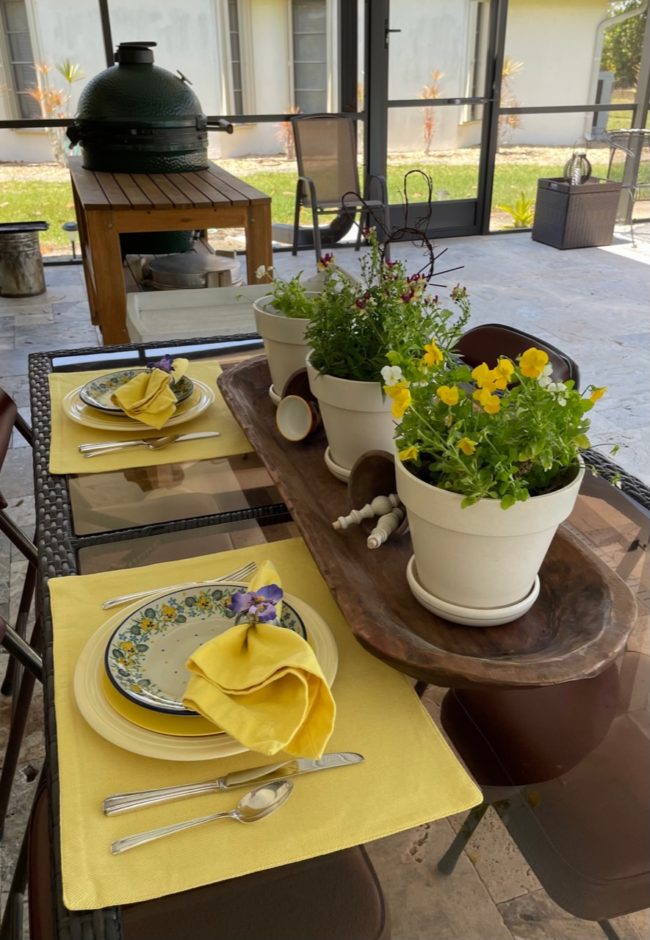
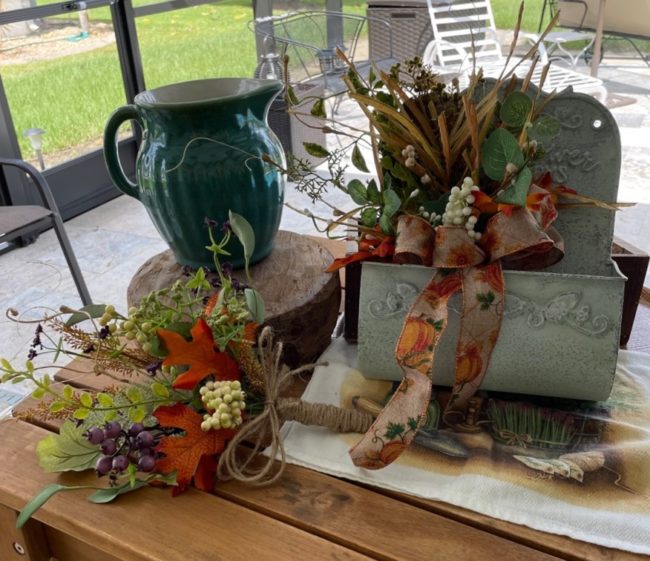
Early Spring Rustic Inspired Dough Bowl Centerpiece

Patriotic tablescape

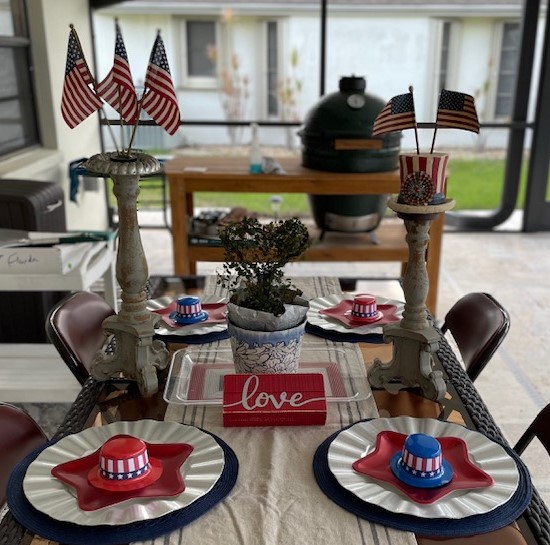
Let’s Show Our Love for Our Country


Check your inbox or spam folder now to confirm your subscription.

Filed Under: Blog Post, Lanai, Outdoor Kitchen, Outdoor Living Tagged With: Big Green Egg, outdoor kitchen

Quick Makeover for a Cottage Style Tray
Happy Heavenly 74th Anniversary to my Parents!

Comments

  1. Carol Karl says

    April 5, 2021 at 3:40 pm

    I’ve always wondered about those big green eggs. Your outdoor space will look amazing – can’t wait to see it finished.

    Reply
    • Kimberly Snyder says

      April 5, 2021 at 7:15 pm

      I honestly would never have comsidered the Egg if the salesman wouldnt have mentioned it! There is a learning curve but we havent ruined anything yet! The Acacia table is just the perfect stand for it!

      The space just adds so much Wow factor! We kept it simple. We didnt get firebowls or a waterfall. Yet it is just beautiful!

      Reply
  2. Dave says

    April 8, 2021 at 3:53 pm

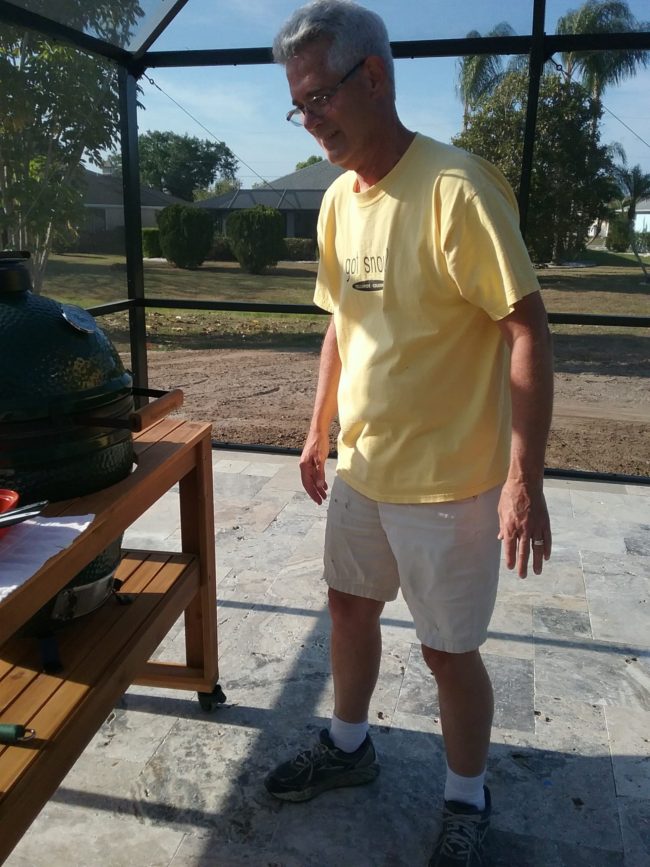
    I don’t normally stand with my arms down at my side & I am not intoxicated! The pork roast did turn out great!

    Reply

Trackbacks

  1. Making New Traditions with Old Things! - From Farmhouse to Florida says:
    April 5, 2021 at 1:21 pm

    […] and even here: […]

    Reply
  2. Let's Celebrate Fall With An Outdoor Living Area Reveal! - From Farmhouse to Florida says:
    October 15, 2021 at 11:06 am

    […] Early on in the researching process, I decided that we needed an outdoor kitchen in addition to the pool.  Well, actually I just wanted a fancy brick pizza oven. I thought I  didn’t need a grill or a sink or storage…. just the pizza oven, please.  it wasn’t long before I discovered that my dream pizza oven cost over $12,000.  So, I found something that would work for about 1/10th the price!  And then we found something that would do several cooking jobs for almost as much as the 2nd choice pizza oven!  More about the discovery  of the Big Green Egg is in this blog post! […]

    Reply
  3. Spring 2023 One Room Challenge - From Farmhouse to Florida says:
    May 16, 2023 at 4:30 pm

    […] Early on in the researching process, I decided that we needed an outdoor kitchen in addition to the pool.  Well, actually I just wanted a fancy brick pizza oven. I thought I  didn’t need a grill or a sink or storage…. just the pizza oven, please.  it wasn’t long before I discovered that my dream pizza oven cost over $12,000.  So, I found something that would work for about 1/10th the price!  And then we found something that would do several cooking jobs for almost as much as the 2nd choice pizza oven!  More about the discovery  of the Big Green Egg is in this blog post! […]

    Reply

Leave a Reply Cancel reply

Your email address will not be published. Required fields are marked *

Recipe Rating


Hello! Kimberly (Kim) Snyder and I'm glad you're here. An entrepreneurial spirit, I've owned a flower shop and antiques store, a pizza parlor and now we're in Florida living a new adventure. Join me as we downsize into our new digs and continue the adventures! WRITER & BLOGGER

Kimberly Snyder shares the adventures of moving to Florida and beginning again in a new space as a herbalist, a creative, and a serial entrepreneur

Instagram

Creating European dish gardens are one of my favor Creating European dish gardens are one of my favorite things to do! Why are they called European dish gardens? Because of the types of plants used and how they are “planted” in the container.  By leaving the collection of green and blooming plants in their pots, the dish garden is quick to put together. #europeandishgarden #bloomingplants #containergardening #containergarden #gardenstyledecor #fromfarmhousetoflorida #kimstyledecor
This patio table refresh remains one of my favorit This patio table refresh remains one of my favorite projects! I love the patina of the mesh table top. Several different colors of chalk spray paint helped me achieve the look.  #chalkpaintspraypaint #rustoleum #rustoleumchalkpaint #gardenstyledecor #gardenstyledecorating #kimstyledecor #outdoorfurniture
Mowgli isn’t quite sure about the hat! But he is Mowgli isn’t quite sure about the hat! But he is sure that it is thyme to celebrate Summer! #summertime #fromfarmhousetoflorida #chugsofinstagram #kimstyledecor
Pretty in Pink for Spring! Thinking about layering Pretty in Pink for Spring! Thinking about layering in some aqua for Summer. What do you think? #kimstyledecor #coastalfarmhouse #coastalfarmhousestyle #fromfarmhousetoflorida #decoratingwithshells
Summer thyme is just around the corner! Let’s re Summer thyme is just around the corner! Let’s refresh your outdoor area! #fromfarmhousetoflorida #kimstyledecor #outdoorlivingspace #summervibes☀️ #coastalhomedecor #coastalfarmhouse
It is so easy to refresh a wicker basket with a co It is so easy to refresh a wicker basket with a coat of chalk paint! I used some left over chalk paint for this project. After the basket was dry, I filled it with a couple pots of blooming plants! #chalkpaint #wickerbasket #basketmakeover #basketlover #gardenstyledecor #kimstyledecor #fromfarmhousetoflorida
We had the house painted last fall. I finally got We had the house painted last fall. I finally got the vintage urns out of storage and added white mums.  #brocantestyle #brocante #gardenantiques #gardenstyle #kimstyledecor #whitemums #fromfarmhousetoflorida
Instagram post 18044738081437452 Instagram post 18044738081437452
I love to use my Mom’s vintage Hamilton Beach mi I love to use my Mom’s vintage Hamilton Beach mixer! It still works after all these years. I did have it re-wired several years ago because the original cord was frayed. #hamiltonbeach #fromfarmhousetoflorida #vintagekitchenwares #mothersday #farmhousekitchendecor

Tags

"Kim" Style 4th of July Architectural Salvage Autumn brocante style budget friendly Christmas Christmas decorating container gardening cooking with herbs DIY dough bowl Easter entertaining entrepreneur European dish garden Family Farmhouse Flowers Gardening Garden Style garden style decor gluten free Herbs Holiday decorating lanai Mad Dash Mixes Mix It Up Monday No Bake Cheesecake outdoor living patio pots patriotic pumpkins recipe recipes Silk arrangement silk flower arrangement Soup spray paint Spring sugar mold summer Summer Holidays Thanksgiving Valentine's Day

Recent Posts

  • salmon pink geraniums in a hanging basketCreate a Geranium Hanging Basket
    In Blog Post, Flowers, Gardening
  • Gray Herb box in a vignetteDownsizing The Family Homestead
    In Blog Post, Decorating & Design
  • piece of chocolate sponge type cake with powdered sugar and whipped topping on a white plateWhat is Wacky Cake?
    In Blog Post, Desserts, Recipes

Categories

  • Appetizer
  • Architectural Salvage
  • Autumn
  • Beverages
  • Blog Post
  • Christmas Decorating
  • Decorating & Design
  • Desserts
  • DIY
  • Easter Decorating
  • Entertaining
  • Entrepreneur
  • Flowers
  • Furniture
  • Gardening
  • Holiday Decorating
  • Home Decor
  • Home Tour
  • Lanai
  • Main Dishes
  • Outdoor Kitchen
  • Outdoor Living
  • Petals & Porch Posts
  • Pizza
  • Pizza Business
  • Pool
  • Porch
  • Recipes
  • Salad
  • Spring
  • Summer
  • Thanksgiving Deccorating
  • Valentine's Day
  • Winter

Recent Posts

  • salmon pink geraniums in a hanging basketCreate a Geranium Hanging Basket
    In Blog Post, Flowers, Gardening
  • Gray Herb box in a vignetteDownsizing The Family Homestead
    In Blog Post, Decorating & Design
  • piece of chocolate sponge type cake with powdered sugar and whipped topping on a white plateWhat is Wacky Cake?
    In Blog Post, Desserts, Recipes
  • Advertise
  • Contact
  • Disclosure Policy

Copyright © 2025 · Sassafras Theme by Hello You Designs

Copyright © 2025 · Sassafras Theme on Genesis Framework · WordPress · Log in