• Pinterest
  • Facebook
  • Instagram

From Farmhouse to Florida

Bloom Where You Are Planted!

  • From Farmhouse to Florida
  • Home
  • About
  • Home Tour
  • Advertise
  • Blog
  • Recipes

Quick & Easy Way to Make a Footed Tray!

November 3, 2020 by Kimberly Snyder 52 Comments

Spread the love

Do you have a tray that needs a quick makeover for the holiday season?  Follow along with me while I give a wooden tray a new look for the upcoming holiday season!

As an Amazon Affiliate, I earn from Qualifying Purchases

The Challenge

Last month, I was invited to participate in a Blogger DIY Challenge involving making a footed tray and styling it to reflect our own holiday style.  The finished vignette could be for either Thanksgiving or Christmas.

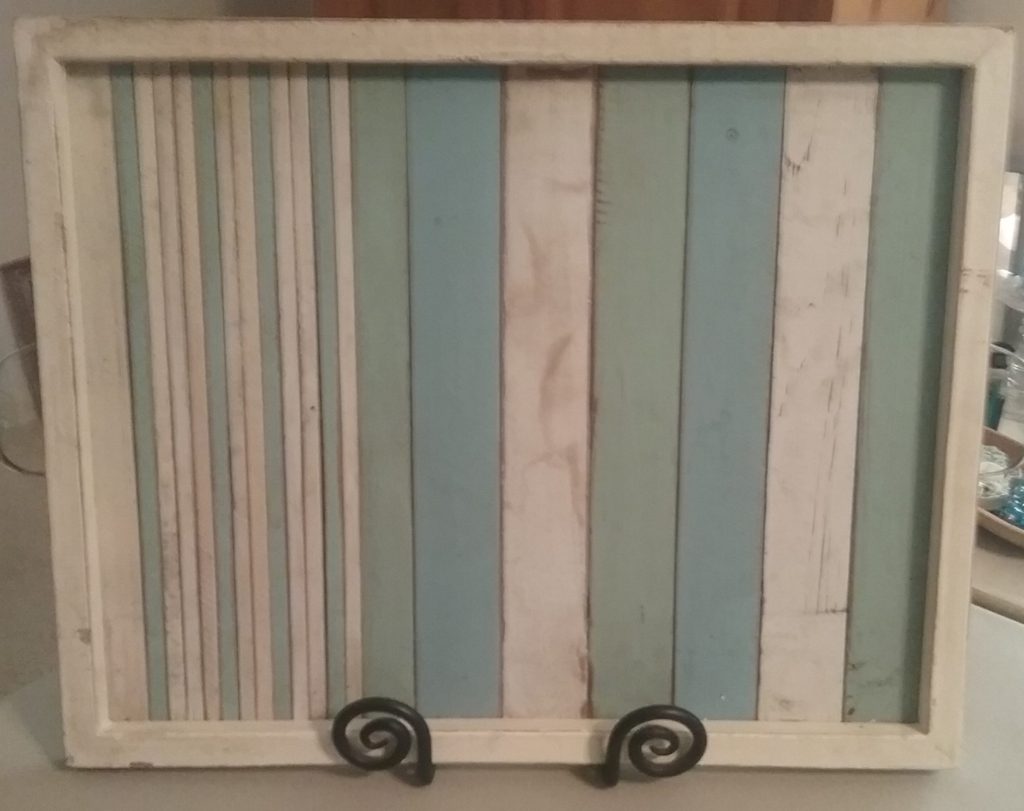
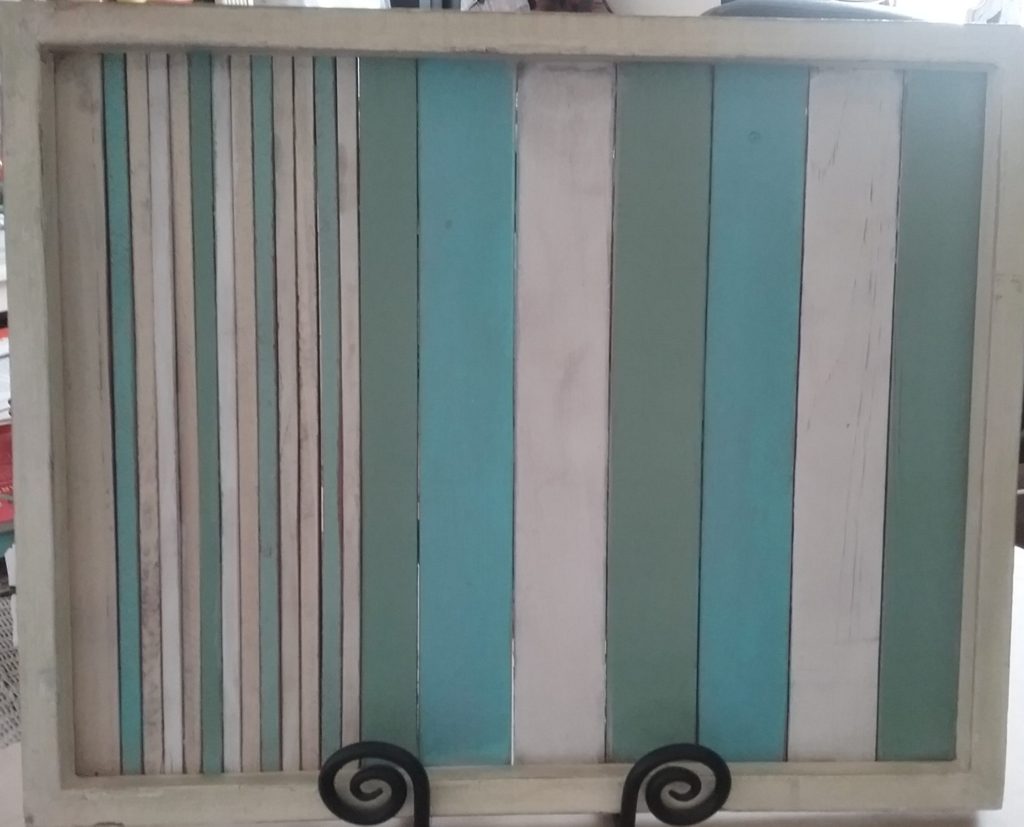
This wooden tray had been on our lanai since July.  It was a little tired looking and very dirty.  I used a spray cleaner that was safe to use on wood and let it dry completely before painting it.

Wooden tray before makeover

The Supplies

wicker basket filled with assorted cans of floral spray paint


The tray was already painted in beach themed colors.  In order to keep things as easy as possible, I decided to stay with the same color scheme.  I also wanted to use items that I already had.  I had several cans of spray paint left from my days as a florist so I decided to use them.
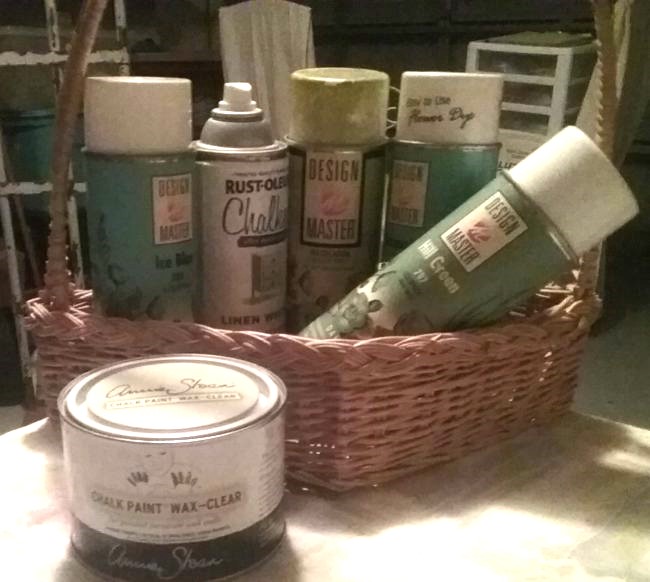
Kim’s “Tool Box”

Here are a few tools and products I recommend if you don’t already have them on hand.  Design Master has many, many , many colors to chose from.  One of my favorite greens is Basil.   Dresden Clear Glaze is a good product to have on hand as it can be used in a variety of ways to give a quick update to an item.  One can of Dresden Clear Glaze will go a long way.  I have used it on wicker baskets that need a quick refresh as well as a way to add a bit of protection to a painted piece.  Rust-Oleum makes a great chalked spray paint that I have used on several projects.

Bolt cutters and wire snips are handy when working with silk flowers and different kinds of wire.  The Rejuvenate product is a great cleaner.  Please read and follow the directions for using it.

Ready to Paint

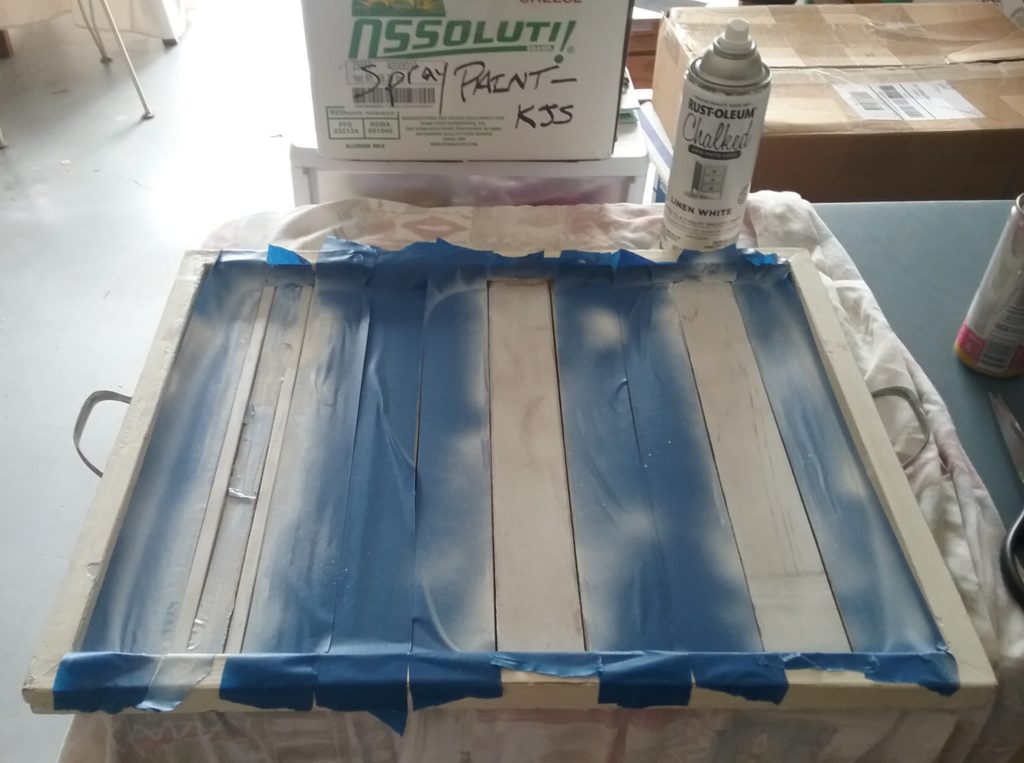
The use of painters tape helped keep my lines straight as well as protect the different areas from the spray paint.

In hind sight, I should have painted the darkest stripes first and worked my way to the lightest.  I started with the linen white chalk paint.  Then went to one of the green colors.

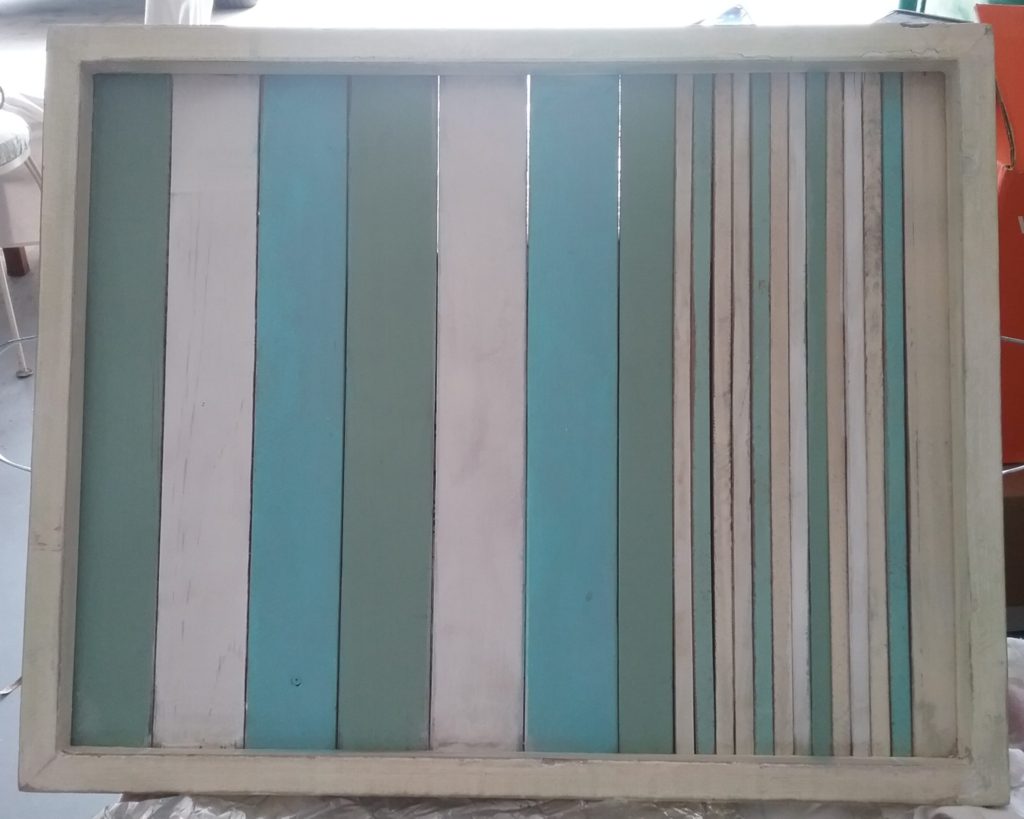
I allowed the paint to dry between each color.  After the tray was dry, I repeated the process of protecting the other colors by using the painter’s tape.

After all the base of the tray was painted, I then used the celadon green paint and rubbed the paint on the rim of the tray to give the wood a very light green color.

The picture below is after the painting was all finished and the tray was dry.

Painted tray before wax

Ready for the Wax

In order to protect the paint , I used the clear Annie Sloan wax.  I used a clean cotton cloth and gently rubbed a coat of the wax on the display area and the sides of the tray.  After the wax was dry, I was ready to take it inside and start the really fun part!  The decorating!

tray painted waxed

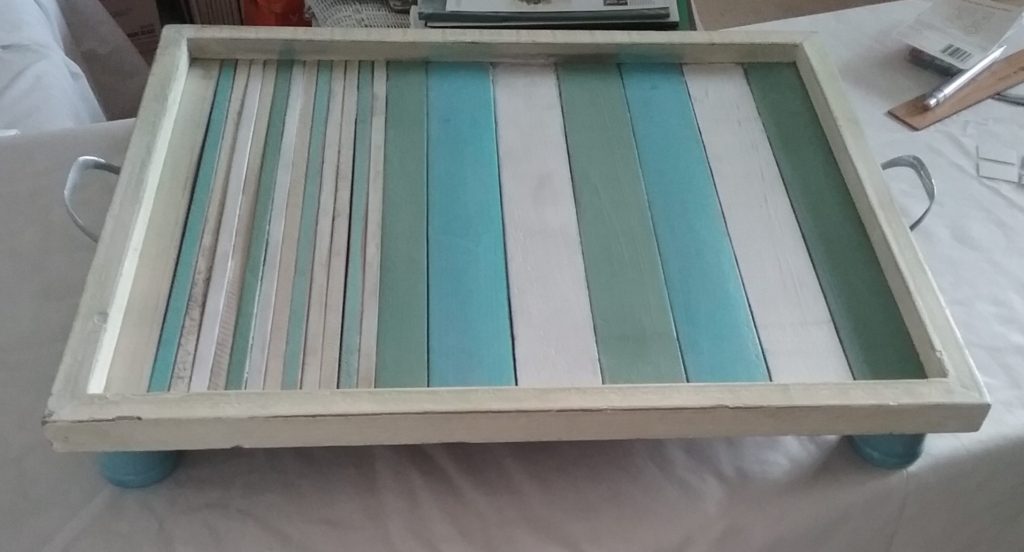
Oops! Almost Forgot the Feet!

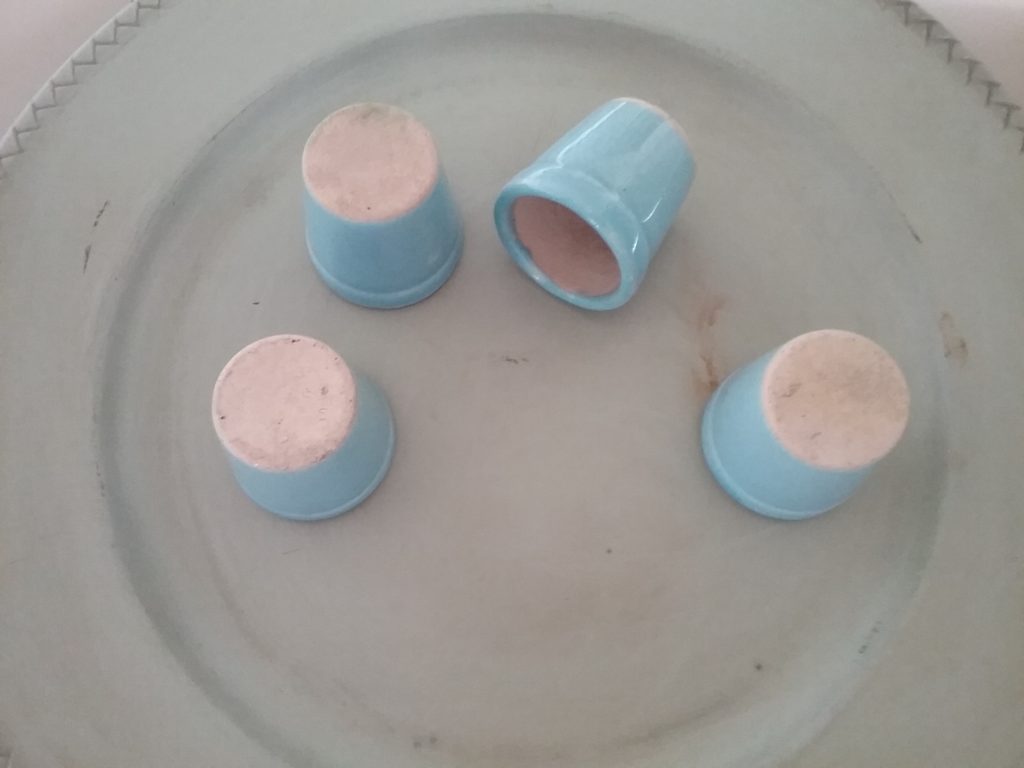
Deciding what to use for the feet provided a bit of a challenge.  While the tray is made of wood, it is rather thin.  I had a set of glass drawer pulls that I thought about using but I was afraid that the screws would be too long.

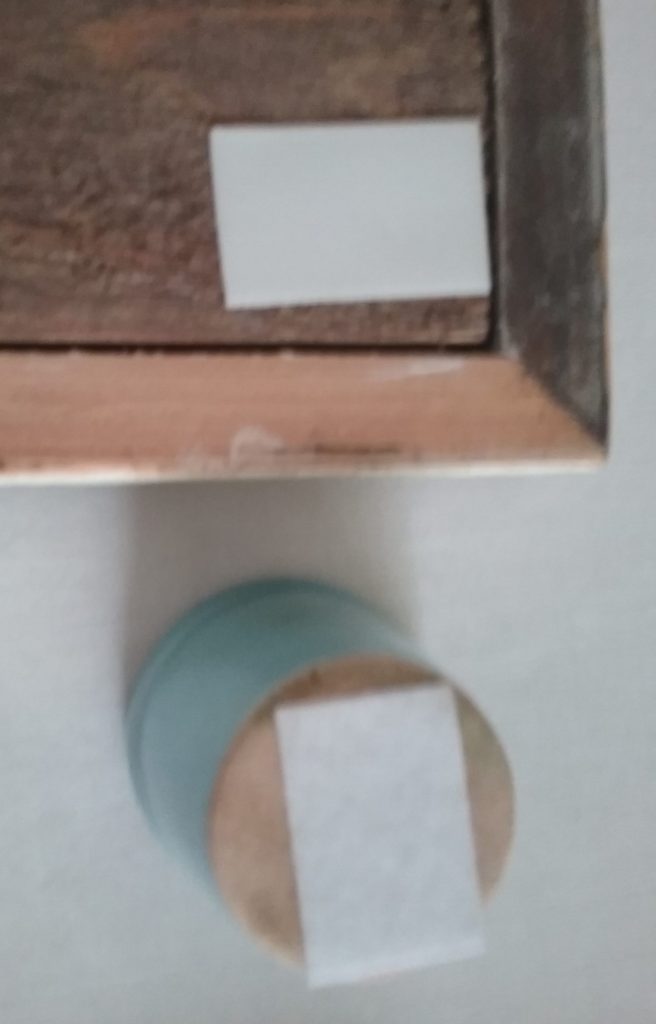
I searched through my “cave of wonders” and finally decided to use these tiny flower pots.  They originally had little bitty succulents in them .  I pondered how I would attach them and finally decided to try Velcro.  By using the Velcro, I wouldn’t damage the tray and if I decided I didn’t like the feet, I could easily change them.  I cut the strips of Velcro to fit the corner of the tray.

mini flower pots

finished tray, ready to decorate

Shopping Links

Here is a link to the type of Velcro I used if you are interested in trying it.

Getting the Elements Ready

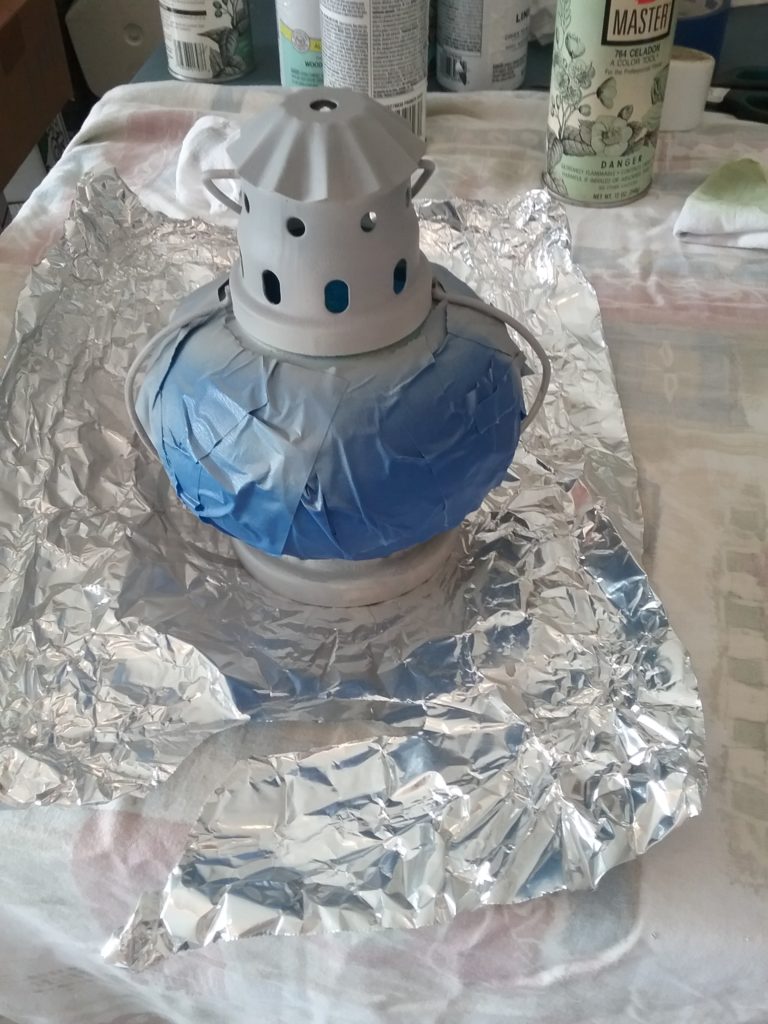
Another piece of my potential display needed a bit of a face lift.  This hurricane light had been on the lanai since January and the metal had started to rust.  I used the painter’s tape to wrap the glass in order to protect it while I sprayed the metal with gray primer paint.  Once it dried, I used Dresden Clear Glaze to give it a bit of a sheen.

Sneak Peak

lantern refreshed with spray paint

To see another way  I used the lantern, please go to this post: Let’s Refresh The Lanai for the Holidays with a Retro Feel

One more tip

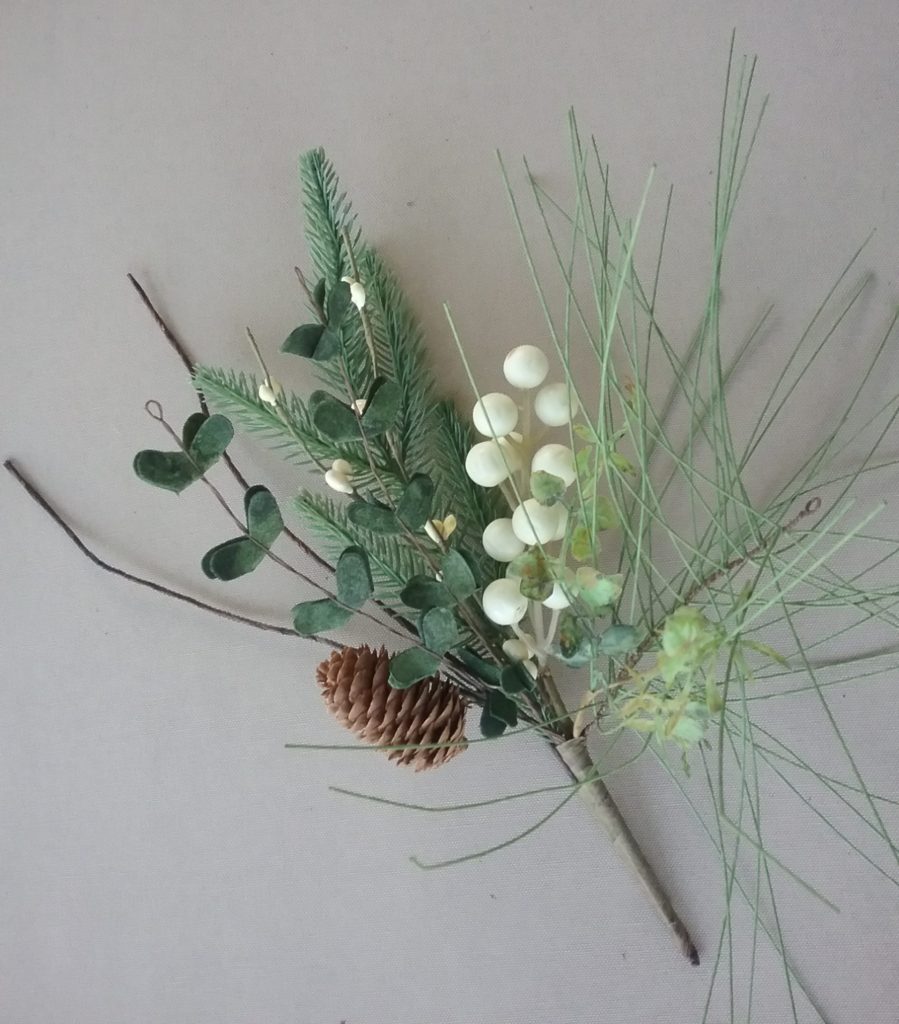
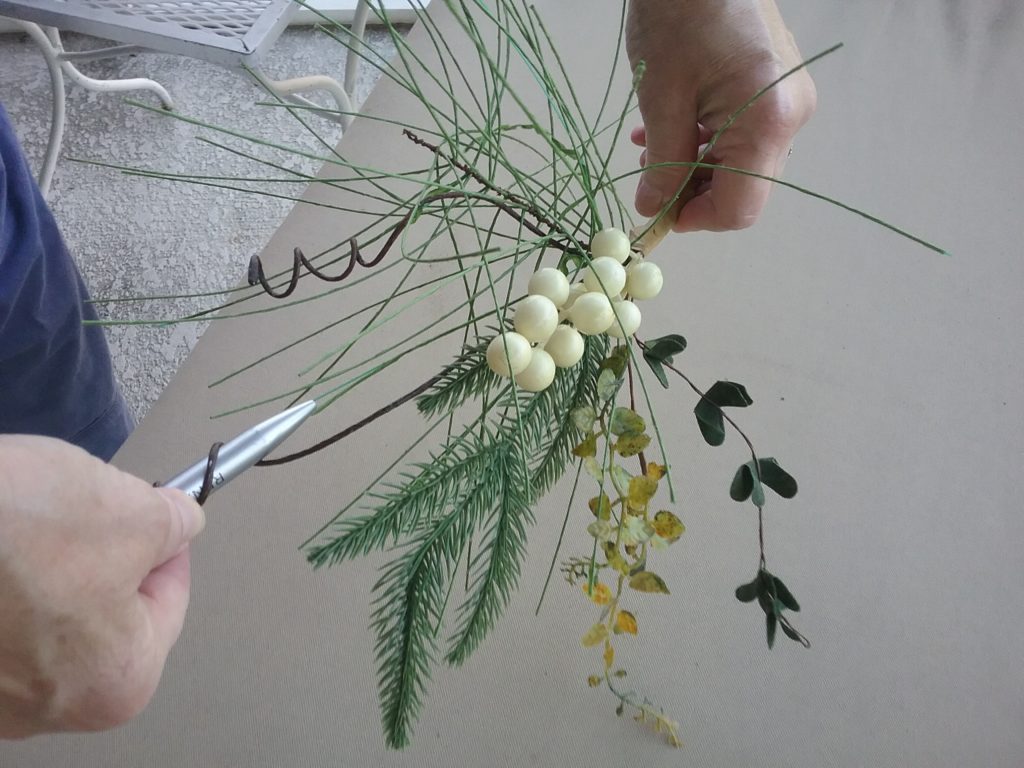
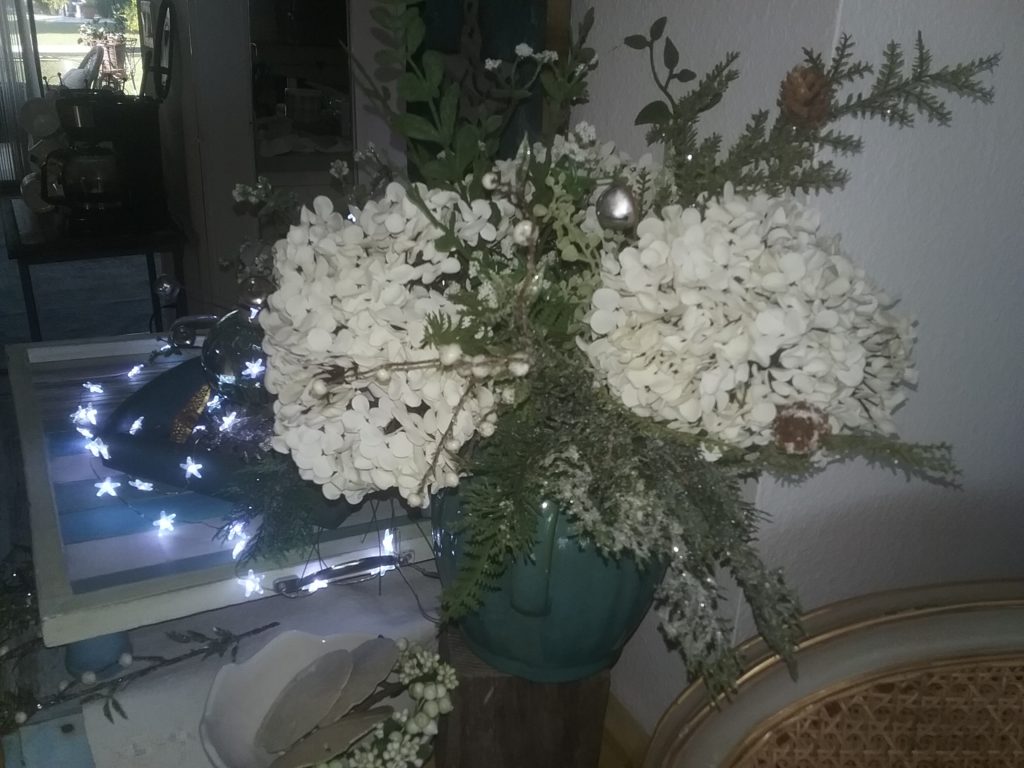
Before I show you the finished display, I wanted to share a quick tip on how to add whimsey to your silk arrangements.  If you have silk pine picks that are individually wired, you can use a pen or pencil to twist the wired pieces to add cute curly pieces.
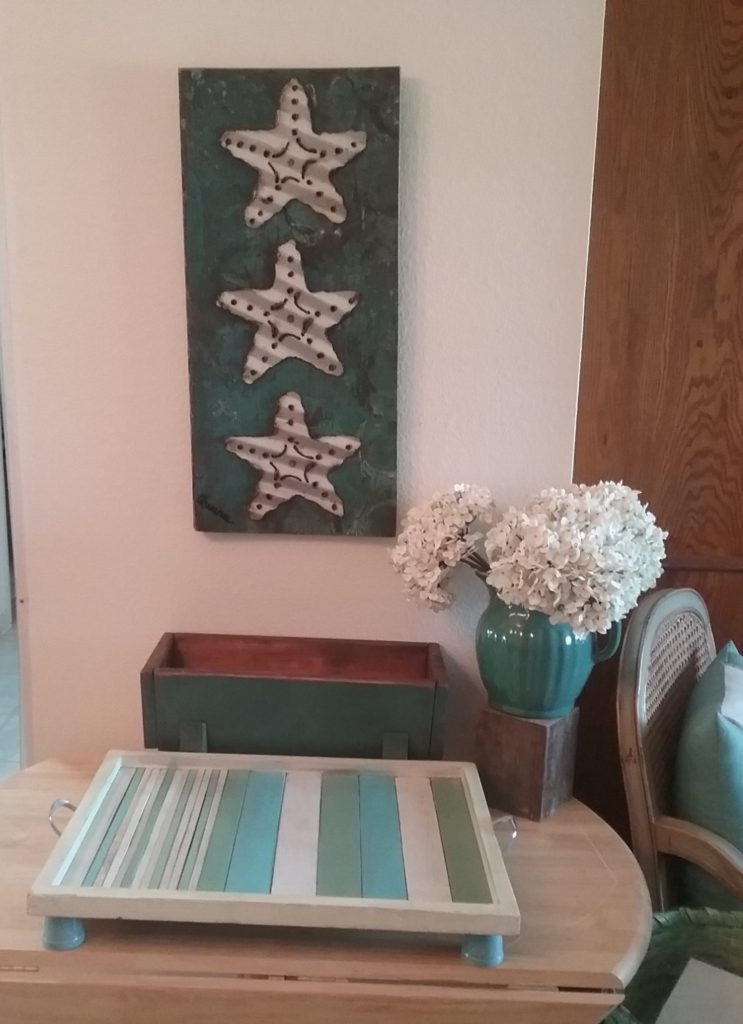
pine pic

twirling the wired piece of the pine pic


Where to Put It

tray on buffet

The above spot was the second place I tried to display the tray in order to decorate it.  While the color schemed worked with the colors in the batik on the wall, I couldn’t get the rest of the area to look right.

dining room nook area

The area above was the 3rd spot  I tried.  I decided I liked this spot the best.  I did end up not using the long footed box in the back.  It took up too much of the table and wouldn’t have been seen once I had the display done.

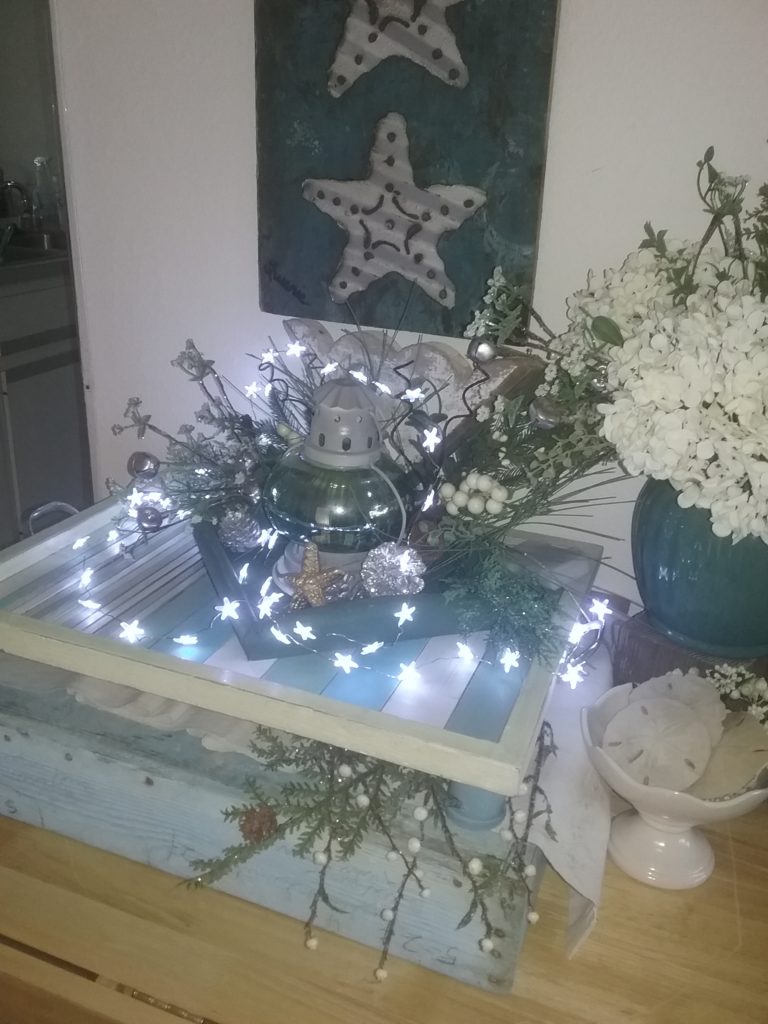
The Finished Vignette!

diningroom side table Christmas Vignette

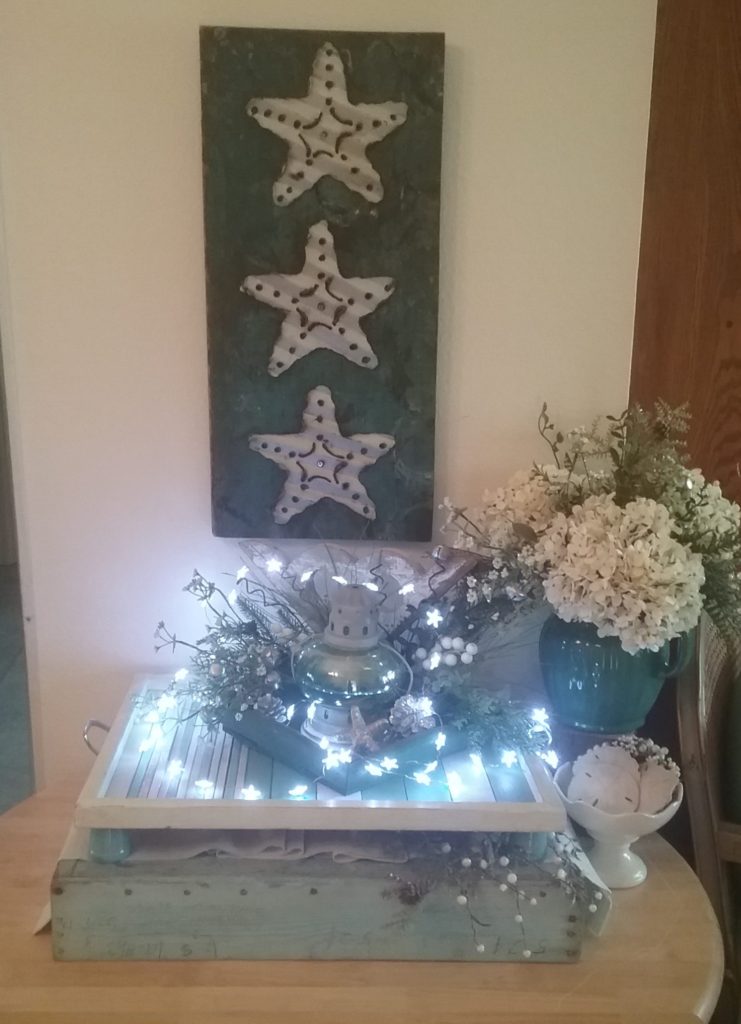
The finished vignette reflects my love of worn wood, shells, barn tin and architectural salvage.  More about my fondness of those things can be found here:

and here:

side view of icy hydrangea

This is definitely the earliest my house has had a Christmas decoration on display!  I am pleased with how it turned out!  It was fun coming up with a creative way to update the tray and then to stage the tray in a holiday vignette!

Ways to Add Sparkle to Your Vignette

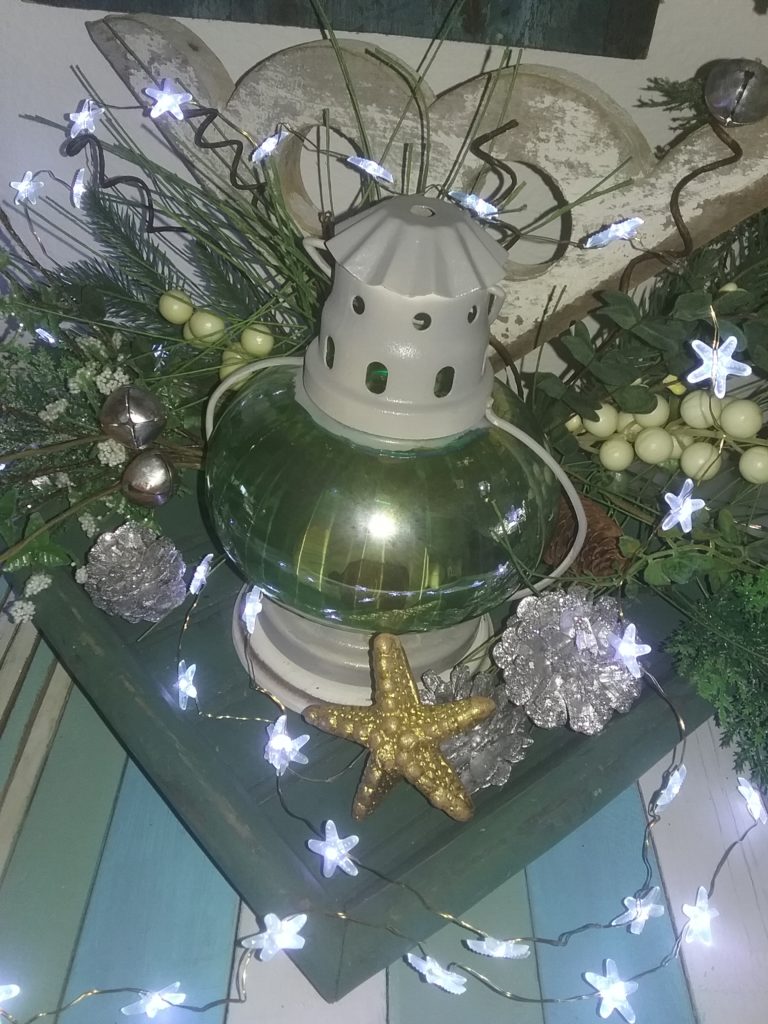
Strands of battery operated lights are a quick way to add a bit of sparkle to your vignettes.  I use them year round, not just at the holidays.  I also seem to always run out of batteries so I am planning on ordering a pack of 40 AA batteries so I won’t run out as quickly!

Blogger Challenge Participants

A baker’s dozen of bloggers plus myself and one other lady participated in this Blogger DIY challenge!  There are many, many talented ladies in our group!  I have included links to the other ladies’ projects.   These ladies are all quite creative and not afraid to use tools!

I hope you will take the thyme to check out their projects!

Links to my friends’ posts:

American School of Charm

Chalking Up Success

Feet Under My Table

J Dubby Design

Modern on Monticello

MTB Home Living

The Ponds Farmhouse

Sydney and Co

Cottage on Bunkerhill

Cottage in the Mitten

Shop At Blu

Mrs Coleman

Sonja Burgess

Faith and Farmhouse

One Last Look

coastal holiday footed tray

Check your inbox or spam folder now to confirm your subscription.

Filed Under: Blog Post, Decorating & Design Tagged With: Chalk Paint Spray Paint, DIY

VacayStyle – A Capsule Wardrobe
It is Almost Harvest Thyme!

Comments

  1. Rachel Harper says

    November 3, 2020 at 7:26 am

    Oh this is so cute. Great job. So happy to be doing this challenge with you.
    Rachel

    Reply
    • Kimberly Snyder says

      November 3, 2020 at 8:02 am

      Thank you Rachel! Thanks too for the shout out on Instagram! I haven’t figured out all the things we can do on Instagram yet!

      Reply
  2. Jennifer Williams says

    November 3, 2020 at 7:52 am

    It turned out beautifully! I love the lantern as well.

    Reply
    • Kimberly Snyder says

      November 3, 2020 at 8:03 am

      Thank you Jennifer! I think the lantern and the little piece of architectural salvage really make the display!

      Reply
  3. Jayne says

    November 3, 2020 at 8:27 am

    I’m so happy to be joining this challenge with you! Love the stripes and sparkly lights!

    Reply
    • Kimberly Snyder says

      November 3, 2020 at 8:53 am

      Thank you, Jayne! It is great to be surrounded by so many talented ladies!

      Reply
  4. Linda says

    November 3, 2020 at 9:49 am

    It turned out so pretty! I love the beachy colors so much!

    Reply
    • Kimberly Snyder says

      November 3, 2020 at 1:14 pm

      thank you Linda! I can’t wait to see how yours turned out! So many talented ladies in our group!

      Reply
  5. Donna @ Modern on Monticello says

    November 3, 2020 at 11:45 am

    I absolutely love the tiny little clay pot feet! Such a clever idea and it looks really good. I really like the addition of the sparkling lights. So pretty. Pinned.

    Reply
    • Kimberly Snyder says

      November 3, 2020 at 1:15 pm

      Thank you, Donna! The lights have little starfish on them!

      Reply
  6. Sue at Blu says

    November 3, 2020 at 3:55 pm

    Kim I always love to see beautiful coastal decor! Your tray is just lovely with those blues and whites. What a fun challenge!

    Reply
    • Kimberly Snyder says

      November 3, 2020 at 5:18 pm

      Thank you! It was so fun!

      Reply
  7. Renee Barton says

    November 3, 2020 at 5:16 pm

    I love the colors in this tray!!!! What a great job

    Reply
    • Kimberly Snyder says

      November 3, 2020 at 5:19 pm

      thank you, Renee! I appreciate it! Everyone did such an awesome job!

      Reply
  8. Kim Waldorf says

    November 3, 2020 at 5:29 pm

    I love the colors you used and the twinkle lights. Good job! What a fun project this has been!

    Reply
    • Kimberly Snyder says

      November 4, 2020 at 8:24 am

      Thank you , Kim! It was really fun!

      Reply
  9. Danielle says

    November 3, 2020 at 5:47 pm

    It came out so cute! I love the colors you chose! Coastal is such a unique and creative Christmas theme!

    Reply
    • Kimberly Snyder says

      November 4, 2020 at 8:25 am

      Thank you, Danielle! Since moving to Florida, I have had to tweak my decorating palette! It has been fun but a bit stressful! I get twitchy when things don’t match… !

      Reply
  10. Jennifer says

    November 3, 2020 at 6:17 pm

    Really nice job!! I’m glad you had fun with this challenge!

    Reply
    • Kimberly Snyder says

      November 4, 2020 at 8:26 am

      thank you, Jennifer! I need to break out the tools for the next one!

      Reply
  11. Sonya says

    November 4, 2020 at 7:51 am

    I love how it turned out and that you were able to upcycle something you already had. It was fun being part of the challenge with you.

    Reply
    • Kimberly Snyder says

      November 4, 2020 at 8:27 am

      Thank you Sonya! I was trying to use up some of my paints. My husband was fussing because he thinks I have too many!

      Reply
  12. Sharon Rexroad says

    November 4, 2020 at 9:20 am

    How cute is this? And I love the flexibility you created by using velcro to attach the feet. I’ll have to remember that idea!

    Reply
    • Kimberly Snyder says

      November 4, 2020 at 9:36 am

      Thank you Sharon! I thought the Velcro was pretty creative, myself! I used a Velcro pad that is supposed to hold 5 lbs but I didn’t test it. I happened to have some left over from hanging the batik over the buffet. Thanks for taking the time to read my post!

      Reply
  13. Leslie Watkins says

    November 4, 2020 at 6:02 pm

    I love this tray! My favorite part was the Velcro and little pots for feet! Genius!! Love the colors, too..great job!

    Reply
    • Kimberly Snyder says

      November 4, 2020 at 7:32 pm

      Thank you, Leslie!

      Reply
  14. Allison O'Dell says

    November 4, 2020 at 7:10 pm

    I absolutely LOVE that you were able to make use of what you already had. I definitely need to do more of that! This came out beautiful and your display is so festive! I love your blues!

    Reply
    • Kimberly Snyder says

      November 4, 2020 at 7:34 pm

      Thank you, Allison! The challenge was a lot of fun!

      Reply
  15. Carol Karl says

    November 8, 2020 at 4:50 pm

    I love everything about this tray – I especially love that you used the little pots for the feet.

    Reply
    • Kimberly Snyder says

      November 10, 2020 at 8:13 am

      Thank you Carol! I love how the blue color of the pots accents the other colors in the tray!

      Reply
  16. Cindy says

    July 28, 2021 at 8:53 pm

    Your tray has such pretty colors.

    Reply
    • Kimberly Snyder says

      July 29, 2021 at 10:25 am

      thank you so much! this was such a fun project!

      Reply

Trackbacks

  1. DIY Wood Footed Tray - Modern on Monticello says:
    November 3, 2020 at 7:01 am

    […] From Farmhouse To Florida […]

    Reply
  2. Christmas Tray | DIY - Cottage On Bunker Hill says:
    November 3, 2020 at 8:07 am

    […] Quick And Easy Way To Make A Footed Tray– FROM FARMHOUSE TO FLORIDA […]

    Reply
  3. How To Make An Easy Footed Tray - Faith and Farmhouse says:
    November 3, 2020 at 9:23 am

    […] Quick and easy tray! […]

    Reply
  4. How to make a table riser - Shop at Blu says:
    November 3, 2020 at 9:28 am

    […] HILL HOW TO CREATE A SENTIMENTAL FOOTED TRAY FEET UNDER MY TABLE QUICK EASY WAY TO MAKE A FOOTED TRAY FROM FARMHOUSE TO FLORIDA UNIQUE FOOTED TRAY FOR HOLIDAY DECOR AND […]

    Reply
  5. Tightly Coiled or Spiraling Out of Control? - From Farmhouse to Florida says:
    November 23, 2020 at 10:32 am

    […] and here: […]

    Reply
  6. DIY DECORATIVE TRAY | SYDNEY & CO. says:
    December 8, 2020 at 10:39 pm

    […] QUICK EASY WAY TO MAKE A FOOTED TRAY | FROM FARMHOUSE TO FLORIDA […]

    Reply
  7. Saturday Shares- Week 6. - Cottage On Bunker Hill says:
    February 26, 2021 at 9:35 am

    […] Quick And Easy Way To Make A Footed Tray– FROM FARMHOUSE TO FLORIDA […]

    Reply
  8. How to Use Scandinavian Decor as Holiday Table Inspiration - American School of Charm says:
    July 2, 2021 at 11:53 am

    […] EASY WAY TO MAKE A FOOTED TRAY | FROM FARMHOUSE TO […]

    Reply
  9. My Top Ten Blog Posts for the Past Year! - From Farmhouse to Florida says:
    September 2, 2021 at 8:43 am

    […] #3 Quick & Easy Way to Make A Footed Tray […]

    Reply
  10. Coastal Farmhouse Sideboard Display for Fall - From Farmhouse to Florida says:
    October 8, 2021 at 6:13 pm

    […] The picture above is how this display looked for Spring and Summer.  I had originally made the footed tray with flower pot feet as part of a blogger challenge last November.   […]

    Reply
  11. How to Affix Feet to a Tray Without Using Nails - From Farmhouse to Florida says:
    November 3, 2021 at 11:56 am

    […] If you would like to read all about the blogger challenge, you can find it here: Quick & Easy Way to Make a Footed Tray […]

    Reply
  12. A Very Merry & Unique Style of Gingerbread! - From Farmhouse to Florida says:
    November 19, 2021 at 8:42 am

    […] By standing this piece of gingerbread on its end, it looks like angel wings!  The details about how to make the footed tray it is sitting on as well as how I put the arrangement together can be found here:  Quick & Easy Way to Make A Footed Tray.  […]

    Reply
  13. Let's Refresh The Lanai for the Holidays with a Retro Feel - From Farmhouse to Florida says:
    December 3, 2021 at 11:51 am

    […] I had given it it’s first makeover in this post: Quick & Easy Way to Make a Footed Tray! […]

    Reply
  14. Reflections on 2020 - From Farmhouse to Florida says:
    February 2, 2022 at 3:21 pm

    […] Quick & Easy Way to Make A Footed Tray […]

    Reply
  15. Chalk Painted End Table Refresh - From Farmhouse to Florida says:
    April 20, 2022 at 7:05 pm

    […] Quick & Easy Way to Make a Footed Tray! […]

    Reply
  16. How to Decorate with Antique Garden Tools & Accessories - From Farmhouse to Florida says:
    April 30, 2022 at 6:07 am

    […] I even used these little tiny pots as feet for a wooden tray! […]

    Reply
  17. Holiday Themed Footed Tray - From Farmhouse to Florida says:
    November 2, 2022 at 1:32 pm

    […] A footed tray is going to be the base of my holiday vignette. I didn’t really have a footed tray so I made one! This wooden tray had been on our lanai for quite a while.  It was a little tired looking and very dirty. The complete details on how I made it can be found here: Quick & Easy Way to Make a Footed Tray! […]

    Reply
  18. A Unique Way to Decorate with Gingerbread! - From Farmhouse to Florida says:
    December 7, 2022 at 7:29 am

    […] By standing this piece of gingerbread on its end, it looks like angel wings!  The details about how to make the footed tray it is sitting on as well as how I put the arrangement together can be found here:  Quick & Easy Way to Make A Footed Tray.  […]

    Reply
  19. Rustic Inspired Living Room Refresh ORC Week 5 - From Farmhouse to Florida says:
    July 4, 2023 at 8:56 am

    […] How to Make A Footed Tray […]

    Reply
  20. Feeling Tightly Coiled or Spiraling Out of Control? - From Farmhouse to Florida says:
    October 9, 2023 at 2:47 pm

    […] and here: […]

    Reply

Leave a Reply Cancel reply

Your email address will not be published. Required fields are marked *

Recipe Rating


Hello! Kimberly (Kim) Snyder and I'm glad you're here. An entrepreneurial spirit, I've owned a flower shop and antiques store, a pizza parlor and now we're in Florida living a new adventure. Join me as we downsize into our new digs and continue the adventures! WRITER & BLOGGER

Kimberly Snyder shares the adventures of moving to Florida and beginning again in a new space as a herbalist, a creative, and a serial entrepreneur

Instagram

Not sure if I ever shared this version of the pott Not sure if I ever shared this version of the potting bench. I started decorating it with a lavender theme. I must have gotten distracted before I finished it! It just needs a few potted lavender plants ti finish it! #lavender #farmhousedecorating #gardenstyle #fromfarmhousetoflorida #pottingbench
Simple Summer sugar mold idea! I made the flower o Simple Summer sugar mold idea! I made the flower out of the trim from an old pillowcase.  #sugarmoldcenterpiece #sugarmolddecor #fromfarmhousetoflorida #farmhousedecor #fauxhydrangeas #gardenstyledecor #cottagedecor #kimstyledecor
Mother’s Day week is here! If you have been foll Mother’s Day week is here! If you have been following me for a while, you know I can’t resist filling a dough bowl (or2) with blooming plants! I designed this one with a combination of vintage garden tools, an old book and a selection of plants.  It would make the perfect gift fire that special Mom in your life! #mothersdaygifts #mothersday #mothersdaygiftideas #gardenstyle #farmhousedoughbowl #doughbowl #kimstyledecor #fromfarmhousetoflorida
I don’t talk about my faith a lot. I do believe I don’t talk about my faith a lot.  I do believe God puts certain people in your path for a reason.  An example of this occurred on Tuesday.  It was colonoscopy/sigmoidoscopy day.  I was really nervous about how it would all work since it was my first time since I had my cancer surgery. 

 The nurse that was taking care of me in the pre op area turned out to be the same nurse who had prayed for me last year. My husband was in the parking lot of the medical center speaking with his friend who happened to work at the center with this particular nurse. I was very sick at the time and they prayed for my healing.  It was great to be able to thank her in person and let her see that the prayers had been answered. ❤️

Then the anesthesiologist came in and told me about his cousin who had also been diagnosed with Stage 4 colon cancer about a year ago. He mentioned some of the treatments his cousin had had and how important a positive attitude is.  I was touched that he took the time to tell me about his cousin’s experience. 

 We had arranged in advance to have my husband’s friend as the nurse anesthesist.  He was able to pray with us as well as reassure us about the procedure.

The procedure went well. The three polyps that the surgeon removed were sent to pathology.  The report is already back and there no evidence of cancer.  Prayers were answered again❤️

#coloncancersurvivor #coloncancer  #coloncancersucks  #colonoscopy #sigmoidoscopy  #fromfarmhousetoflorida
Celebrating my “roots” for Earth Day and beyon Celebrating my “roots” for Earth Day and beyond! The tractor was painted a few years ago by a dear family friend @annrund  The two white wooden hearts were purchased at one of my favorite shops in Illinois @thefeatherednest1  #fromfarmhousetoflorida #farmhousedecorating #gardenstyledecor #gardenstyle #kimstyledecor
Instagram post 18068406688937948 Instagram post 18068406688937948
Two different ways to display this Easter bunny: r Two different ways to display this Easter bunny: rustic wooden box or an oval dough bowl! Which do you like better? #eastervignette #fromfarmhousetoflorida #easterdisplay #cottagedecor #kimstyledecor
Need a quick dough bowl decor idea? Simply tie mus Need a quick dough bowl decor idea? Simply tie muslin ribbon around a bouquet of silk tulips! I used white but any color would work! #doughbowls #farmhousedoughbowl #farmhousedecor #fromfarmhousetoflorida #cottagedecor #kimstyledecor
In honor of National Pet Day, sharing the first ti In honor of National Pet Day, sharing the first time I met Mowgli! He jumped right up into my arms proving he was #destinedtofly  I just happened to be wearing a #antomiestyle tank!  With Capri jeans, it makes an #everydayanatomie look!

Tags

"Kim" Style 4th of July Architectural Salvage Autumn brocante style budget friendly Christmas Christmas decorating container gardening cooking with herbs DIY dough bowl Easter entertaining entrepreneur European dish garden Family Farmhouse Flowers Gardening Garden Style garden style decor gluten free Herbs Holiday decorating lanai Mad Dash Mixes Mix It Up Monday No Bake Cheesecake outdoor living patio pots patriotic pumpkins recipe recipes Silk arrangement silk flower arrangement Soup spray paint Spring sugar mold summer Summer Holidays Thanksgiving Valentine's Day

Recent Posts

  • picture of vintage mesh patio table with chalk paint spray paint in the backgroundCan This Table Be Saved?
    In Blog Post, DIY
  • Mother's Day Dough BowlMother’s Day “Forget Me Not” Dough Bowl
    In Blog Post, Decorating & Design
  • Purple Iris growing in a gardenEasy Tips For Growing Beautiful Purple Iris
    In Blog Post, Flowers, Gardening

Categories

  • Appetizer
  • Architectural Salvage
  • Autumn
  • Beverages
  • Blog Post
  • Christmas Decorating
  • Decorating & Design
  • Desserts
  • DIY
  • Easter Decorating
  • Entertaining
  • Entrepreneur
  • Flowers
  • Furniture
  • Gardening
  • Holiday Decorating
  • Home Decor
  • Home Tour
  • Lanai
  • Main Dishes
  • Outdoor Kitchen
  • Outdoor Living
  • Petals & Porch Posts
  • Pizza
  • Pizza Business
  • Pool
  • Porch
  • Recipes
  • Salad
  • Spring
  • Summer
  • Thanksgiving Deccorating
  • Valentine's Day
  • Winter

Recent Posts

  • picture of vintage mesh patio table with chalk paint spray paint in the backgroundCan This Table Be Saved?
    In Blog Post, DIY
  • Mother's Day Dough BowlMother’s Day “Forget Me Not” Dough Bowl
    In Blog Post, Decorating & Design
  • Purple Iris growing in a gardenEasy Tips For Growing Beautiful Purple Iris
    In Blog Post, Flowers, Gardening
  • Advertise
  • Contact
  • Disclosure Policy

Copyright © 2025 · Sassafras Theme by Hello You Designs

Copyright © 2025 · Sassafras Theme on Genesis Framework · WordPress · Log in