Make your space bloom with these easy ideas using artificial hydrangeas! Get creative and add a unique touch of elegance to any room!
Hydrangeas have a timeless beauty that can bring a special touch to any room. But if you don’t want to worry about care and maintenance, artificial hydrangeas are the perfect way to add a touch of elegance without the hassle! Today I am sharing a few easy design ideas using artificial hydrangeas.
Artificial hydrangeas (sometimes referred to as faux hydrangeas) are very long lasting. They are low maintenance but not necessarily no-maintenance! They can attract dust and become faded if left in a bright location. A light dusting with a feather duster to help remove dust particles may occasionally be necessary.
From petite floral accents to large bouquets, here are several creative ideas for incorporating artificial hydrangeas into your home decor.
On this blog, I may sometimes use affiliate links, which means I earn a small commission if you purchase via the link. The price will be the same whether you use the affiliate link or go directly to the vendor’s website using a non-affiliate link. By using my affiliate links to shop, it helps me to be able to continue bringing you fresh new ideas and projects! Thank you!
Easy Design Ideas Using Artificial Hydrangeas
Faux Hydrangea Bouquets in a Tool Box
Let’s start with how to make an easy hand tied bouquet. Once you master this technique, you can quickly design a bouquet to use wherever you would would like.
What is a hand tied bouquet?
A hand tied bouquet is a bouquet that is designed by arranging the flowers in your hand rather than in a vase or other container. It can be a bit tricky to master, especially if you have small hands! Once you get all the flowers arranged, you then tie the stems together. After the stems are tied, I often wrap the stems with green floral tape.
How to Make A Hand Tied Faux Hydrangea Bouquet-
You will need the following materials:
One large hydrangea head for each bouquet you are making. The pink roses are shown just to add interest to the photo!
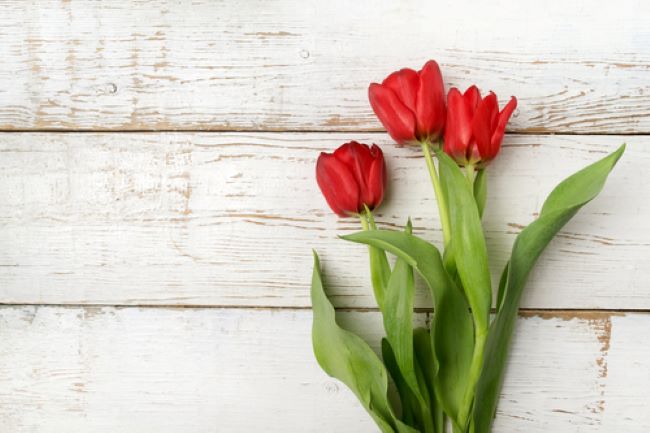
Red tulips : we will use three for each bouquet
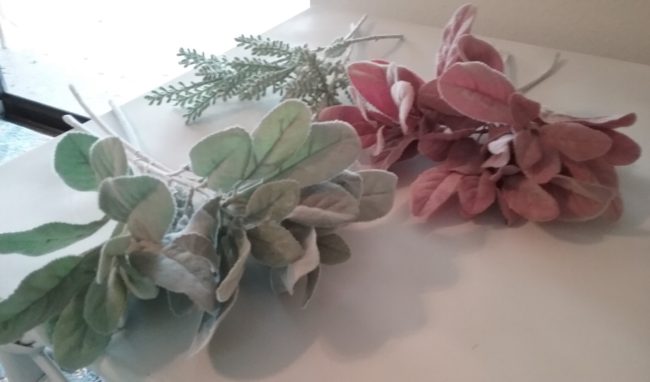
an assortment of artificial lamb’s ear to add texture
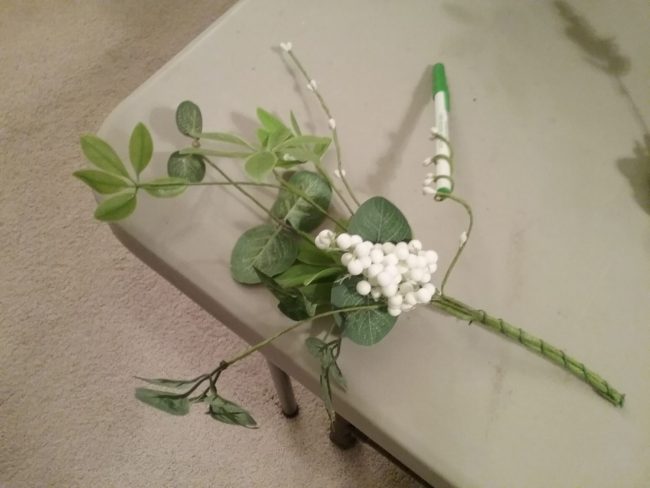
Berry stems that are individually wired so that I can twist the stems around a pen to make whimsical curlicues to add interest and movement to the arrangement.
The Process
To make designing this hand tied bouquet even easier, I am going to use the hydrangea head as an armature. What is an armature? In floral design, an armature is used to add support to an arrangement. An armature can be made out of natural materials such as curly willow. a large flower or even non-botanical material such as aluminum wire.
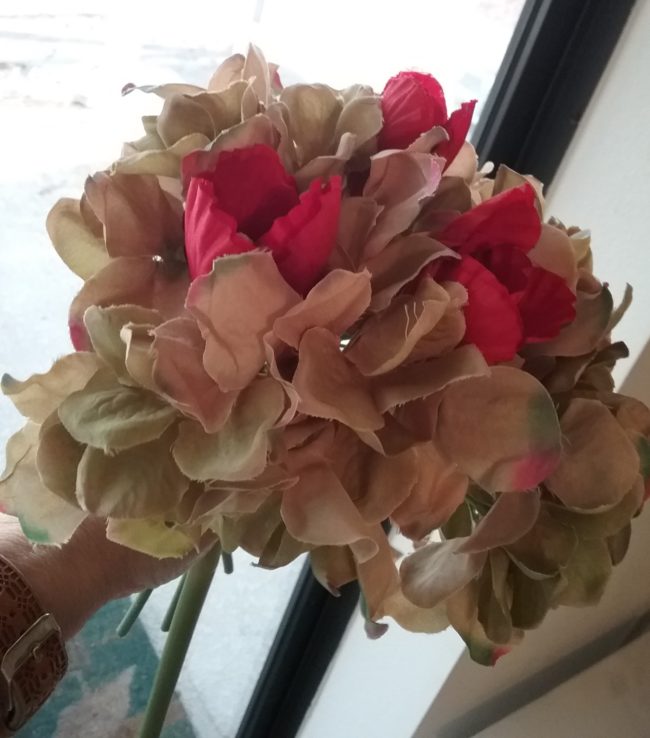
Since I am right handed, I will hold the hydrangea head in my left hand. With my right hand, I add the tulips into the hydrangea at a slight angle. The blossoms of the hydrangea are supporting the heads of the tulips. Continue to add the stems to the bouquet, always inserting the stems between the blossoms of the hydrangea. You may need to turn the bouquet in your hand so that the stems are easier to insert.
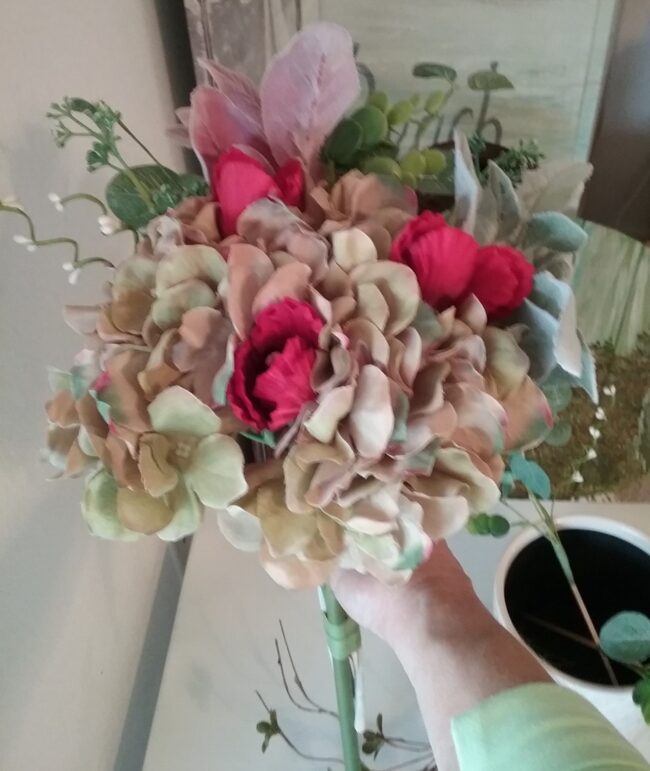
Because I am going to be using the bouquet as part of a larger arrangement, I made it one sided. If I was only making one bouquet, I would have made it more symmetrical and used the lamb’s ear all around the edge to form a collar. There are many ways to design your bouquet. As long as you are happy with it, that is all that matters!
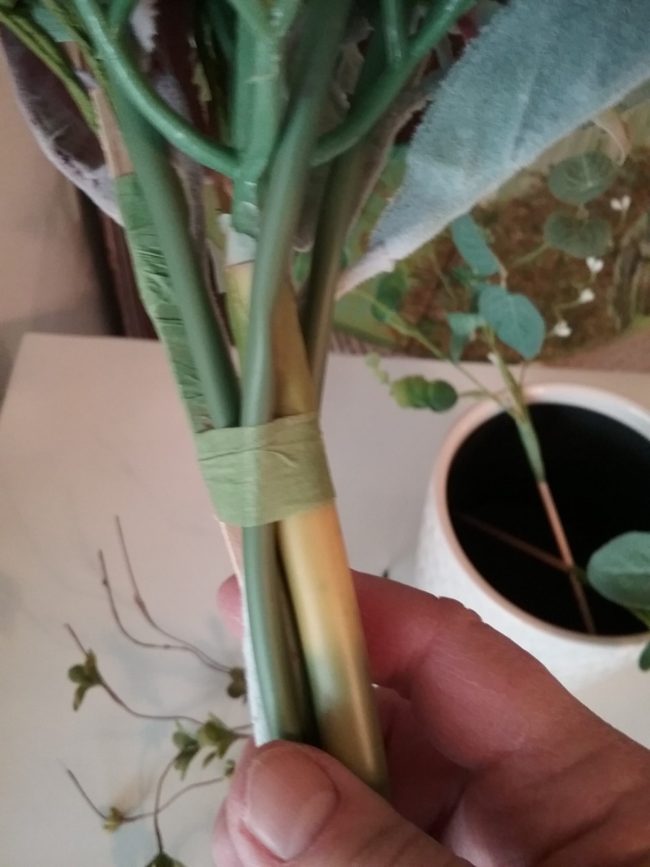
Once you have all your stems in place, it is time to tie the bouquet together. I simply used green floral tape to tie the stems. I chose this method because my stems aren’t going to show in my final arrangement. If you were making the bouquet for a wedding, for example, once your stems were secured you could wrap them with ribbon.
The floral tape will stick to itself as you stretch it around the stems. A gentle pull is all it takes. If you pull too hard, the tape will rip.
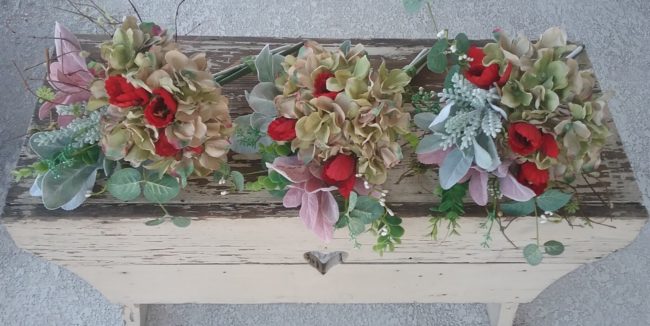
The Finished Bouquet
Save This Pin For Later!
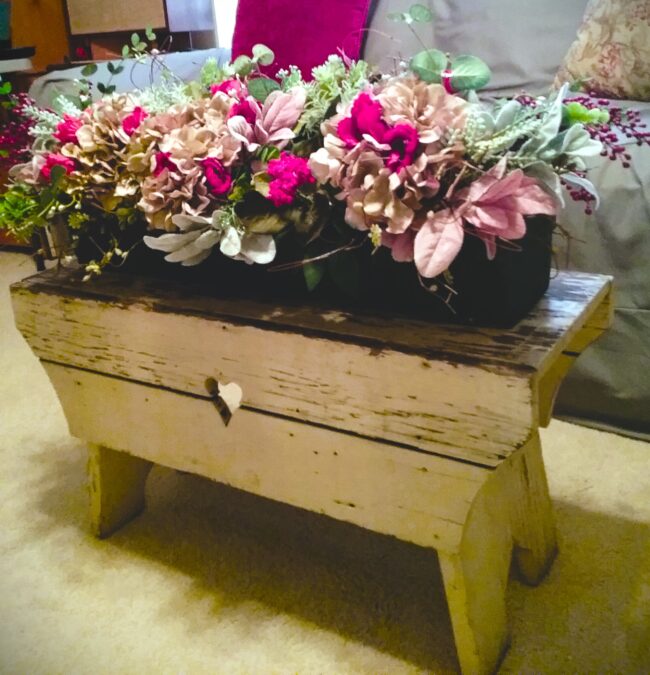
Let’s Fill The Tool Carrier!
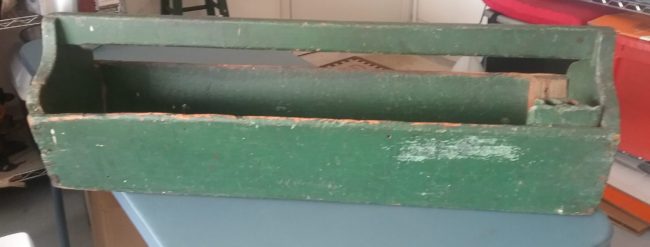
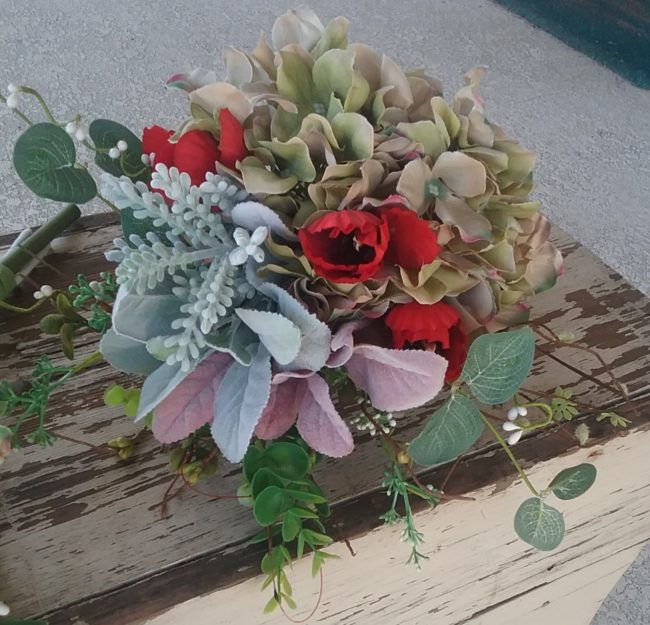
I had a vision in my head before I actually started designing the bouquets. I knew I wanted to fill this old green tool carrier. Based on its size, I thought I would need three bouquets to fill it. I designed the three bouquets to fit in the box. For reference, the tool carrier is 28 inches long. Each bouquet is approximately 9 inches in diameter.
The Placement
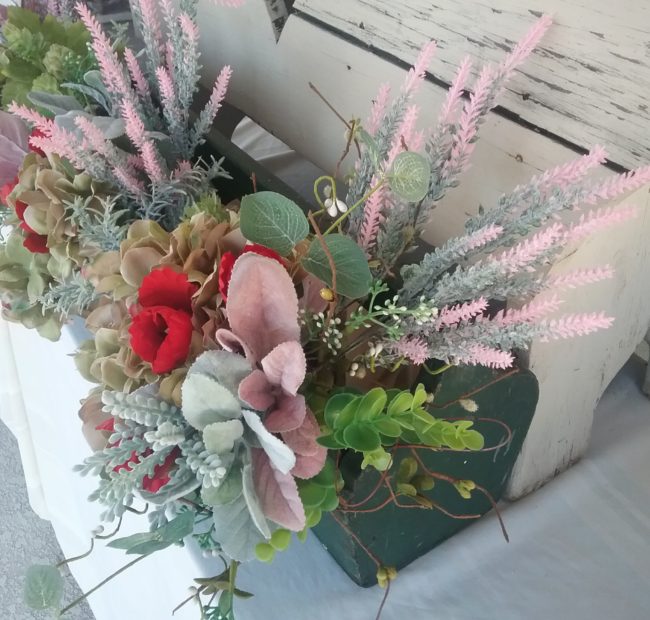
Once I placed the bouquets in the carrier, I added the pink lavender in the back to give the arrangement some height. I also filled in the holes between the bouquets with some additional greenery.
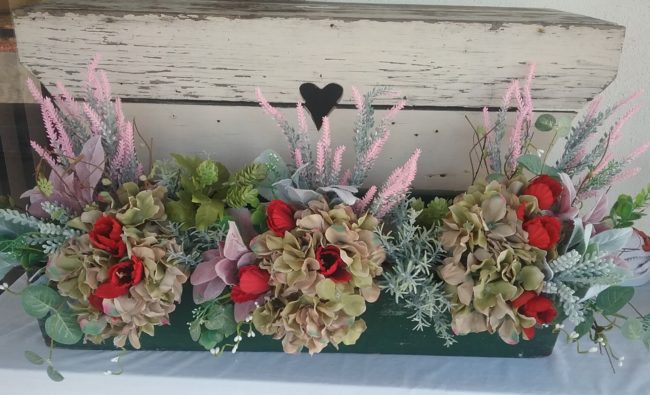
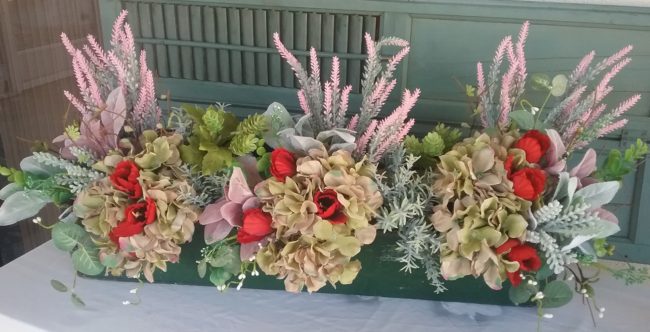
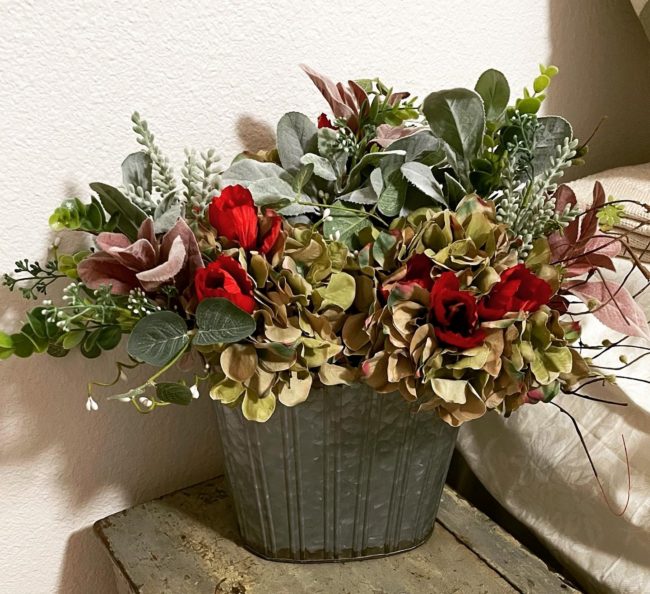
The three bouquets look great in the carrier! This green tool carrier with the three hand tied bouquets would look amazing in the center of a rustic farmhouse table! Since you are the designer, it is all up to you!
Another option is to use a metal container instead of a tool carrier.
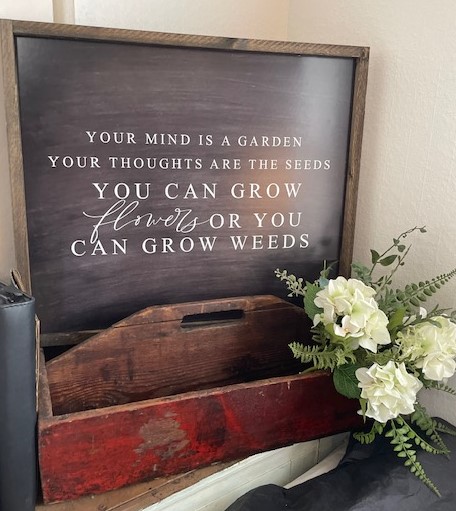
If you wanted a simpler look, a bouquet of white hydrangea and greenery tucked in the end of a tool box would look beautiful too!
More Easy Design Ideas Using Artificial Hydrangeas
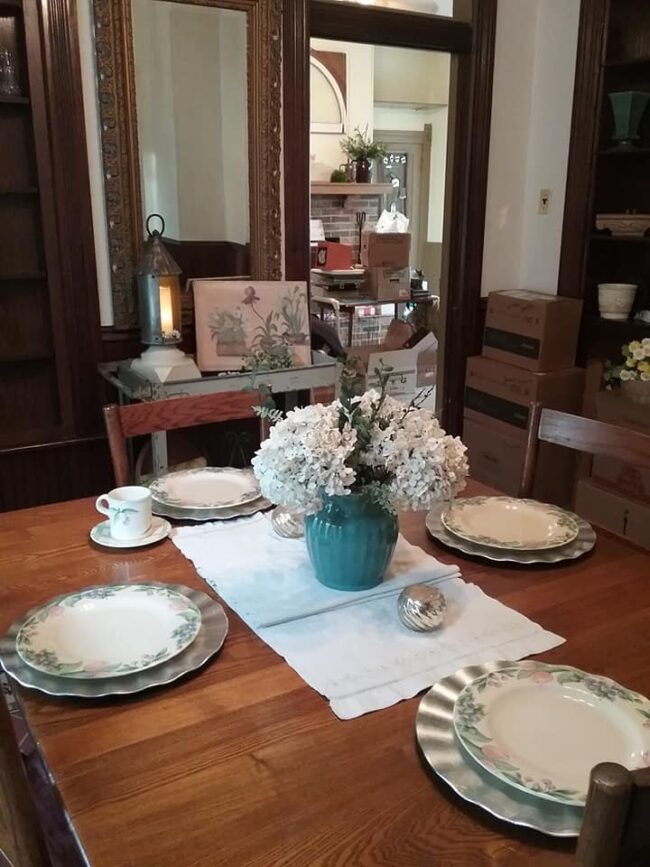
Faux Hydrangeas for The Table
Early Spring Garden Style Tabletop Vignette
Create an eye-catching centerpiece for any table with faux hydrangeas. This tin wall pocket or planter box is embossed with the words “Spring Flower Garden Blooms”. For the Early Spring season, I simply placed a bundle of faux herbs and one hydrangea stem in it.
For Summer, I filled an old crockery pitcher with faux cream colored hydrangeas and a few stems of greenery.
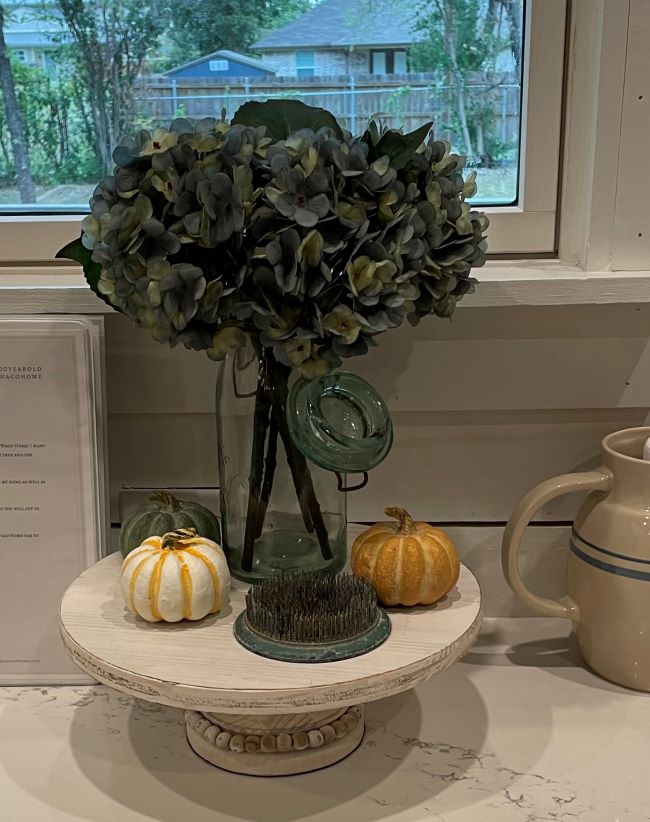
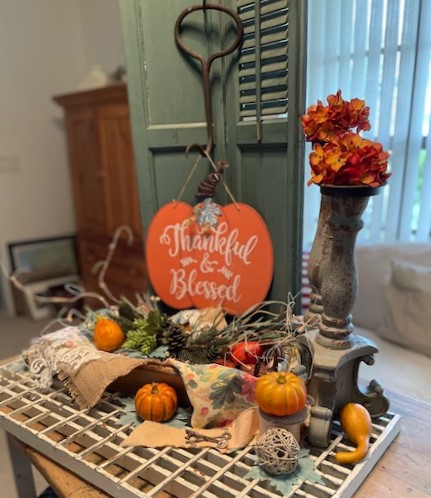
A very simple arrangement of green hydrangeas in a mason jar is perfect for Autumn!
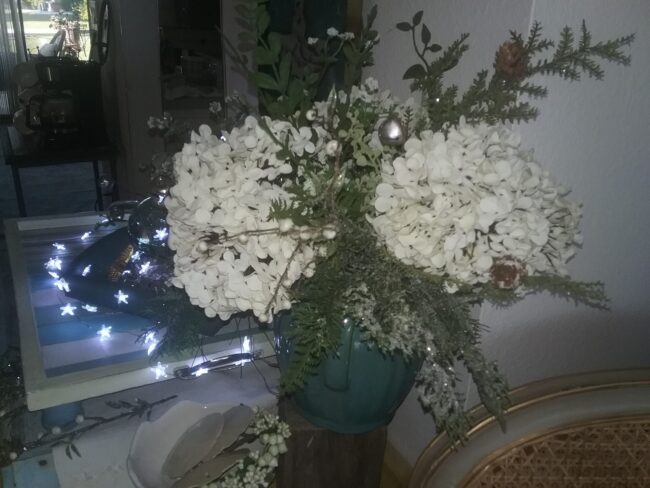
For winter, I used the blue crockery pitcher again with the same faux hydrangeas and added a bit of winter greenery and some icy foliage.
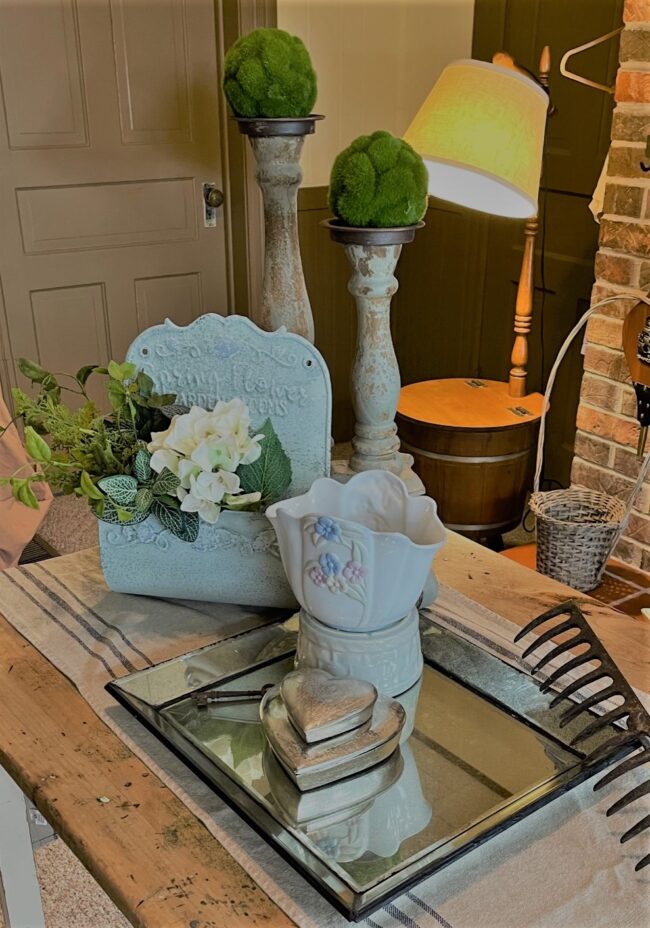
Artificial Hydrangea Entryway Accent
Coastal Farmhouse Summerthyme Entryway
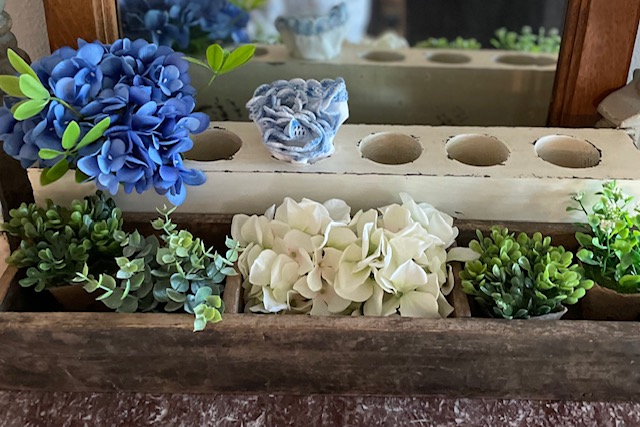
Make use of the space at your entryway with an artificial hydrangea accent. I filled the box with little pots of faux herbs and two cream hydrangea heads. A few stems of blue hydrangea are placed in one of the sugar mold holes.
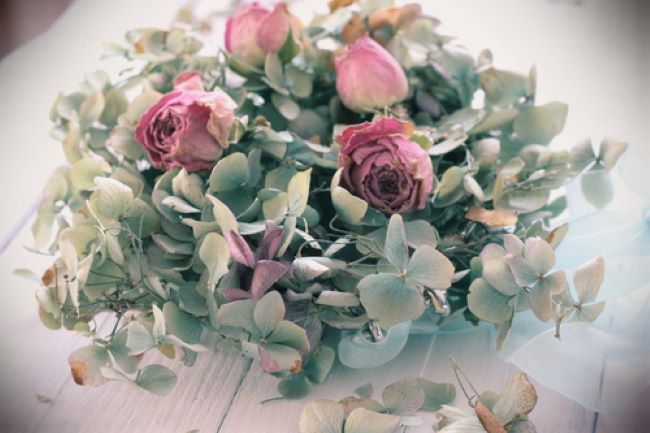
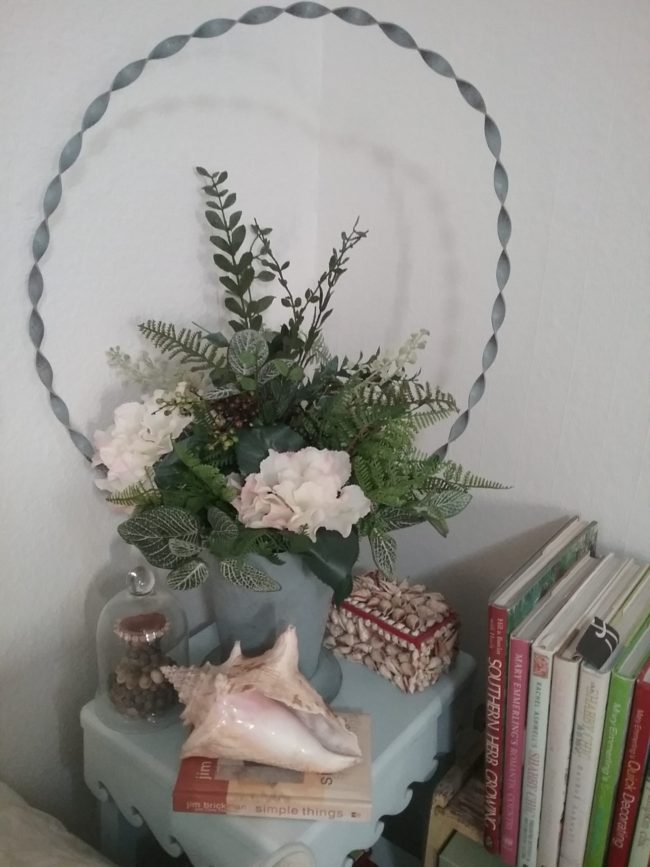
Faux Hydrangea in an Antique Basket
How to Design a Silk Arrangement in a Basket
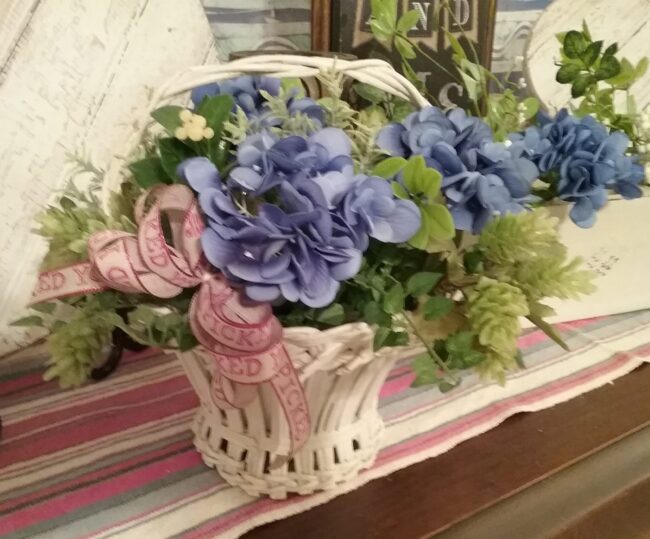
This antique basket is so sweet I wanted to use it to make a Spring silk arrangement. I combined faux blue hydrangea, greenery and a burlap bow. So simple and easy but it looks fantastic!
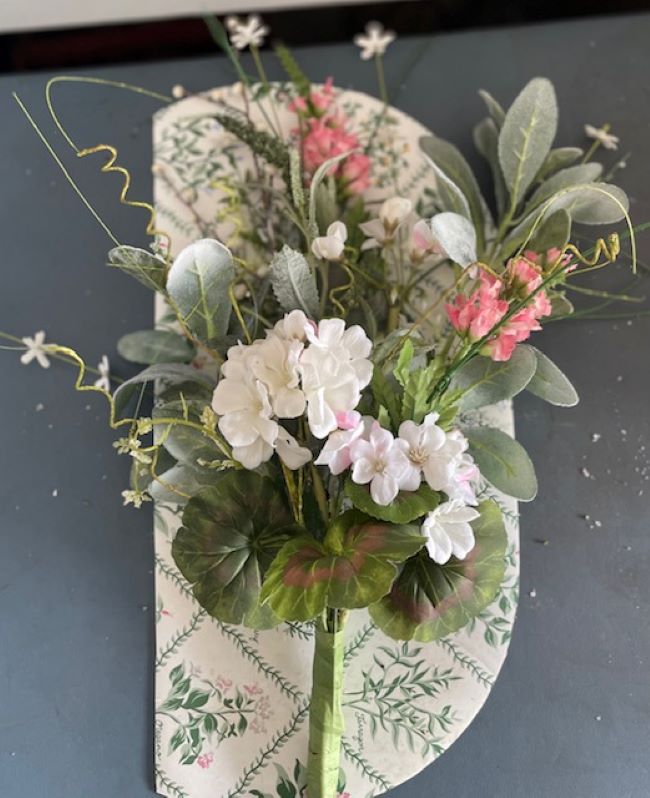
Use An Artificial Hydrangea as a Focal Flower in a Swag
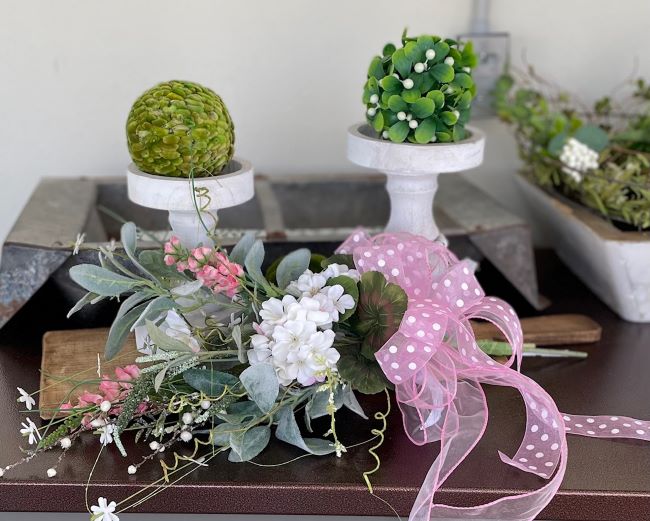
How to Create a SpringThyme Silk Bouquet
A one sided bouquet is a bouquet that has a flat side (or back) and all the flowers face the front. One-sided bouquets made of silk flowers are extremely versatile. They can be used practically anywhere you need a pop of color or to add interest. They can be used as a swag on a table or wall. They can hang on your door or on a shutter. You can even pop them in a vase or a sap bucket!
Fill A Large Container
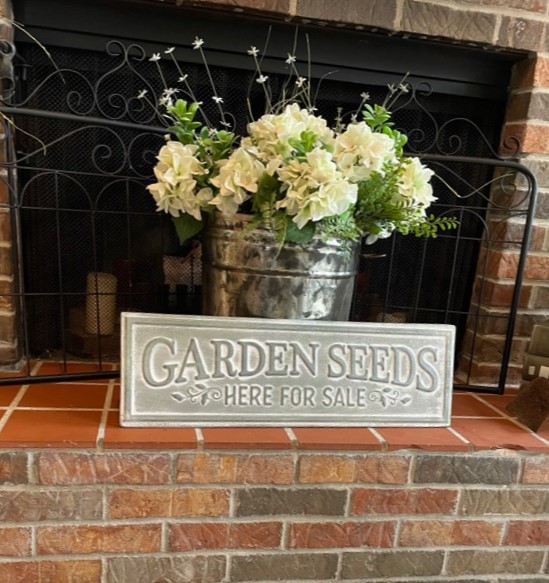
To fill this old lard bucket, I used an assortment of greenery and long stems of cream colored hydrangea.
A combination of white hydrangea and assorted greenery fill this antique metal presentation basket.
Top A Candle holder
Did you know you could use a hydrangea head as a “pouf” or topper for a candlestick? I used my bolt cutters to cut the blossoms off of the stems!

Garden Style Springthyme Mantel Styling Tips
I hope you enjoyed these easy design ideas using artificial hydrangeas!
Disclosure: Some of the links in this post are affiliate links, meaning, at no additional cost to you, I will earn a small commission if you click through and make a purchase. The opinions here are all my own. It helps me to continue to bring to you DIY and projects on my blog.
Please see my disclosure page for more information
Absolutely stunning! Thank you for sharing this – gives me great inspiration.
Thank you , Carol! I appreciate you taking the time to read and comment!!!
Very pretty! You did such a nice job.
Thank you , Kim!
Love your color palette! The wood carrier is very cute.
Thank you , Marie! The hydrangea are really prettier in person. It was hard to photograph them!
Your bouquets are so pretty! I love the idea of tying individual bouquets together and then using several in a container. Thanks for sharing your technique!
Thank you so much!
Beautiful bouquets! I love the cotainer as well.
thank you , Jennifer! I have had this tool carrier a long time. I bought it from my friend when she had a shop. I love tool carriers!!
This arrangement is so pretty! I love the green wood box also!
thank you, Danielle! The box is one of my favorites!
Such a FABULOUS collection of decorating ideas!!
Don’t forget to join us over at the Creatively Crafty Linky Party every Wednesday through Sunday
https://creativelybeth.com/creative-crafts-linky-party-2/
Pinned!
Creatively, Beth
Thank you so much, Beth! I will definitely check out your linky party!