• Pinterest
  • Facebook
  • Instagram

From Farmhouse to Florida

A Life Styled with Heart

  • From Farmhouse to Florida
  • Home
  • Blog
  • About
  • Contact
  • Services

How to Make A Hand Tied Bouquet

November 4, 2022 by Kimberly Snyder 1 Comment

Spread the love

Using a hydrangea as an armature is an easy way to make a hand tied silk bouquet! Let me show you how to do it!

As An Amazon Affiliate, I earn From Qualifying Purchases

tin bucket with silk flowers

Before I get started, I would like to explain a few floral design terms!

What in the world is an armature?

In floral design, an armature is used to add support to an arrangement.  An armature can be made out of natural materials such as curly willow or non botanical material such as aluminum wire.  

dough bowl - winter close up

What is a hand tied bouquet?

A hand tied bouquet is a bouquet that is designed by arranging the flowers in your hand rather than in a vase or other container.  It can be a bit tricky to master, especially if you have small hands!  Once you get all the flowers arranged, you then tie the stems together.   Bridal bouquets are often hand tied.

Why are they called silk flowers?

In the late 1800s, artificial flowers were actually made out of silk.  Since that time, advancements have been made in technology and now they are made out of a variety of materials.  The term “silk flowers” is widely used when referring to artificial flowers .  I personally think it sounds better to call them silk flowers rather than artificial flowers.  I do sometime refer to them as faux flowers also.

Regardless of what they are called, the advancements in technology have also allowed the silk flowers to look more life like or botanically correct.  Silk flowers are available in all price ranges.

Silk flowers are very long lasting.  They are low maintenance but not necessarily no-maintenance!  They can attract dust and become faded if left in a bright location.   Lightly dust the silk flowers with a feather duster to help remove dust particles.  Sometimes, you can even wash them in a sink full of soapy water, rinse them well and let them dry!  I have done that many times.

Whew!  Now that we are done with the floral vocabulary lesson, let’s get to the fun part!  Designing!

The Stems

Hydrangea Head

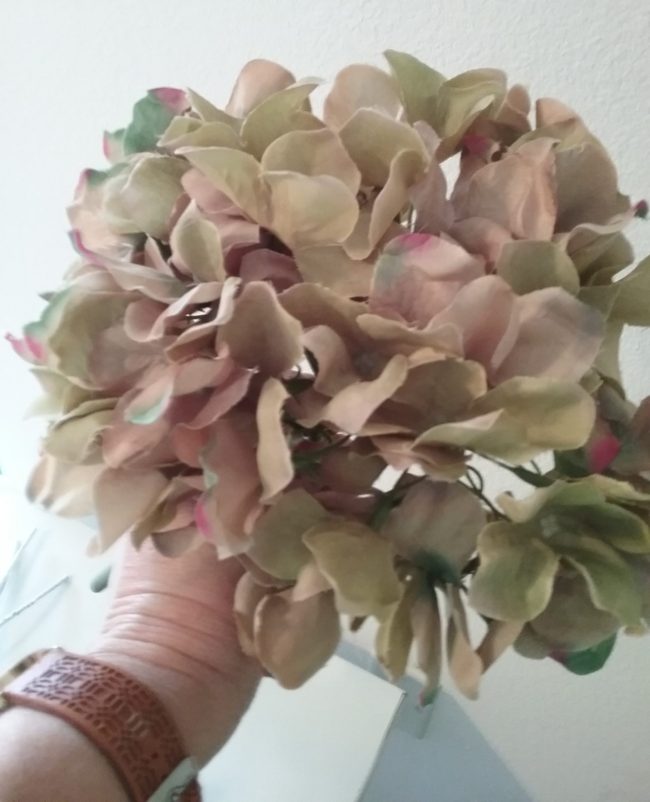
One large green hydrangea head


Artificial tulips

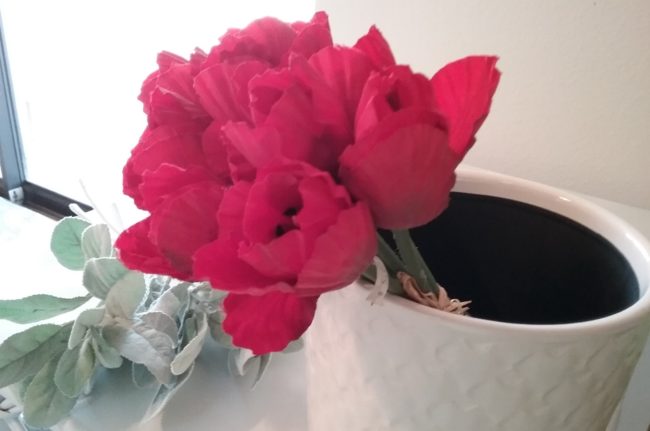
Red tulips :  we will use three for the bouquet


artificial lamb's ear

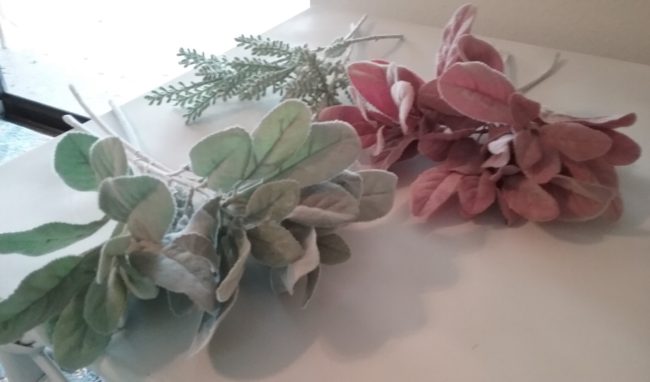
Assorted Lamb’s Ear for added texture

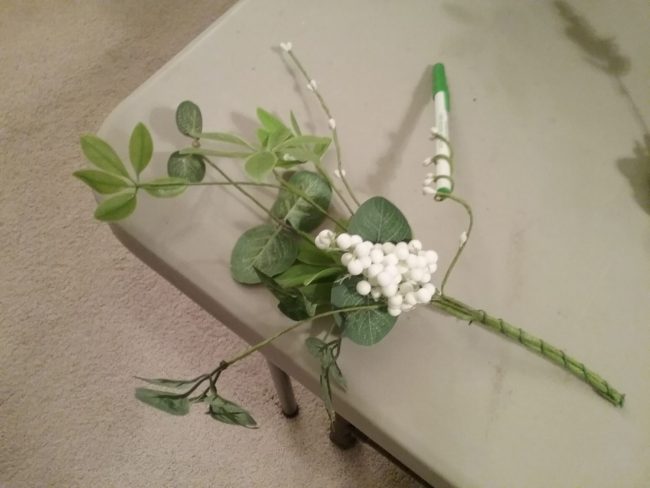
These berry stems are individually wired so that I can twist the stems around a pen to make whimsical curlicues to add interest and movement to the arrangement.  

The Process

Tulips in the center of a Hydrangea head

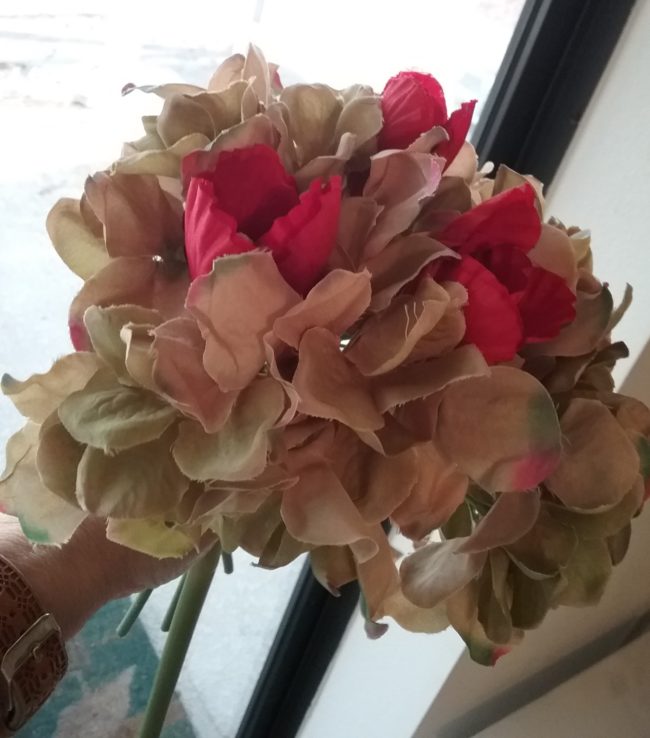
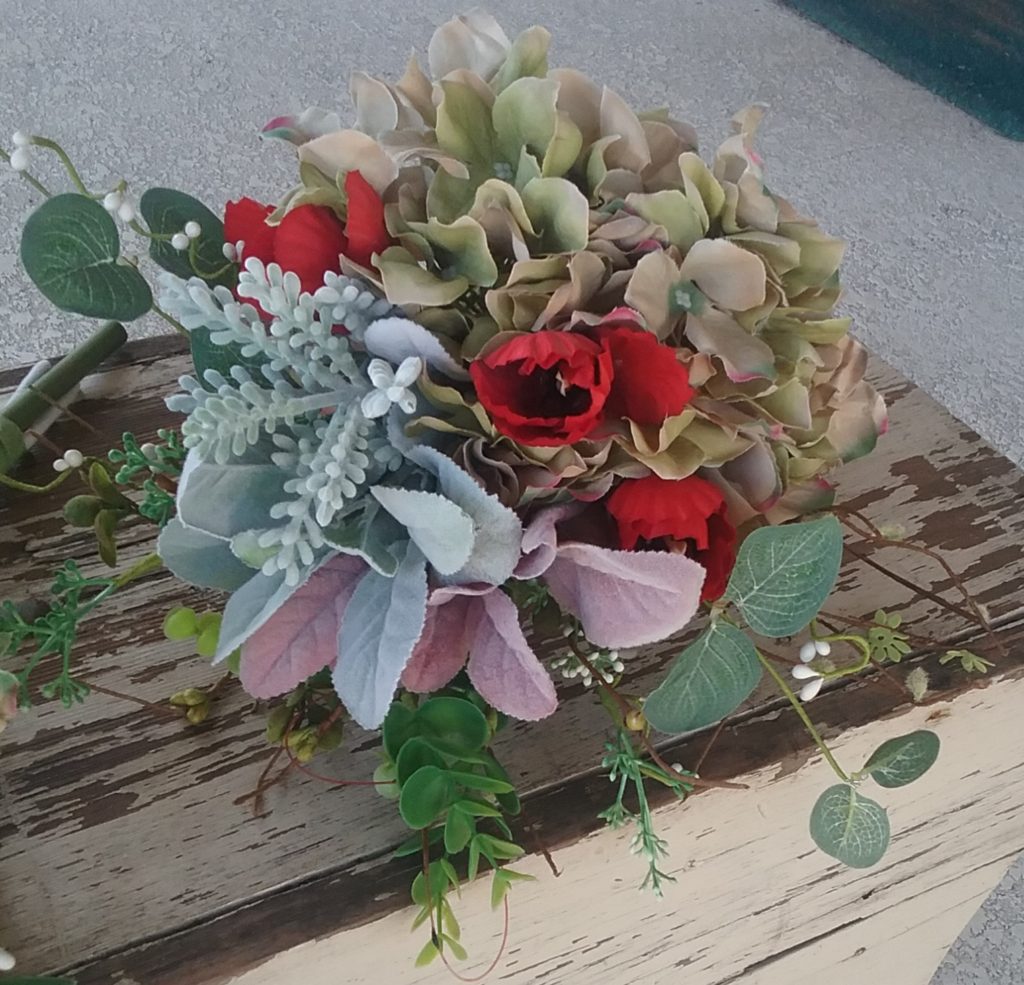
Since I am right handed, I will hold the hydrangea head in my left hand.  With my right hand, I add the tulips into the hydrangea at a slight angle.  The blossoms of the hydrangea are supporting the heads of the tulips.  Continue to add the stems to the bouquet, always inserting the stems between the blossoms of the hydrangea.  You may need  to turn the bouquet in your hand so that the stems are easier to insert .

Because I am going to be using the bouquet as part of a larger arrangement, I made this one one sided.  If I was only making one bouquet, I would have made it more symmetrical and used the lamb’s ear all around the edge to form a collar.  There are many ways to design your bouquet.  As long as you are happy with it, that is all that matters!

Taping the Stems of a hand tied bouquet

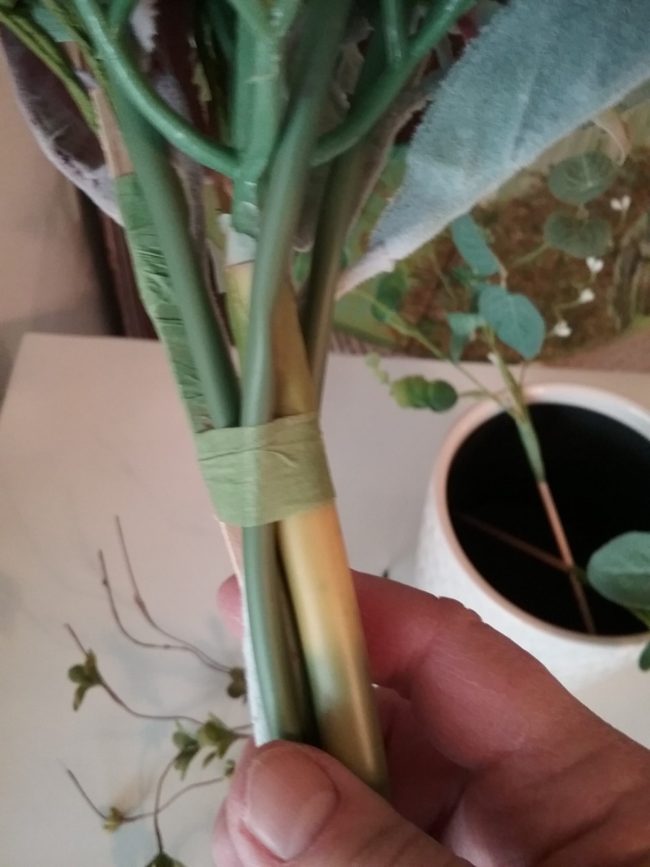
Once you have all your stems in place, it is time to tie the bouquet together.  I simply used green floral tape to tie the stems.  I chose this method because my stems aren’t going to show in my final arrangement. The floral tape will stick to itself as you stretch it around the stems.  A gentle pull is all it takes.  If you pull too hard, the tape will rip.

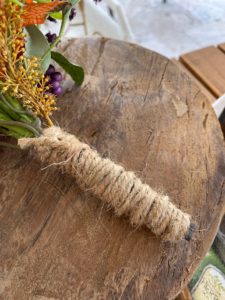
If you were making the bouquet for a wedding, for example, once your stems were secured you could wrap them with ribbon.  Or you could use twine, as I did here:

tussie mussie with twine handle treatment

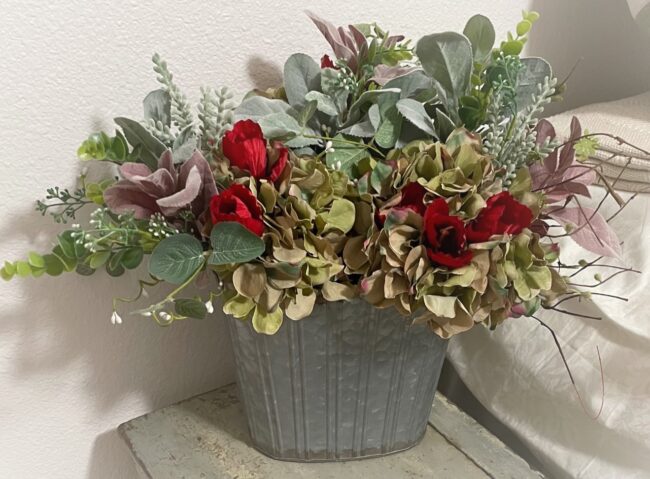
The Finished Bouquet

hand tied bouquet

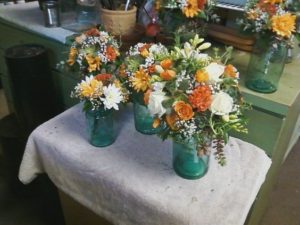
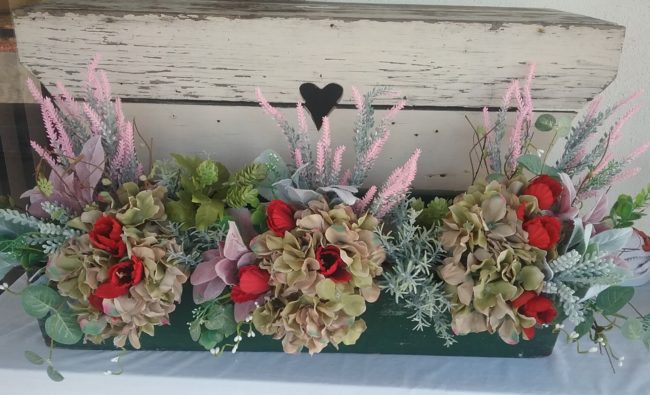
Once I had one bouquet finished, I simply repeated the process two more times.  I wanted a trio of bouquets.

Because of the colors and textures I chose, these bouquets could be used in my home from late fall until late winter.  A very simple way to display them is to place them in an oval tin bucket.

tin bucket with silk flowers

Save This Pin for Later!


Another way to display them would be to use them to fill an antique tool carrier similar to the photo below:

Tussie Mussies in Toolbox

Once you have the basic techniques mastered, you will be able to create beautiful silk arrangements for any season!

If you are curious about the white wooden bench in the background of the picture above, you can read more about it here:

Thank you for stopping by today!

Disclosure: Some of the links in this post are affiliate links, meaning, at no additional cost to you, I will earn a small commission if you click through and make a purchase. The opinions here are all my own. It helps me to continue to bring to you DIY and projects on my blog.

Please see my disclosure page for more information

Check your inbox or spam folder now to confirm your subscription.

Filed Under: Blog Post, Decorating & Design Tagged With: hydrangea, silk flower arrangement

How to Safely Clean Old Wood**
Red, Rustic & Reclaimed Holiday Centerpiece

Trackbacks

  1. How to Store your Silk Flowers - From Farmhouse to Florida says:
    February 11, 2022 at 5:38 pm

    […] I bought this set of three tin containers.  Two of them are in the box with the sap buckets.  The other one is being used to hold some silk bouquets detailed in this post A Quick Way to Make A Hand Tied Bouquet […]

    Reply

Leave a Reply Cancel reply

Your email address will not be published. Required fields are marked *

Recipe Rating


Instagram

Two years later, I’m reflecting on the surgery, th Two years later, I’m reflecting on the surgery, the setbacks, the NG tubes, the insurance battles, the detours — and the rainbow that arrived almost a year before I knew how much I’d need it.
#coloncancerawareness #floridacancerspecialists
Add a whimsical rustic wire bunny to a pot of bloo Add a whimsical rustic wire bunny to a pot of blooming flowers. Line up several pots in a dough bowl for an easy Spring centerpiece! #farmhousedoughbowl #doughbowl #gardenstyle
The Garden of Gethsemane is one of those places th The Garden of Gethsemane is one of those places that stays with you — ancient olive trees, quiet paths, and a stillness that settles into your heart. This Holy Week, I’m reflecting on the humble herbs of Scripture and the small symbols that carry deep meaning.
#HolyWeek #Gethsemane #BiblicalHerbs #FaithJourney
Sending Irish blessings your way! Happy St Patrick Sending Irish blessings your way! Happy St Patrick’s Day! #everyoneisirishtoday
Only a few pieces of my parents’ first dishes surv Only a few pieces of my parents’ first dishes survived.  This pattern is perfect for Spring, so I had to find a few more pieces on EBay. #sweetcloverpattern #vintagedishes
Just a few of my favorite things gathered together Just a few of my favorite things gathered together for a Spring preview! Angel vine on a heart shaped topiary 🩷 #gardenstyle #brocantestyle #earlyspring
A little humor about my December appointment: when A little humor about my December appointment: when my Doctor asked about how my walking was going , I answered “How ‘bout them Cubs?” It’s my classic diversion line when I don’t want to talk about something.  This season of the journey has been quieter - steady scans, nearing the end of treatment, a trip or two to see old friends. a blessing in its own way. I did end up needed fluids again ( dehydration sneaks up faster than you think) but I am holding steady and grateful for the softer days.  Thank you for walking this journey with me . #cancerjourney #coloncancerawareness #immunotherapy #faiththrufriendship #healinginprogress
Despite the bitter cold embracing the country, Spr Despite the bitter cold embracing the country, Spring is just around the corner! It is easy to add touches of Early Spring to your decor. Simply combine faux flowers and vintage items for a Garden Style Spring look! #gardenstyle #brocantestyle #springhomedecor
Valentine’s Day is just around the corner! I love Valentine’s Day is just around the corner!  I love to create seasonal vignettes,don’t you?  To be honest, I think that heart box stayed out all last year! #fromfarmhousetoflorida #valentinesdaydecor #gardenstyledecor

Tags

"Kim" Style 4th of July Architectural Salvage Autumn brocante brocante style budget friendly Christmas Christmas decorating container gardening cooking with herbs DIY dough bowl Easter entertaining entrepreneur European dish garden Family Farmhouse Flowers Gardening Garden Style garden style decor Herbs Holiday decorating lanai Mad Dash Mixes Mix It Up Monday No Bake Cheesecake outdoor living patio pots patriotic pumpkins recipe recipes Silk arrangement silk flower arrangement Soup spray paint Spring sugar mold summer Summer Holidays Thanksgiving Valentine's Day
Company
  • Contact
  • About
  • Advertise
  • Contact
  • Disclosure Policy
Support
  • Help Center
  • FAQ
From Farmhouse to

Subscribe to Our Newsletter

Check your inbox or spam folder now to confirm your subscription.

Copyright © 2026 · Sassafras Theme by Hello You Designs

Copyright © 2026 · Sassafras Theme on Genesis Framework · WordPress · Log in