What do I know about cookin’? I know that my readers love my recipes! Here is a quick overview of my most loved recipes!
Instead of an installment of Mix It Up Monday with Mad Dash Mixes today, we are going to take a little trip down memory lane and revisit a few of my most popular recipe and food related posts!
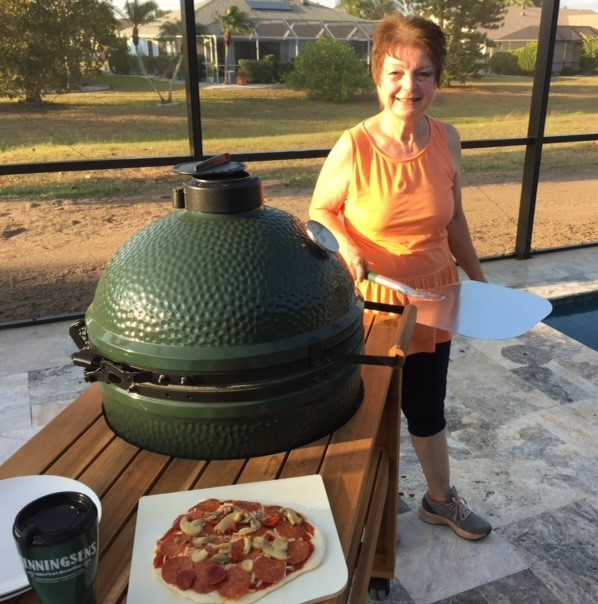
How to Cook Pizza On the Big Green Egg
If cooking isn’t your thing, here is a link to my Top Ten (non food) Reader Favorites! A Look Back Your Favorite Posts!
Before We Get Started!
Before I get started with the review, I’d like to take the thyme to thank you for following me on my journey! I am so glad you are here!
It took several trips to see Santa

and many birthday wishes
Sprout/ Grow/ Bloom : My Journey
before my journey as an entrepreneur finally got started!
From the early days when the business was known as Kim’s Kakes, Kuttings & Kandles Too to Petals & Porch Posts to Makin’ Pizza to From Farmhouse to Florida, my love of herbs, decorating, flowers, cooking and family continues. Over the years, I have combined my passion for flowers (a former florist), flour (a former pizzeria owner) and brocante. I have still have a lot to share! I enjoy showcasing my love of these creative pursuits thru my blog. If you would like to learn more about my journey, all the details can be found here:
I hope you enjoy your thyme here today!
My Top Ten Recipes
While decorating dough bowls is still a popular topic among my readers and followers, simple makeovers and recipes were the most popular posts this year! Over the next few days, we will revisit the popular posts in these areas. Since my husband thinks all I ever think about is where my next meal is coming from, let’s kick off the week with a look back at the most popular food related posts!
#1 The 5 Secrets to Baking the Perfect Brownie
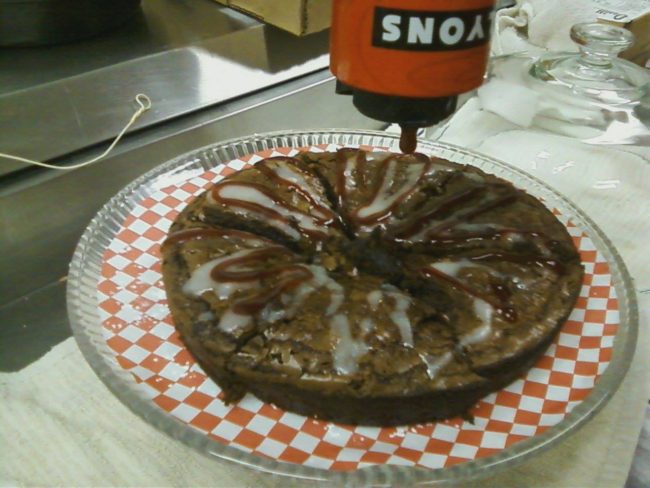
Five Secrets to Baking the Perfect Brownies
It comes as no surprise to me that my most popular recipe post was my post about the 5 secrets to baking the perfect brownie! Brownie pizza was one of the first things I added to the menu when I purchased an existing pizzeria several years ago! In this post, I shared the recipe for Brownie Pizza as well as shared the 5 secrets that will help you bake the perfect brownie!
Fudgy Brownie Pizza
Equipment
- medium sauce pan
- mixing bowl
- electric mixer
- 9 " round baking pan
- spatula
- parchment paper
- knife to cut brownies after they have cooled
Ingredients
- 1/2 cup butter or margarine
- 1 cup granulated sugar
- 1 tsp vanilla
- 2 eggs room temperature
- 2 1 ounce squares unsweetened chocolate
- 3/4 cup sifted all purpose flour
- 1/2 cup chopped walnuts optional
Instructions
- In a mediium saucepan, melt the butter & chocolate over low heat.
- Remove from heat and allow to cool for 30 minutes
- Pour melted butter/chocolate mixture into mixing bowl
- Beat in sugar
- Blend in eggs one at a time, beat until ribbon stage is reached. *
- Add Vanilla
- Stir in flour and mix well
- Spread batter in a greased 9 " round baking pan.
- If desired, the baking pan can be lined with parchment paper to make it easier to remove brownies when they are done baking.
- Bake at 350 degrees for 30 minutes
- Caution: do not overbake!
- Remove from oven and allow to cool
- After brownies have cooled for at least 1 hour, cut into 8 slices
Optional Brownie Pizza Toppings
- a simple glaze can be made from powdered sugar (1 cup powdered sugar, 2 tsp vanilla and 2 - 4 tablespoons of milk blended together)
- powdered sugar can be sifted over the top of the brownie
- raspberry sauce from the grocery store can be drizzled over the top of the brownie pizza
- for even more chocolate flavor, chocolate sauce can also be drizzled over the brownie pizza
Notes
- Ribbon Stage is met when the chocolate/egg/sugar mixture drips off the beaters in "ribbons".
- an 8 x 8 square pan can be substituted for the 9 " round pan if you prefer a square brownie
- small pieces of fresh mint can be used to decorate the slices of brownie
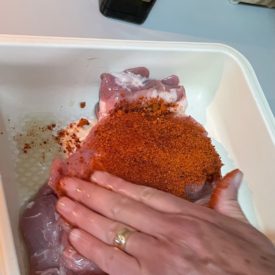
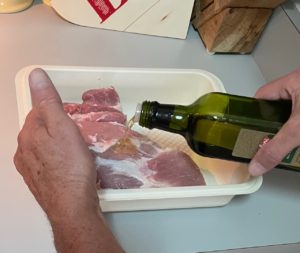
#2 Grilled Pork Roast with Texas BBQ Rub
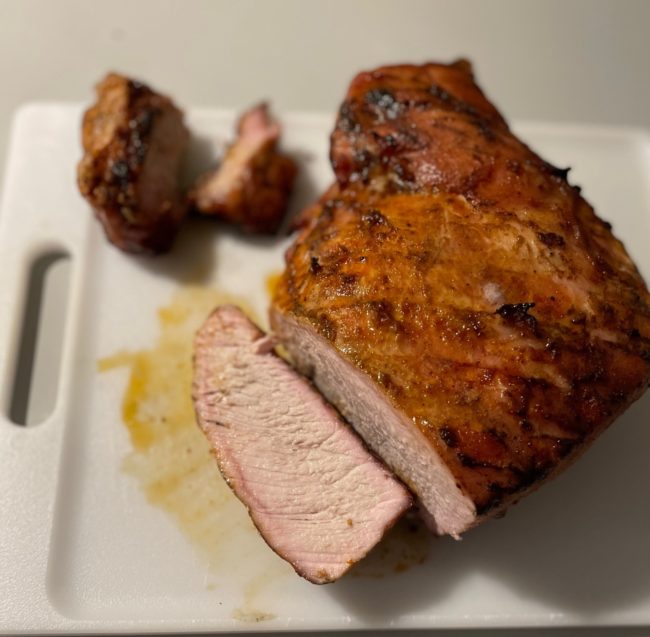
Grilled Pork Roast with Texas BBQ Rub
The Texas BBQ Rub and olive oil combine to make this a deliciously tender main course! If you haven’t tried it, I highly recommend it! I prepared it on our Big Green Egg. This pork roast can also be prepared in the oven. It is so delicious!
Pork Roast with Texas BBQ Rub
Equipment
- 1 measuring spoons
- 1 glass or plastic pan to marinate
- charcoal or gas grill
- cutting board
Ingredients
- 2 tbsp Texas BBQ seasoning by Mad Dash Mixes
- 2 tbsp olive oil extra virgin
- 2 1/2 lb pork roast
Instructions
- pour olive oil on one side of pork roast , covering the top and the sides
- sprinkle at least 1 tablespoon Texas BBQ seasoning over the top of the meat, rub in
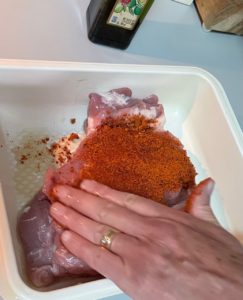
- flip meat over and repeat the olive oil and Texas BBQ seasoning steps. Be sure to coat the sides of the meat also.
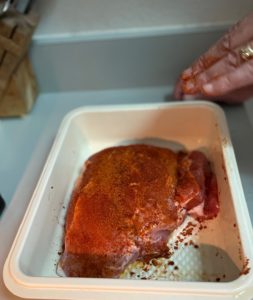
- allow the meat to marinate at room temperature for at least 30 minutes or in the refrigerator for several hours.
- place meat on grill, right over the flame and sear each side for 2 minutes. Then move meat farther away from the flames and continue to cook for approximately 1 hour.

- Meat is cooked when the internal temperature reaches at least 170. Use a meat thermometer to check the temperature
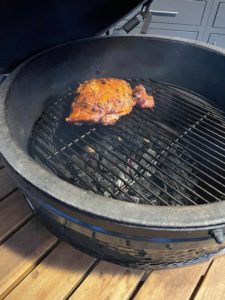
- remove from heat and place on cutting board. Allow to cool slightly before slicing

Notes
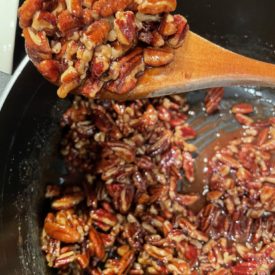
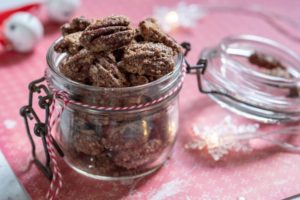
#3 Pumpkin Spice Sugared Pecans
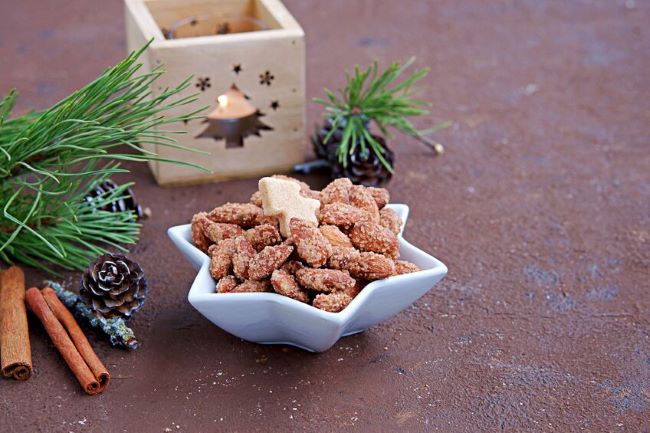
I developed this recipe many years ago when I was writing my first cook booklet, Just Desserts Herbal of Course. The recipe only takes 4 ingredients and can be prepared in less than an hour. And it is gluten free!
Kim's Krunchies
Equipment
- baking sheet or cookie sheet
- large saucepan
- measuring cups
- measuring spoons
- wooden spoon
- parchment paper or pan spray (cooking spray)
Ingredients
- 1 cup brown sugar firmly packed in measuring cup
- 1/3 cup boiling water
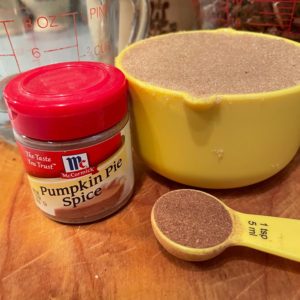
- 1 teaspoon pumpkin pie spice
- 2 cups pecan halves or pieces other nuts such as walnuts or almonds can be used
Instructions
- line the baking sheet with parchment paper. The parchment paper will make clean up a breeze! If you don't have parchment paper, spray the pan with cooking spray or pan spray.
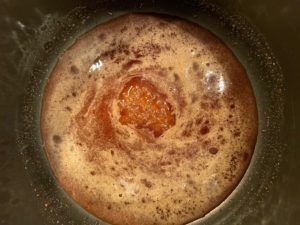
- In a large saucepan, bring the water to boil
- Add the brown sugar and the pumpkin pie spice
- Bring the mixture to a full boil over medium heat. Stir occasionally
- Once the boiling stage is reached, allow syrup to boil for 5 minutes without stirring
- remove from heat, add pecans
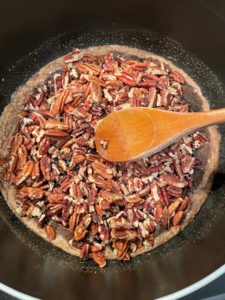
- Stir the mixture until it begins to sugar.
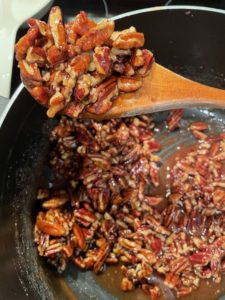
- Once the pecans are coated, pour onto the prepared baking sheet

- spread nuts so that they don't clump together.
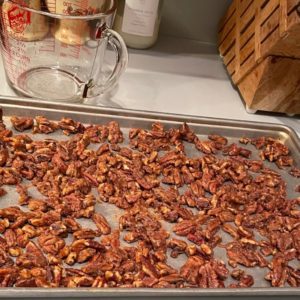
- Toast in a 350-degree oven for 15 to 20 minutes
- cool completely before storing in an airtight container
Notes
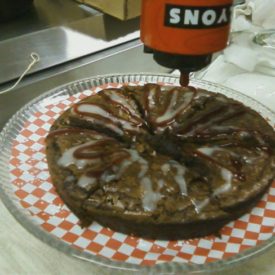
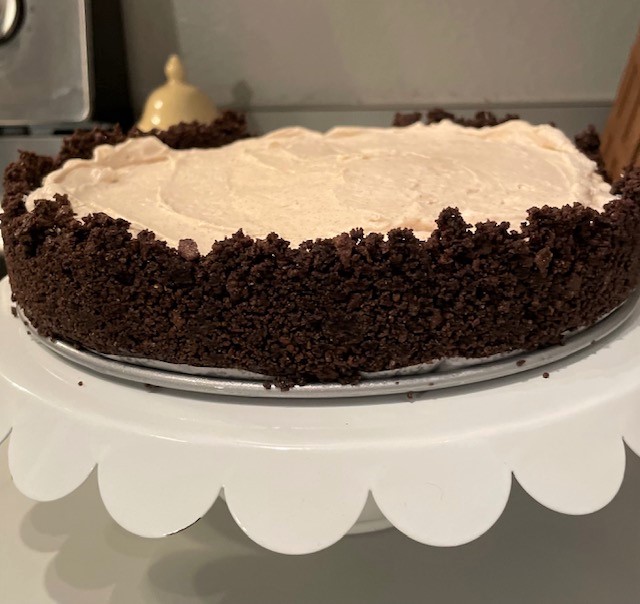
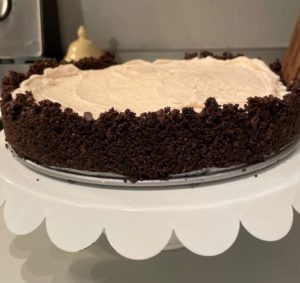
#4 How to Take Your Cheesecake from Blah to Wow!
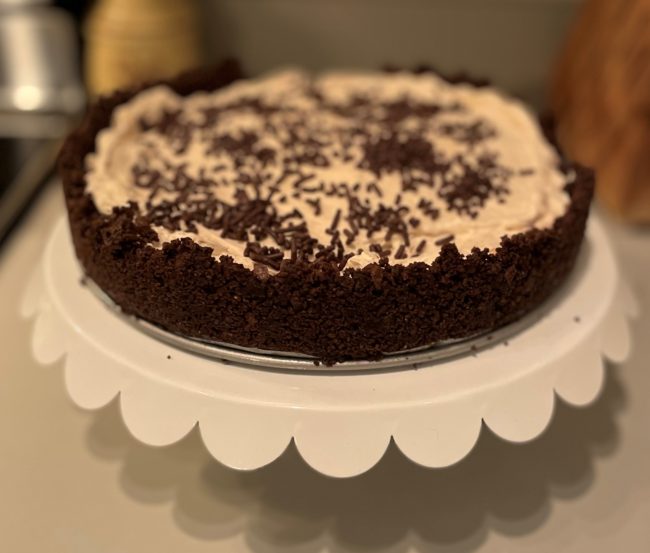
How to Take Your Cheesecake from Blah to Wow!
Using a springform pan to make your cheesecakes is one of the simple ways to elevate your cheesecake presentation! Click on the link under the photo to see all my tips!
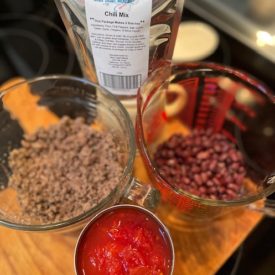
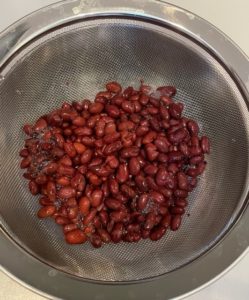
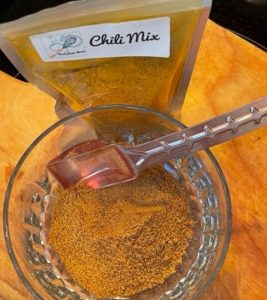
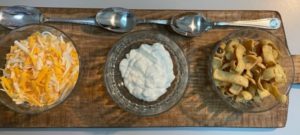
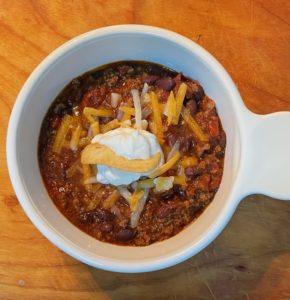
#5. Kim’s Black Bean Crock Pot Chili
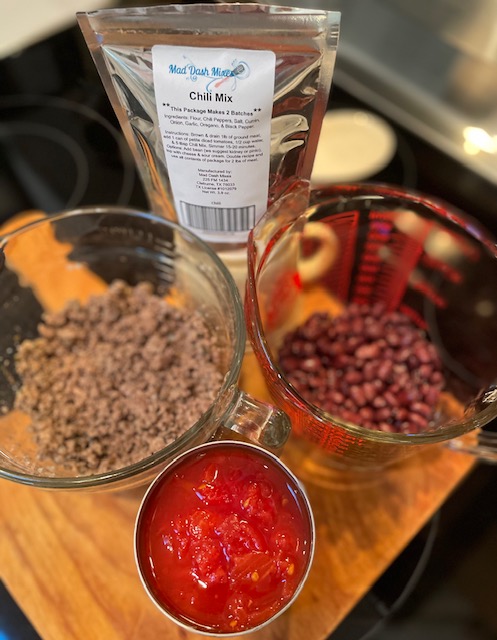
If you love a great chili recipe, you are definitely going to want to gather the ingredients pictured above and whip up a pot of my Black Bean chili! It is so easy to prepare, especially if you keep some browned ground beef ready to use in your freezer!
Kim's Black Bean Slow Cooker Chili
Equipment
- slower cooker or Crock pot
- measuring cups
- wooden spoon
Ingredients
- 5 tablespoons Chili Mix (1/2 packet) by Mad Dash Mixes
- 1/2 cup water
- 1 pound ground beef prepared in advance
- 1 can diced tomatoes
- 1 can Black Beans, drained & rinsed can use Kidney Beans or Pinto Beans if you prefer
- 1 can pan spray to help keep the chili from sticking to the sides of the slow cooker. Use only what is needed to lightly coat the inside of the slow cooker
Instructions
- Spray the inside of the slow cooker with pan spray. Add one can of diced tomatoes to the slow cooker.

- Add 1 pound of browned ground beef to the diced tomatoes. Stir the ingredients together. If using already browned ground beef that has been frozen, thaw it out ahead of time.
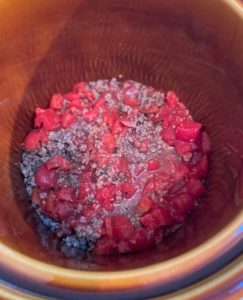
- Add 1/2 cup water and stir
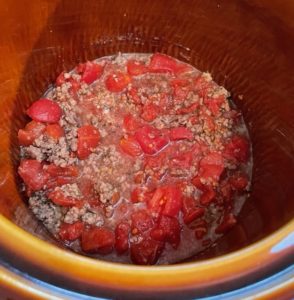
- Drain & Rinse 1 can of Black Beans and add to the slow cooker
- Add 5 Tablespoons of the Chili Mix to the ingredients in the slow cooker
- Mix all ingredients together in the slow cooker, plug in and turn to low.
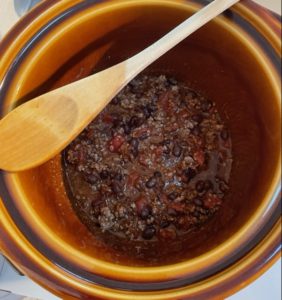
- cook on low for 4 to 5 hours.
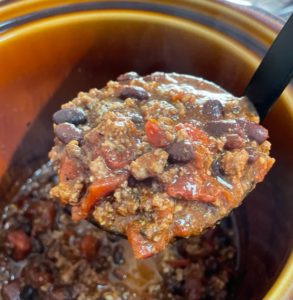
- Prepare bowls of assorted toppings for the Chili . Toppings can include shredded cheese, sour cream and corn chips. If your family likes black olives, they could be used also
- serve in bowls and let everyone add toppings to their own bowl
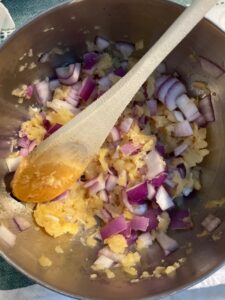
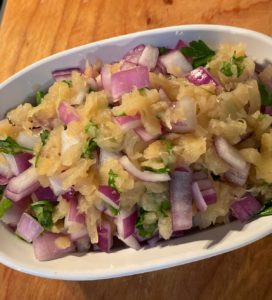
#6 How to Make Pineapple Salsa

This has to be the prettiest recipe I have ever made! This pineapple salsa is as tasty as it is delicious! If you haven’t tried it yet, I highly recommend that you make it soon! You will love it!

Pineapple Salsa
Equipment
- 1 mixing bowl
- measuring cups
- wooden spoon
- measuring spoons
- serving bowl
- knife
- chopping board
Ingredients
- 1 cup crushed pineapple drained well
- 1/2 red onion chopped
- 2 ounces fresh cilantro and parsley chopped
- 1 Tablespoon lime juice
- 2 teaspoons honey
- 1 jalapeno pepper (optional) diced
- salt (optional)
Instructions
- drained crushed pineapple
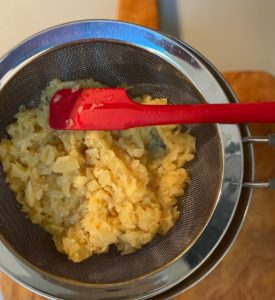
- after draining the crushed pineapple, measure out 1 cup.
- cut the onion in half, chop one of the halves and refrigerate the other half to use at a later time.

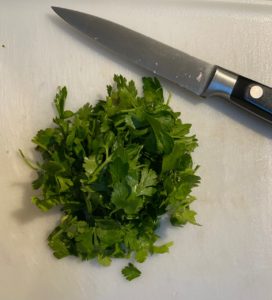
- chop the fresh cilantro and the parsley
- dice the jalapeno pepper into small pieces if you are planning on using it.
- Combine all the ingredients in a bowl
- add the lime juice and the honey and mix well, refrigerate for at least 30 minutes
- place the salsa in a serving bowl
Notes
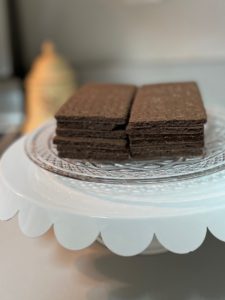
#7 Chocolate Graham Cracker Crust
Important tip:
- When using a springform pan, carry it by holding the sides. Once the pan is filled with either a crust, cake batter or cheesecake… DO NOT PRESS THE BOTTOM OF THE PAN! Pressing the bottom can cause the pan to come apart and potentially make a mess! Ask me how I know…..
Chocolate Graham Cracker Crust in a 9" Springform Pan
Equipment
- 9 ' Springform Pan
- Rolling Pin
- plastic bag with a zipper closure
- parchment paper
Ingredients
- 2 1/2 cups crushed chocolate graham crackers approximately 14 graham crackers
- 8 T melted butter
- butter or shortening to grease the sides of the pan
Instructions
- Approximately 14 graham crackers will be needed to make 2 1/2 cups of crushed graham crackers
Preparing the Springform Pan
- Line the bottom of the springform pan with parchment paper

- use butter or shortening to grease the sides of the pan. In place of the butter or shortening, it may be possible to spray the pan with pan spray. Check the directions with the pan. You could also line the insides of the pan with parchment paper.
- Well greased sides are essential in getting the finished cheesecake out of the pan without the crust crumbling.
Preparing the Crust
- place the graham crackers in the plastic bag and zip shut
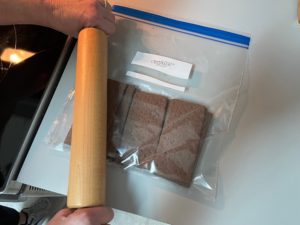
- using a rolling pin, crush the graham crackers
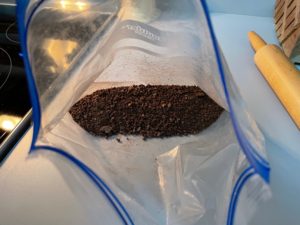
- Place the graham cracker crumbs in a bowl and add the melted butter. Blend with a fork until all crumbs are covered
- Place the crumbs in the prepared pan . Using a spatula , press the crumbs firmly in the bottom and about 1/2 way up the sides of the pan.
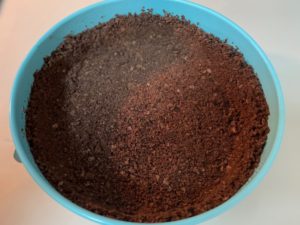
- place the pan the freezer for an hour
- after an hour, you will be ready to fill with the filling of your choice
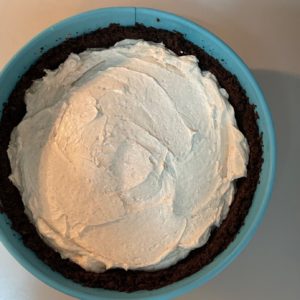
- once you have filled the crust and allowed it to chill, unlatch the latch and gently remove the outer rim from the pan
- Add decorative sprinkles if desired to the top of the cheesecake, slice and serve

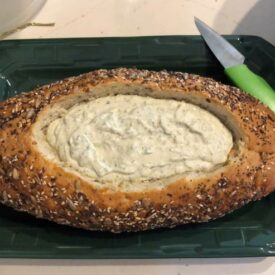
#8 “Dill”icious Spinach Dip in a Bread Bowl
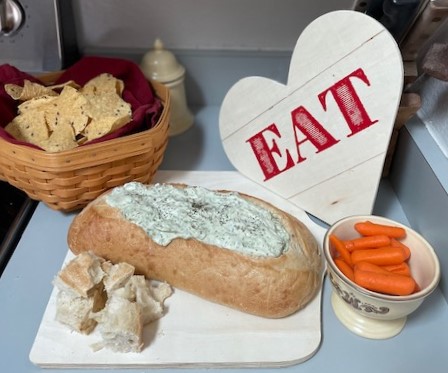
“Dill”icious Spinach Dip Served in a Bread Bowl
Not only did my readers love this recipe, it is one of my favorites as well! This Mad Dash Mixes mix packet is a great one to keep in your pantry for a quick dip to serve your guests!
"Dill"icious Spinach Dip Served in a Bread Bowl
Equipment
- mixing bowl
- measuring cups
- spatula
- serving pieces (tray, baskets, dishes)
Ingredients
- 8 oz Sour Cream
- 8 oz Mayonnaise
- 1 packet "Dill"icious Spinach Mix seasoning packet from Mad Dash Mixes
- 1 loaf Italian bread round or oval
Instructions
- Combine seasoning packet with the sour cream & mayonnaise.
- Chill for at least 4 hours to allow the flavors to blend
- Stir the dip mix again before adding to the bread bowl or other serving container
- Serve chilled with assorted cut vegetables, crackers, bread cubes or tortilla chips.
Notes
#9 How to Cook Pizza On the Big Green Egg
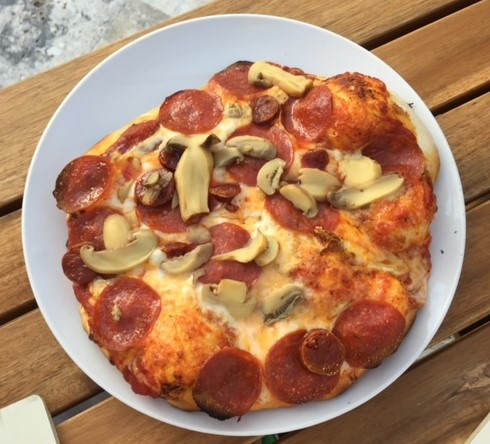
How to Cook Pizza On the Big Green Egg
Since I no longer have a commercial mixer, I like to make my pizza dough in a bread machine. Click on the link below the photo to see how I created the pizza!
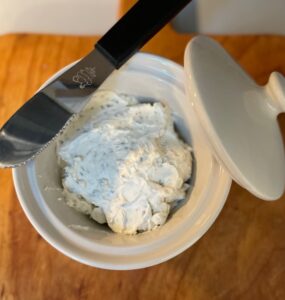
#10 How to Prepare a Quick & Easy Herbed Cheese Spread

This is another recipe that I developed in the early days of my entrepreneurial career. It is a great recipe to mix up and keep in your refrigerator. Serve it on crackers, baguettes, or cocktail bread. I like to use it on bagels for a quick lunch.
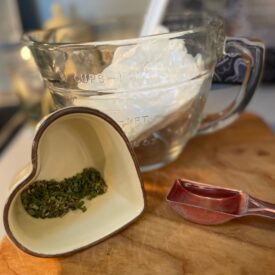
Herbed Cheese Spread
Equipment
- 1 mixing bowl
- 1 spatula
- 1 cheese spreader
- 1 serving container
Ingredients
- 1 tablespoon chopped fresh thyme if using dried thyme, use 1 teaspoon
- 2 teaspoon chopped fresh chives if using dried chives, use 2/3 teaspoon
- 1 to 2 tablespoon herbed vinegar can use white rice vinegar instead
- 8 ounces cream cheese, softened low fat cream cheese can be used
Instructions
- Mix together all ingredients. Blend well
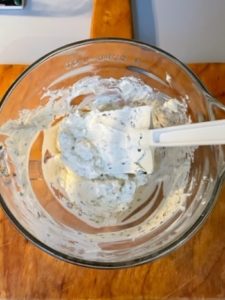
- cover and refrigerate for 1 to 2 hours to allow the herb flavors to blend.
- Serve with assorted crackers or sliced baguette or bread.
- Refrigerate leftover cheese spread. Spread should last up to two weeks in the refrigerator.
Notes
Looking Forward to 2023

[…] Yesterday, we looked back at the favorite recipes and food related blog posts for the year. If you missed it, you can find it here: Favorite Recipes […]