Autumn Thyme Silk Hand Tied Bouquet
If you have been following me, you may know that I downsized from an over 3,000 square foot farmhouse with a number of storage buildings to a 1700 square foot home in Florida. Moving to a smaller home meant finding places to store all of my “things”.
We added an outdoor addition to our Florida home which has helped with my storage challenges. This addition also has given me a place to create new projects. I also use the space to pot & repot various blooming and green plants and design seasonal dish gardens and patio pots.
Because of my storage issues, I am more focused on reusing my containers and my silk flowers for more than one season. Some times I will use spray paint to change the look of the flowers and containers. For example, I discovered most of my pine pics I needed for a project were still in Illinois so I got creative and used spray paint and my imagination to make pine pics for my project!
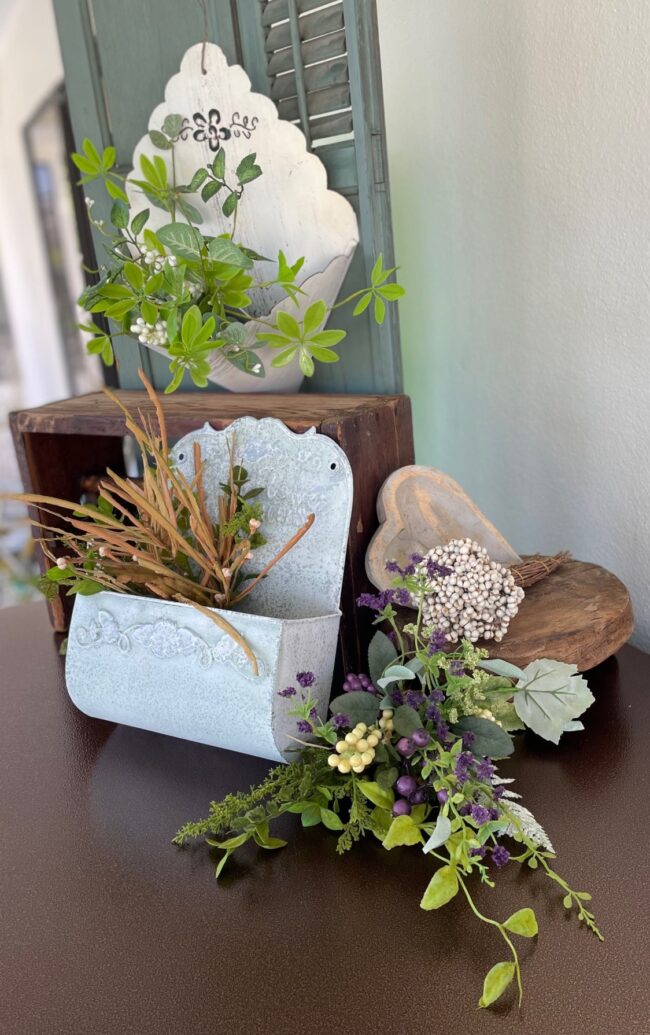
My Autumn Thyme Hand Tied Bouquet project is related to my pine pic project. I had two metal (tin) wall pockets I wanted to decorate for fall and I wanted to use what I had on hand. Spray paint wasn’t needed for this project but you certainly can spray your silk flowers or your containers to change their color if you desire!
On this blog, I may sometimes use affiliate links, which means I earn a small commission if you purchase via the link. The price will be the same whether you use the affiliate link or go directly to the vendor’s website using a non-affiliate link. By using my affiliate links to shop, it helps me to be able to continue bringing you fresh new ideas and projects! Thank you!
Before we get started:
No matter how you arrived here today, whether you are one of my regular readers or perhaps you found me on Google or via Hometalk, I am so glad you are here! My name is Kimberly and I have a passion for flowers (a former florist) and flour (a former pizzeria owner) and many things in between! Especially herbs, rusty stuff, gardening & pizza!
If you are interested in learning more about me and my entrepreneurial journey, please check out this post:
Before we get started with the fun part (the designing), let’s answer a few questions!
WHAT IS A HAND TIED BOUQUET?
A hand tied bouquet is a bouquet that is designed by arranging the flowers (either fresh or silk) in your hand rather than in a vase or other container. It can be a bit tricky to master, especially if you have small hands! Once you get all the flowers arranged, you then tie the stems together. Bridal bouquets are often hand tied.
Hand tied bouquets are sometimes called Tussie Mussies or nose gays. Tussie Mussies date back to the 1400s. They were small bundles of herbs and flowers, each with a symbolic meaning. The language of flowers is very interesting topic. I used herbal symbolism in my wedding. Perhaps I will dig deeper into the language of flowers in a future post! I seem to be getting off track!
Hand tied bouquets made of silk flowers are extremely versatile. They can be used practically anywhere you need a pop of color or to add interest.
WHY ARE THEY CALLED SILK FLOWERS?
In the late 1800s, artificial flowers were actually made out of silk. Since that time, advancements have been made in technology and now they are made out of a variety of materials. The term “silk flowers” is widely used when referring to artificial flowers . I personally think it sounds better to call them silk flowers rather than artificial. I do sometime refer to them as faux flowers also.
Regardless of what they are called, the advancements in technology have also allowed the silk flowers to look more life like or botanically correct. Silk flowers are available in all price ranges. Silk flowers are very long lasting. They are low maintenance but not necessarily no-maintenance! They can attract dust and become faded if left in a bright location. Lightly dust the silk flowers with a feather duster to help remove dust particles.
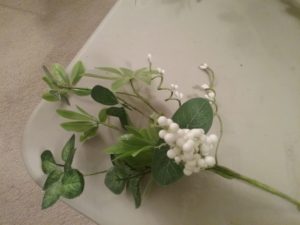
TALLOW BERRIES & TWINE

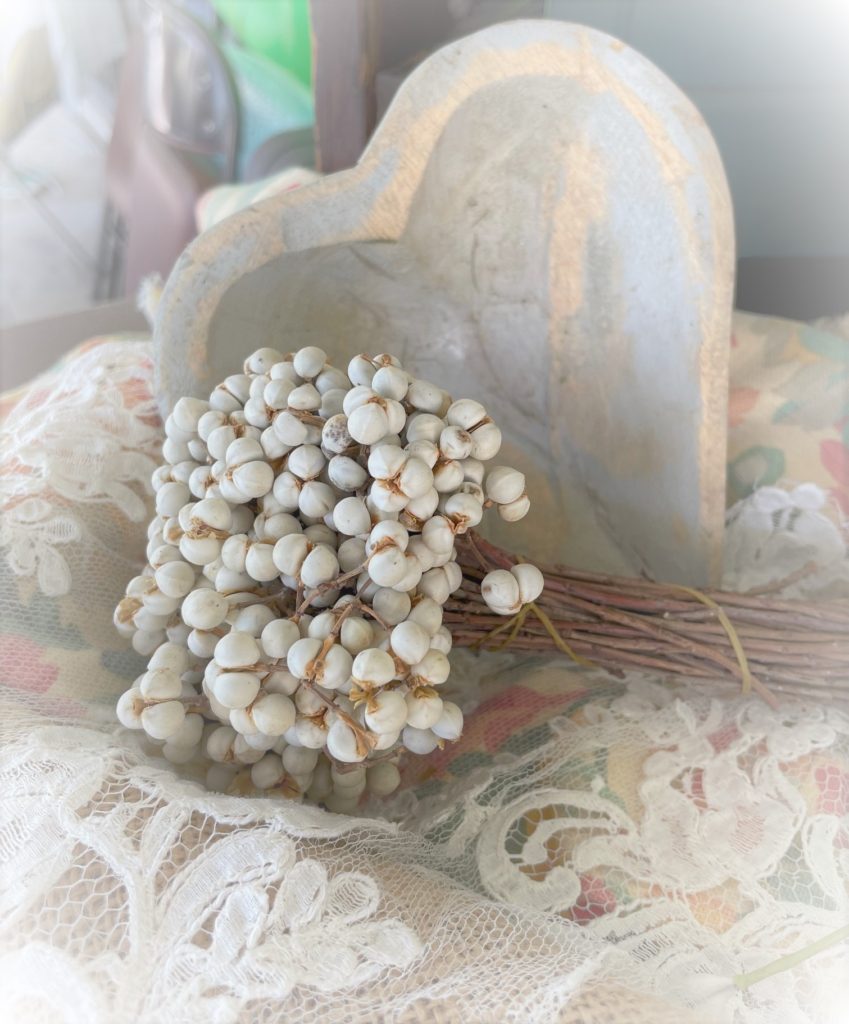
Often when I am designing or thinking about a potential project, I gather my objects together and try to come up with a theme . I originally had three bundles of the tallow berry bush pictured above and used one in my pine pic project. I wanted to use another of the bushes for this project. I left it brown .
Once I get the beginning of an idea, I like to give it a name. I am all about alliteration! One of my projects is call Red, Rustic & Reclaimed.
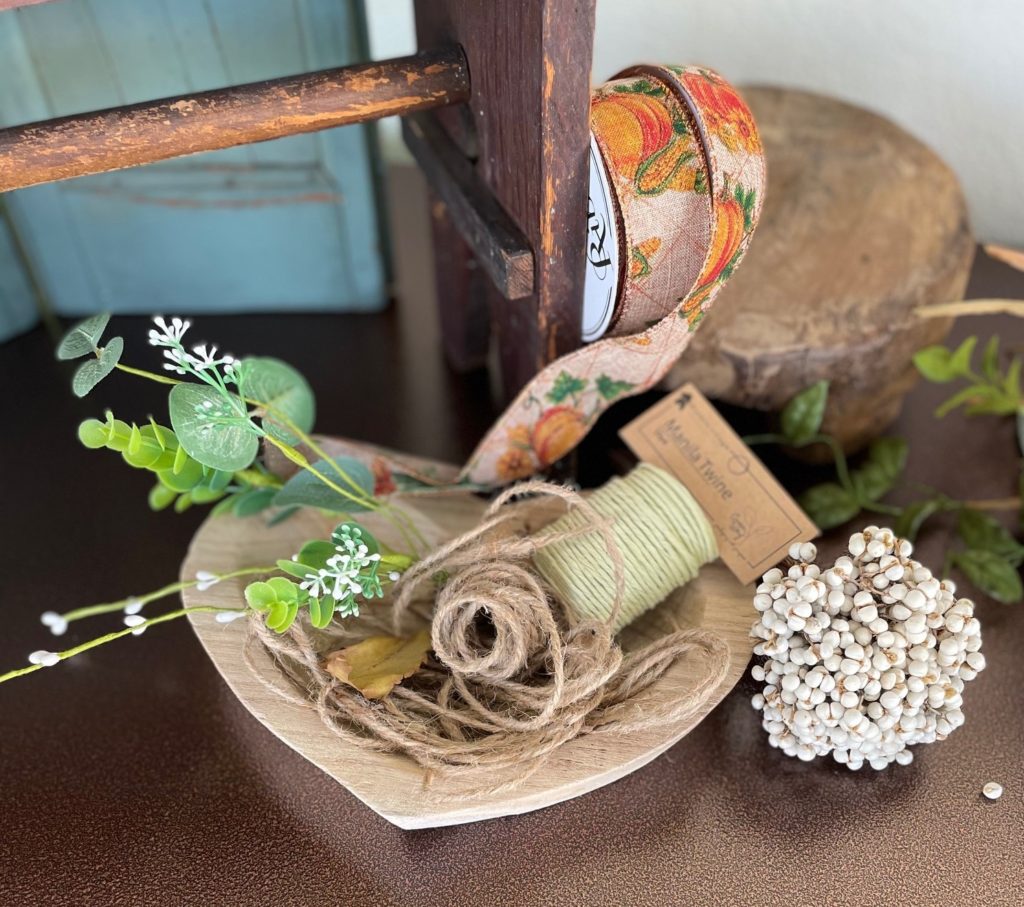
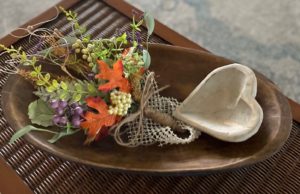
I named this project Tallow Berries & Twine! The twine in the heart bowl pictured above was twine I saved from an order of pictures that I received! My husband says I am a hoarder…. I will let you come to your own conclusion on that!
SUPPLIES
I knew I wanted to use the fall tallow berry bush, the two bundles of greenery and purple berries in the picture with the tin wall pockets and some fall leaves. I wanted to make three bundles: 2 for the wall pockets and one for my oval dough bowl. Dough bowls are one of my favorite things to decorate! I keep an oval one on my coffee table and decorate it for the various seasons! Here is a link to what it looked like one Fall!
Fall Leaves
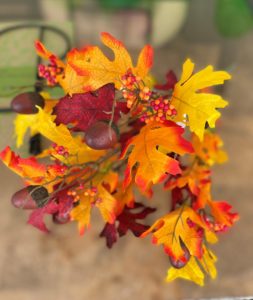
I cut the bush of fall leaves apart so that I could add a few leaves to each of the bundles.
THE PROCESS
Since I am right handed, I hold the stems in my left hand. With my right hand, I add the the different silk flowers at a slight angle. Because of where I was going to use these bouquets, I made them one sided. If I was going to use them in a vase on a table where they could be seen from all angles, I would make the bouquet in a round shape. An example of how to make a round hand tied bouquet can be found here:
I like to work with bushes of silk flowers that I can cut apart using bolt cutters or needle nose pliers. Some of the bushes are made with individually wired stems which makes it a lot easier to bend and shape the stems how ever you want them.
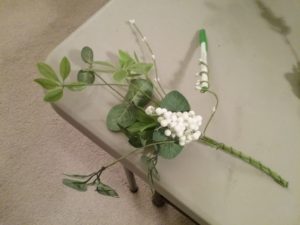
I often add swirls or pig tails to the ends of the stems to add interest. I use a pen and twist the stem around the pen and then gently pull it out, leaving a spiral shape.
Once you have all your stems in place, it is time to tie the bouquet together. I simply used brown floral tape to secure the stems. The floral tape will stick to itself as you stretch it around the stems. A gentle pull is all it takes. If you pull too hard, the tape will rip.
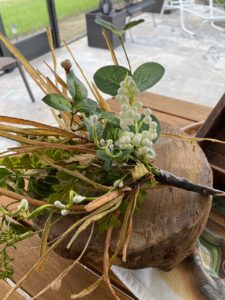
Above is a picture of the stems wrapped with the brown tape. After the brown tape is in place, to finish the stem treatment, I added twine.
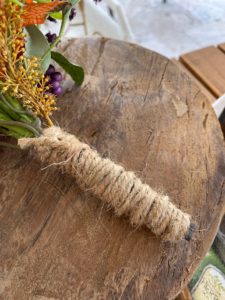
To do this, I started at the top of the handle (the stems) and tied a piece of twine. Then I wrapped the twine around the handle twice and tied a knot at the top.
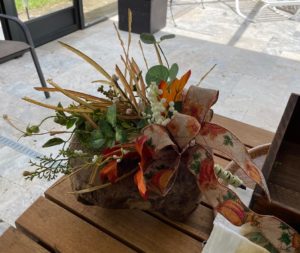
To add more interest to the bouquets, I added a bow. I made a simple twine bow for the small bouquet that was going in the dough bowl.
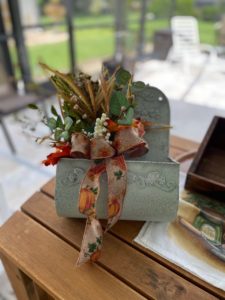
For the medium sized one that was going to be placed in the smaller wall pocket, I made a 3 loop bow from the fall themed burlap ribbon.
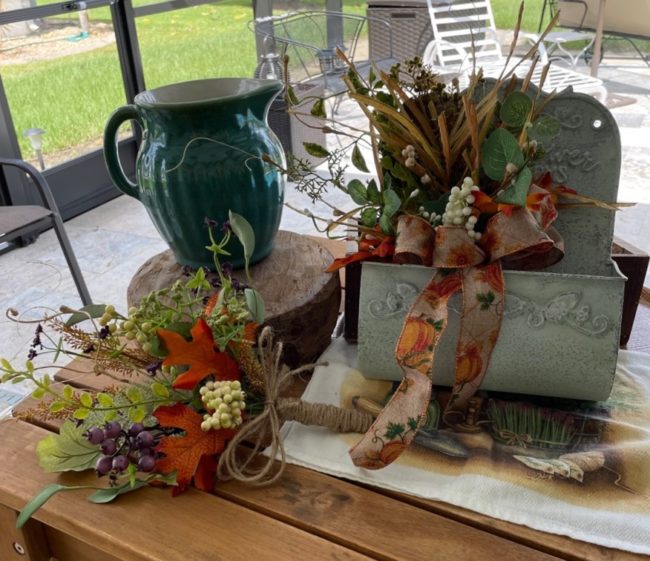
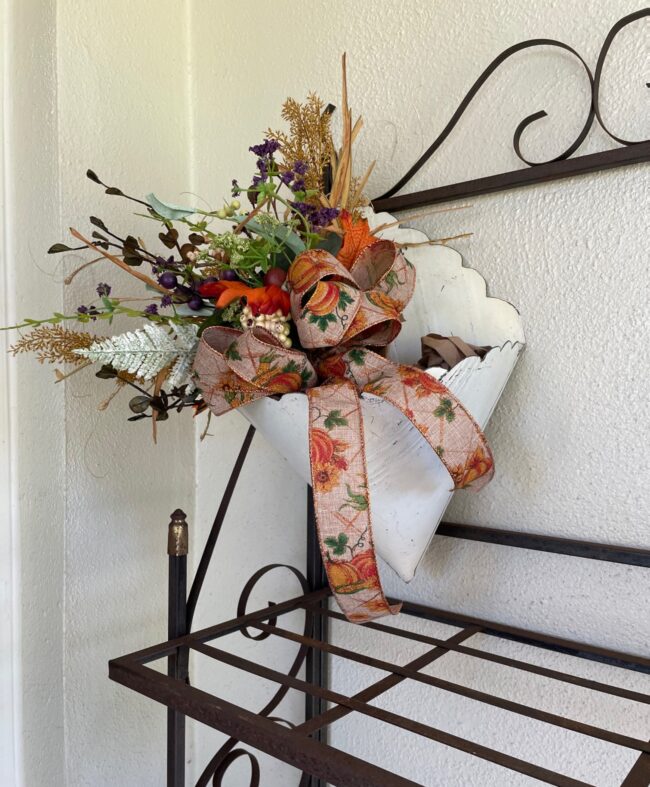
and for the largest of the bouquets, I made a four loop ribbon out of the same ribbon.
There are many ways to design your bouquet. As long as you are happy with it, that is all that matters!
The Finished Bouquets:
I hope you enjoyed your thyme here today!
Save This Pin For Later!
Disclosure: Some of the links in this post are affiliate links, meaning, at no additional cost to you, I will earn a small commission if you click through and make a purchase. The opinions here are all my own. It helps me to continue to bring to you DIY and projects on my blog.
Please see my disclosure page for more information.
What a beautiful arrangement. Thank you for the tutorial. So happy to be on tour with you!
Thank you , Laura! I love how you styled your front porch! Happy Hopping!
Love the bouquet in the dough bowl! So pretty. Happy hopping!
Thank you, Marie! Always enjoy hopping with you!
This looks so pretty, Kimberly! You have me in the mood to work with florals this fall!
Thank you, Robyn! I really love all the fall colors! Can’t wait to see what you come up with!
The fight bowl bouquet is my favorite! I am a bowl junkie! I use them all over and this is a fantastic idea! Beautiful!
Thank you so much Melba! I am still sad that I sold so many of my bowls when we were moving! What was I thinking?
Wow these are so gorgeous! Great tutorial!
Thank you, Christin! I had fun making them!
Love the hand-tied bouquet, Kimberly. I’m thinking small ones would be so pretty used on a tablescape at each setting. Thank you for this beautiful fall idea!
that is a great idea, Misty! That would be so cute! Thanks for sharing that idea!
Love that these are also called a Tussie Mussie!! Thanks for the history on this! Pinned!
Thank you, Cindy! Glad you enjoyed it! Thanks for reading and pinning!
This is so pretty! You have inspired me to give one a try! So happy to hop along with you!!!
Thank you, Crystal! This was a fun project!
Great tutorial! I love pretty projects like this that are so versatile in fall decorating. Great to be part of this blog hop with you! ~Missy
Thank you, Missy! This hop was really fun, wasn’t it?
This is so lovely. Hugs to you.
Thank you, Renae! Enjoyed hopping with you!
Kimberly, thank you for the wonderful tutorial for the fall ‘nosegay’! It is so pretty.
Thank you, Linda! It was fun making them!