Have you ever wanted to showcase a special garment from a loved one’s childhood? Let me show you an idea on how to display a vintage garment!
Earlier in my blogging career I was part of a monthly challenge group. One February, we were tasked with showcasing something near and dear to our hearts and writing up a tutorial on how to make it or put it together. It didn’t take me long to decide what my project was going to be. I actually “borrowed” the idea from an older blog post on Miss Mustard Seed’s blog. Let me share my idea on how to display a vintage garment.
My mother was very sentimental and saved practically everything! When I was going through the family pictures, I found this picture of her as a child. I think she must be about 3 years old.
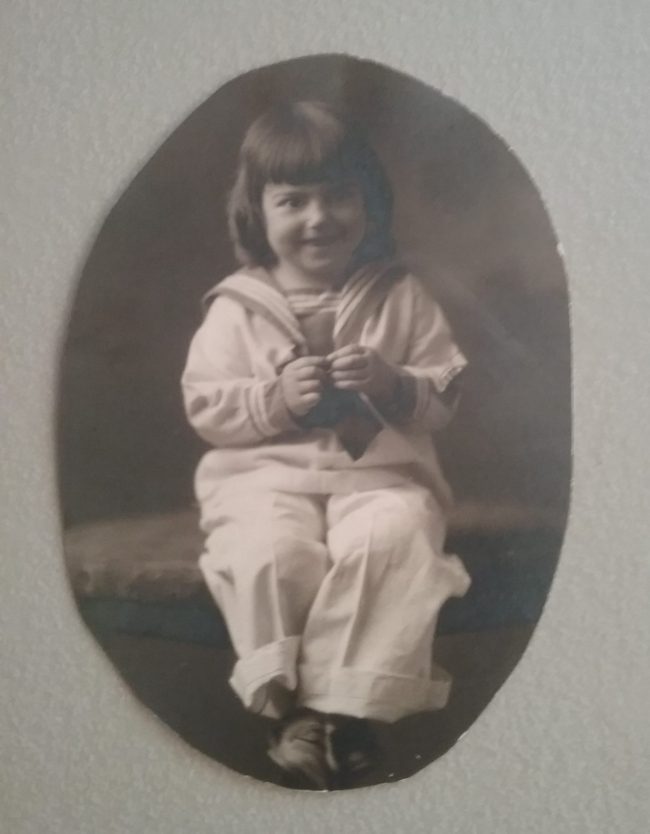
Doesn’t she look sweet in her sailor suit? The picture was probably taken in the early 1930s.
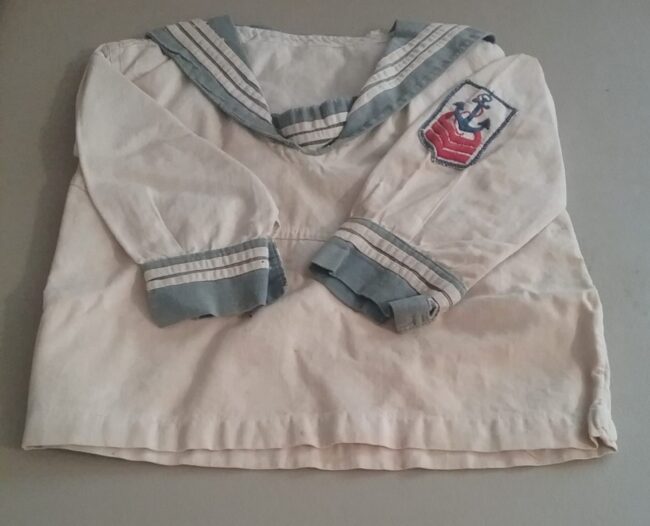
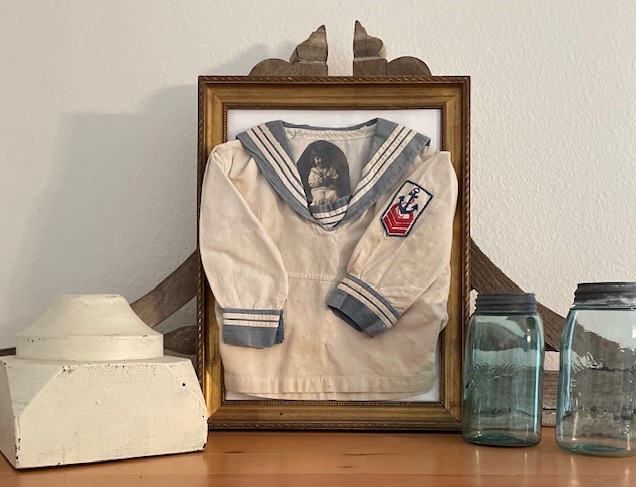
A few days after I found the picture, I was going through a box of vintage baby clothes, and I found the top to the sailor suit! I don’t think the pants survived as they weren’t with the rest of the vintage items.
On this blog, I may sometimes use affiliate links, which means I earn a small commission if you purchase via the link. The price will be the same whether you use the affiliate link or go directly to the vendor’s website using a non-affiliate link. By using my affiliate links to shop, it helps me to be able to continue bringing you fresh new ideas and projects! Thank you!
The shirt is made out of heavy cotton. I washed it on the gentle cycle and used non-chlorine bleach. I did dry it in the dryer on low. I am amazed how vibrant the Anchor insignia still is. Using a warm iron, I pressed the garment to remove most of the wrinkles before continuing on with my project.
How To Display A Vintage Garment
The Supplies

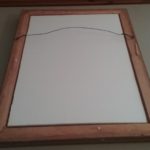
After gathering a frame, a piece of foam board, an old pillowcase, my trusty Velcro strips, scissors, a box cutter and some tape, I was ready to go to work. Using a ruler, I measured the inside of the frame and cut a piece of foam board to fit the area. After placing the foam board inside the frame, I removed it. Before wrapping the pillowcase tightly around the foam board, I cut off the crocheted trim. Once I had the pillowcase wrapped around the foam board, I taped the foam board in place and then finished the back with a piece of brown paper.
Placing the shirt on the frame, I used strips of Velcro to attach the shirt to the frame. A word of advice: make sure that you have the right pieces of Velcro. One is ribbed and the other is more like cotton or smooth fabric. I found myself trying to get to pieces of ribbed or two pieces of smooth to affix to each other! Silly me! To help hold the sleeves in place, I did use straight pins.
The Framed Sailor Shirt
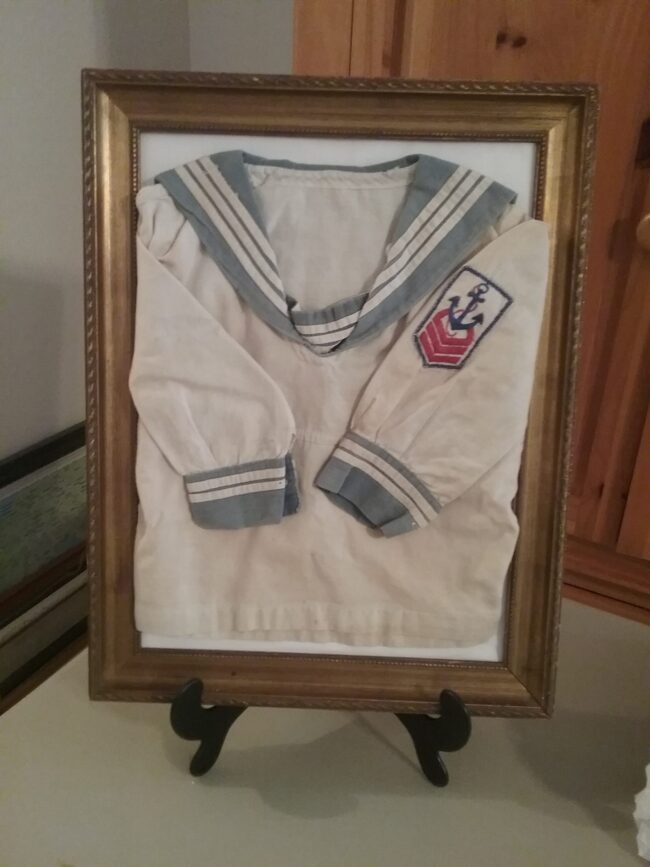
To further protect the sailor shirt, I should have a piece of glass to cover it. This will work for a temporary display, and I will get an actual frame with a piece of glass and re mount the shirt.
What Did I do With The Piece of Crocheted Trim?
Thanks for asking! Of course, I saved the piece of crocheted trim! It was just what I needed to finish off this display a few months later! I simply rolled it up and turned it into a flower! Sometimes it pays off to be a hoarder…. I mean collector!

Coastal Farmhouse Summerthyme Entryway
Vintage Child’s Sailor Suit
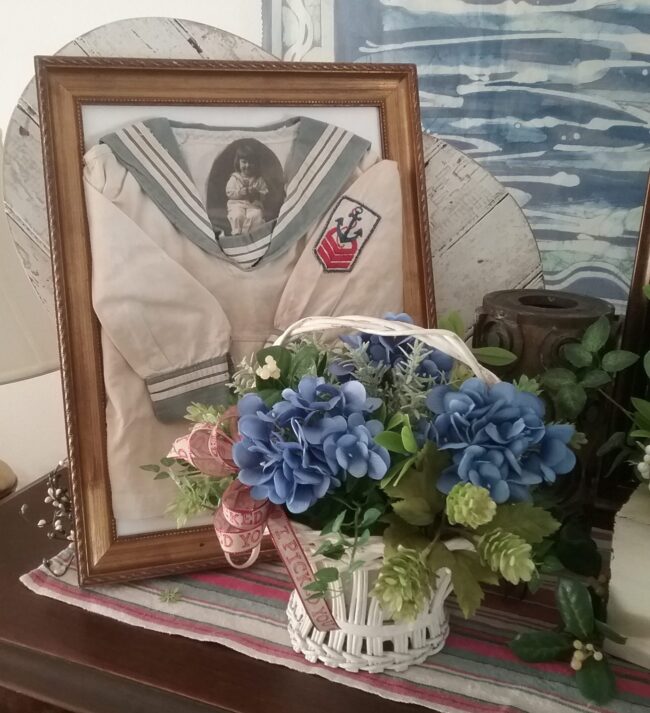
I am pleased with how my project turned out. I have a piece of my Mom’s childhood with me. It even has a nautical motif to go with my Florida home!
The vintage basket filled with blue hydrangeas really helps pull out the blue color in the sailor shirt.
Save This Pin For Later!
One Last Look
Disclosure: Some of the links in this post are affiliate links, meaning, at no additional cost to you, I will earn a small commission if you click through and make a purchase. The opinions here are all my own. It helps me to continue to bring to you DIY and projects on my blog.
Please see my disclosure page for more information.
[…] Easy Way to Display a Vintage Child’s Garment […]