Do you enjoy giving handmade items as Christmas gifts ? I have an easy felt Christmas ornament DIY to share!
As An Amazon Affiliate, I Earn from Qualifying Purchases
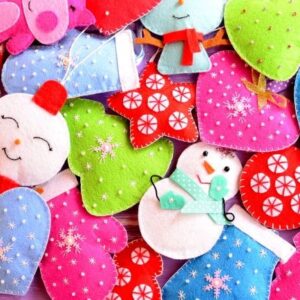
Are you looking for an easy way to make some holiday ornaments for gift giving? These handmade felt Christmas ornaments are easy to make and fun to decorate! You will want to make a few extra so you can keep some for yourself!
Be sure to scroll all the way to the end of the post! I am part of a blog hop today and 4 of my friends are sharing their ideas for unique Christmas ornaments!
Simply follow the steps below to see how to make these cute felt Christmas ornaments!
Before we really get started
No matter how you arrived here today, whether you are one of my regular readers or you “hopped” over from one of my blogger friends participating in today’s hop, I am so glad you are here! My name is Kimberly and I have a passion for flowers (a former florist) and flour (a former pizzeria owner) and many things in between! Especially rusty and chippy items! I love to share all the things I have learned over the years. Sometimes I tell stories about my life. Other times, I will share a craft, a decorating tip or a recipe. I hope you enjoy your thyme here today and learn at least one thing during your visit!
Let’s Get Started!
Felt Christmas Ornament DIY Using Embroidery Thread, Fabric & More
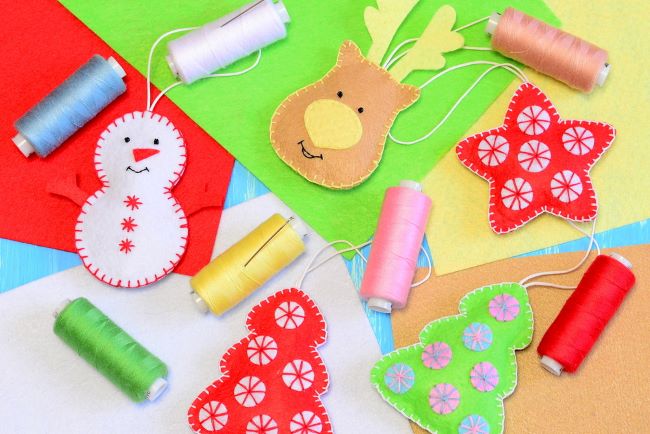
These embroidered Christmas ornaments are an easy, fun craft.
I made these Christmas ornaments using felt. They are so simple to make! If you don’t have felt, they could be made with any fabric. Using Denim or calico fabric would be so cute!
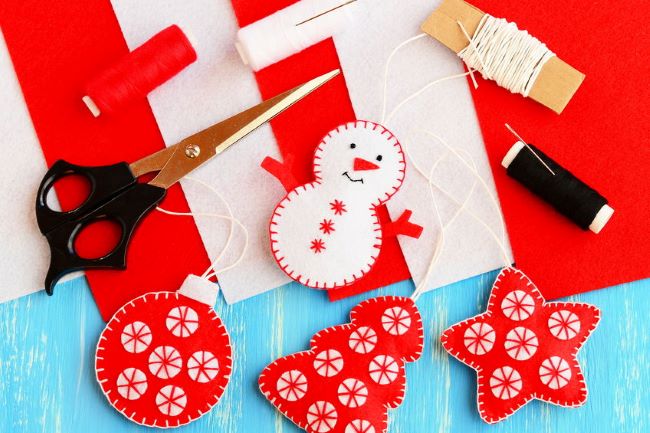
Materials Needed:
1/8″ thick felt of various colors.
Scissors, embroidery floss and a needle
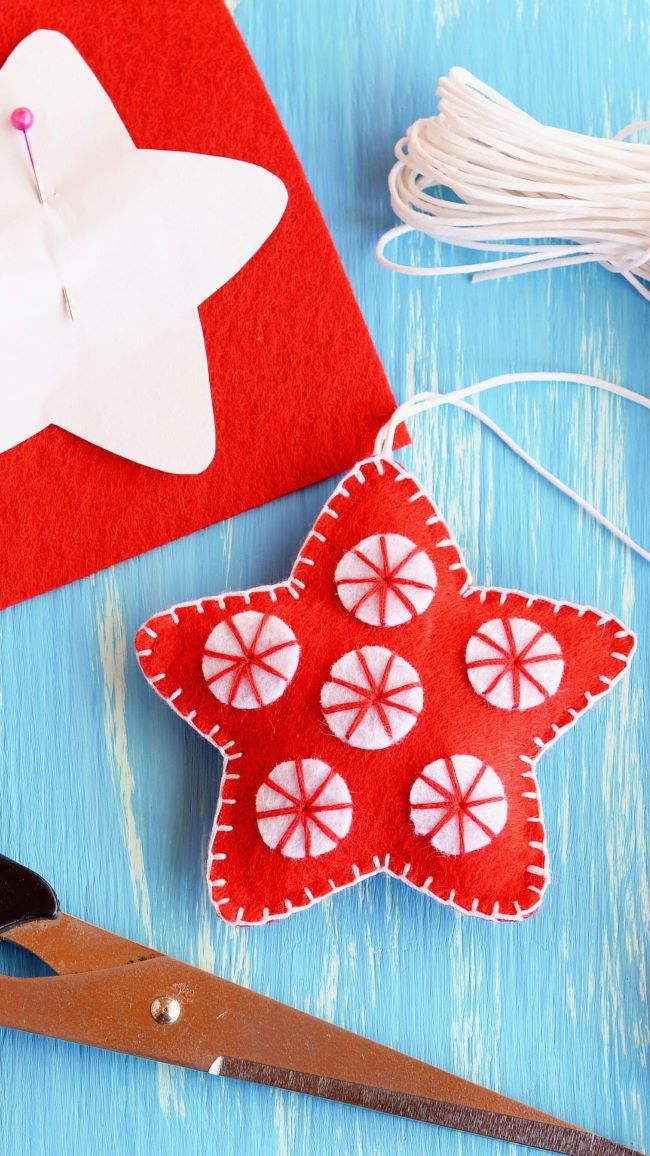
a pattern (I had some older felt ornaments that I used for a pattern. You could use a cookie cutter to trace a pattern)
stuffing or batting
Links to a few of the materials can be found at the bottom of the post!
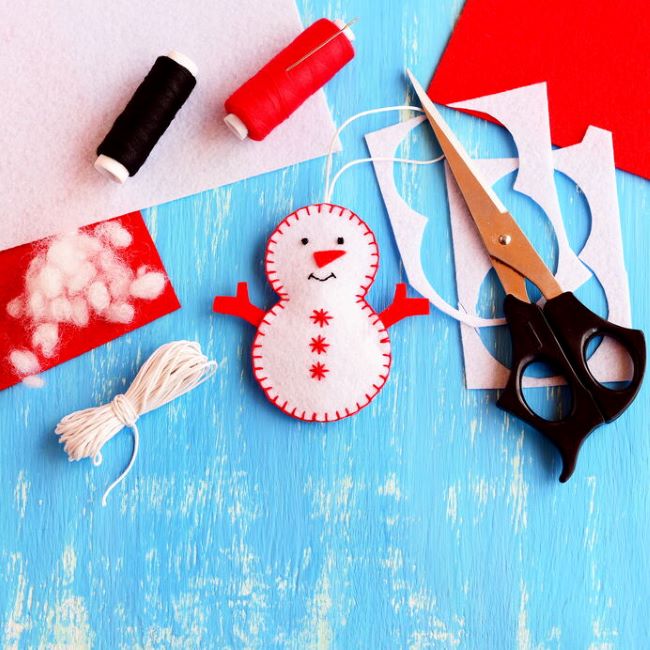
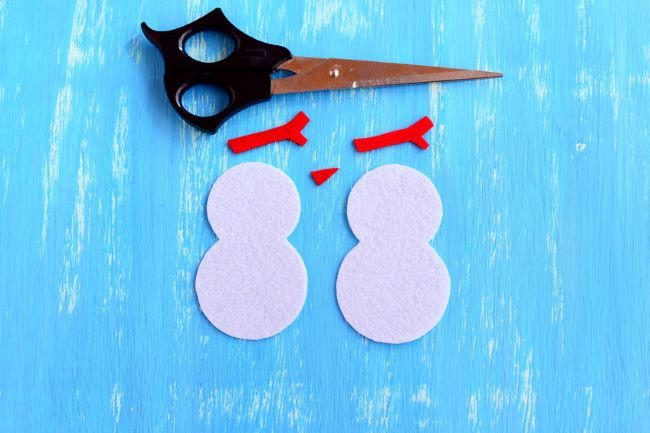
Using your pattern, cut the material into the shapes you will need. For the snowman, I needed a front and a back as well as arms and a tiny carrot shaped nose.
Take the piece of felt that will be the front and embroider the snowman’s eyes, mouth and buttons. Use a tiny bit of glue to affix the nose. Sequins or tiny buttons could be used for the buttons down the front of the snowman.
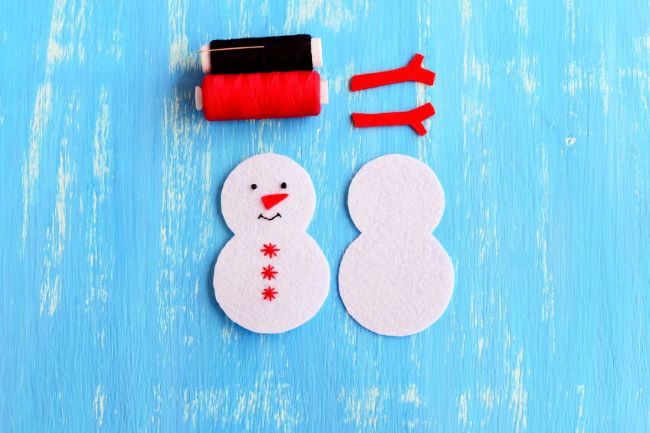
Make a loop of thread to serve as the hanger. Glue that to the top of the piece of felt that will be the back of the ornament. Then put the two pieces of felt together. The hanger will be sandwiched between the two pieces.
Now, take the embroidery thread and start stitching around the edge of the felt. I used a blanket stitch. Stitch almost all the way around the ornament, leaving an open area so that you can add the stuffing.
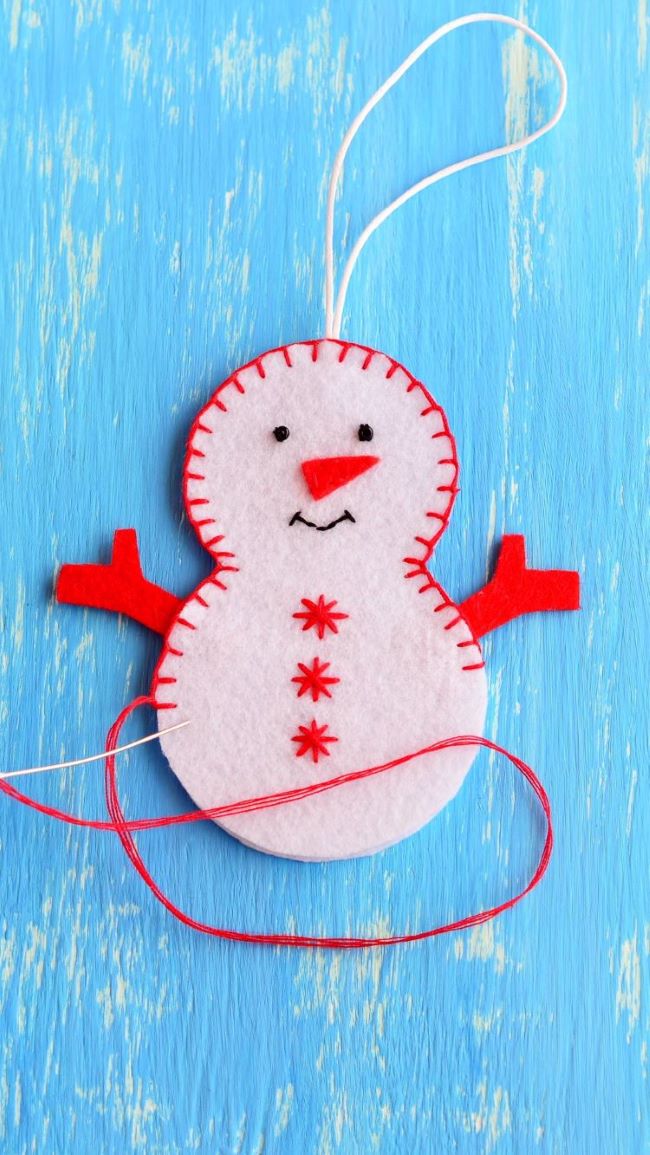
Gently stuff the snowman.
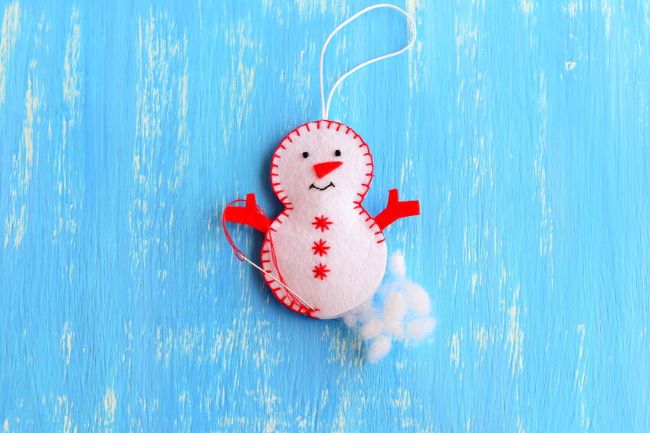
Once you have the stuffing in place, finish sewing around the snowman. Trim off the excess thread. Repeat these steps until you have made all of the ornaments.
To make the star, follow the basic steps that you used to make the snowman.
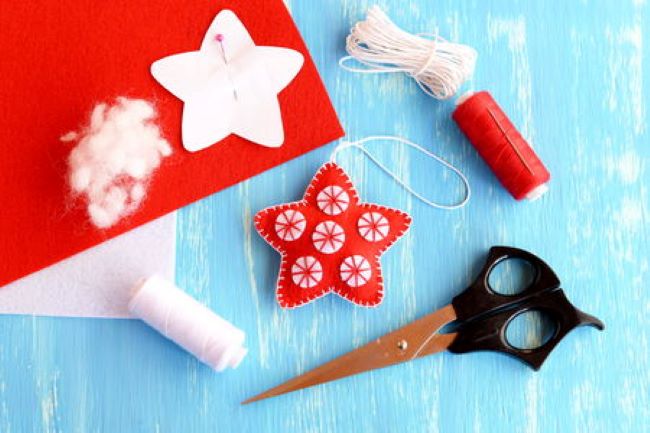
Using your pattern, cut the material into the shapes you will need. The star has little circles on the front that are embroidered to look like peppermint candy. Little buttons could be used in place of the circles if you prefer.
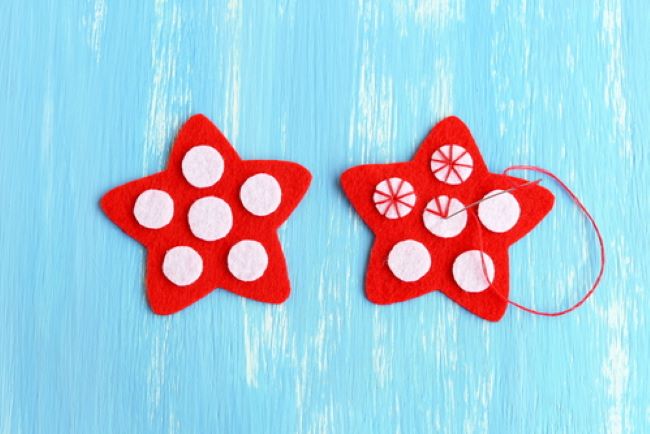
To save time, I left the back of the star plain and only decorated the front of the ornament.
Make a loop of thread to serve as the hanger. Glue that to the top of the piece of felt that will be the back of the ornament. Then put the two pieces of felt together. The hanger will be sandwiched between the two pieces.
Now, take the embroidery thread and start stitching around the edge of the felt. Stitch almost all the way around the ornament, leaving an open area so that you can add the stuffing.
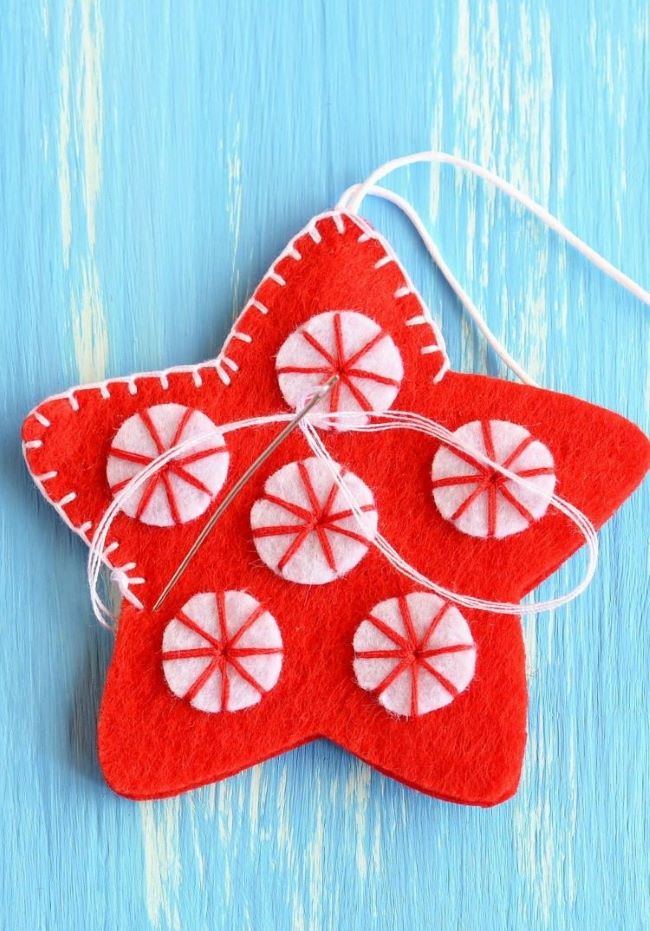
Once you have the stuffing in place, finish sewing around the ornament. Trim off the excess thread. Repeat these steps until you have made all of the ornaments.
Use your creativity to personalize these felt ornaments!
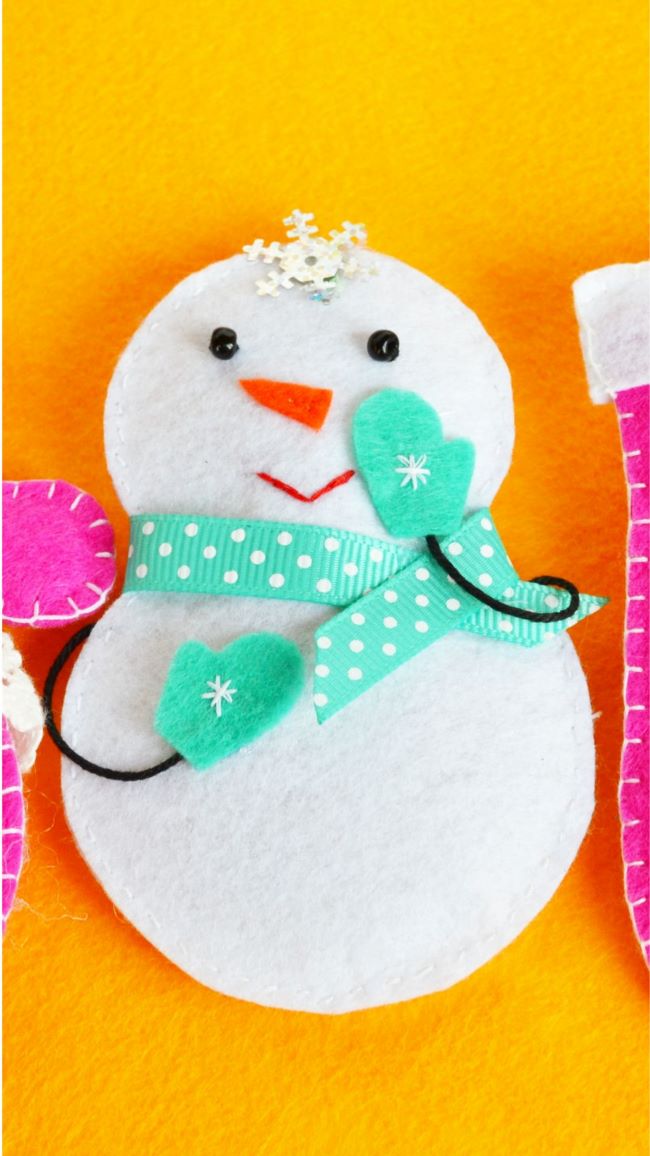
If sewing isn’t your thing, this adorable snowman is easy to make with just fabric, buttons and glue! He has tiny buttons for eyes and a jaunty ribbon scarf! He does have embroidered snowflakes on his gloves but sequins could be used instead!
Now that you have your cute felt ornaments made, you are ready to participate in The Ornament Exchange Blog Hop!
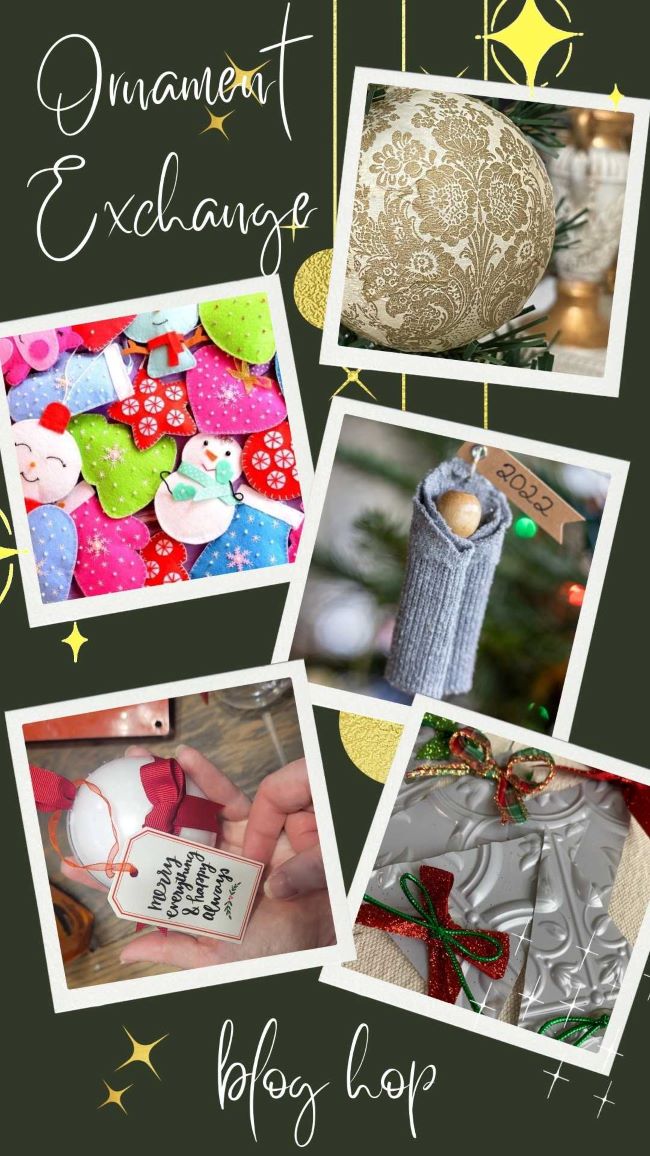
Hop on over to my friends’ blogs and gather some more ornament inspiration!
My friend Juliet was the organizer of this blog hop! Please click on the link below the picture to hop on over to her blog!

Shopping Links:
Disclosure: Some of the links in this post are affiliate links, meaning, at no additional cost to you, I will earn a small commission if you click through and make a purchase. The opinions here are all my own. It helps me to continue to bring to you DIY and projects on my blog.
Please see my disclosure page for more information.
Wow Kimberly these are absolutely adorable. Pinned!
Thank you , Cindy! They were fun to make! Merry Christmas!
Kimberly, I had so many ornaments like this from my childhood. The snowmen are adorable.
Thank you so much for sharing them as part of the Ornament Exchange Blog Hop this month.
Wishing you and your family a wonderful Holiday Season.
XO
Thank you for organizing the hop for us! It was fun! Merry Christmas!!!
Kim these are darling! They would make great keepsakes too! Pinned!
Thank you so much, Sue! It was a fun project! Loved your ceiling tile ornaments! Merry Christmas!
Kimberly, These ornaments are the cutest! I love how you made them in such vibrant colors! Pinning now! I hope you have a wonderful Christmas!
Thank you so much , Donna! They were a lot of fun to make! Merry Christmas to you!!!
Oh my goodness these are some adorable ornaments! These would be great as a garland too. Merry Christmas to you!
A garland is a great idea! Thank you for suggesting that! Your ornament was so sweet! Merry Christmas to you and your family!