Ready to combine your gardening and culinary skills? By learning how to dry herbs, you will be able to add them to your recipes year round!
From Garden to Pantry: Things You Need to Know About Drying Herbs for Culinary Use
Is it thyme to join your gardening skills and your culinary skills together? Learning how to dry herbs is the perfect next step! Discover how satisfying it is to use dried herbs from your own garden to enhance the flavor of your favorite recipes. Today, I am sharing several ways to dry herbs.
The simple process of drying herbs helps preserve their flavor. Once you learn the techniques, you will be ready to use the dried herbs to create your own culinary blends and herbal condiments!
Let’s get ready to step into the garden and harvest some herbs for drying. It is definitely thyme to bring the garden to the pantry and learn how to dry herbs and what to do with them after they are preserved.
Before We Grab Our Garden Scissors
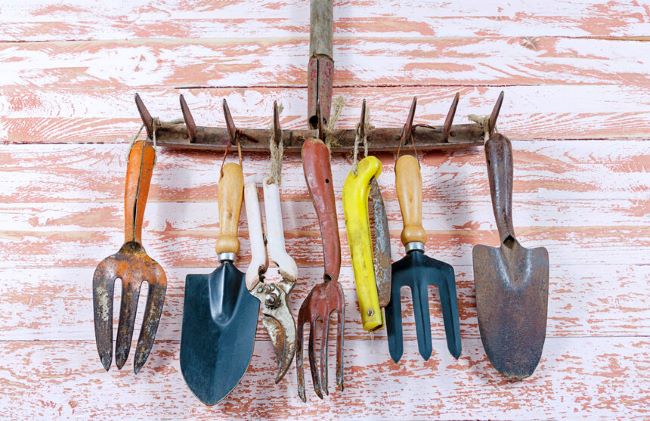
No matter how you arrived here today, whether you are one of my regular readers or perhaps you found me on Google or via Hometalk, I am so glad you are here! My name is Kimberly and I have a passion for flowers (a former florist) and flour (a former pizzeria owner) and many things in between! Especially rusty and chippy gardening tools!
And when it comes to gardening, I often say I am a Zone 6a girl living in a tropical world! After spending most of my gardening life in the Midwest in Zone 6a, even after over 5 years of living in Zone 10a in sunny Southwest Florida, I still want to grab a blanket for a poinsettia when I see one in the landscape outside in January!!!
Sharing things I have learned or experienced over the years is one of my passions. My love of herbs is what prompted me to start my first entrepreneurial endeavor. I often use the word “thyme” in place of “time”. Whether I am decorating my home or my garden, I call my unique style “Kim Style!” I hope you enjoy your thyme here today and learn at least one thing during your visit!
How To Dry Herbs
Benefits of Drying Herbs
Drying herbs is a great way to preserve their flavor. The drying process can also help to concentrate the flavor of the various herbs. Simply by removing moisture from the herbs, drying allows for a longer shelf life, ensuring that you will have access to the delicious herbal flavors all year round. Additionally, dried herbs are often more potent than fresh ones, allowing you to use less in your recipes while still achieving the same level of flavor. Plus, the process of drying herbs is incredibly easy and can be done with minimal equipment, making it a budget friendly activity.
Which Types of Herbs are Best for Drying
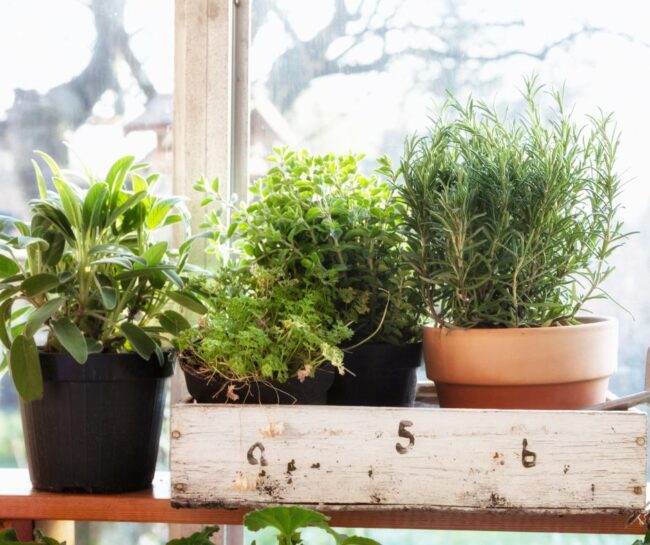
While nearly any type of herb can be dried, some are better suited for this preservation method than others. Herbs with low moisture content, such as rosemary, thyme, oregano, and sage, are excellent candidates for drying. These herbs tend to retain their flavor and aroma well during the drying process. On the other hand, high-moisture herbs like basil and mint may not dry as successfully and could lose some of their essential oils, resulting in a less flavorful end product. However, if you can’t resist drying these herbs, there are ways to do so successfully, which I will cover a bit later.
Preparing Herbs for Drying
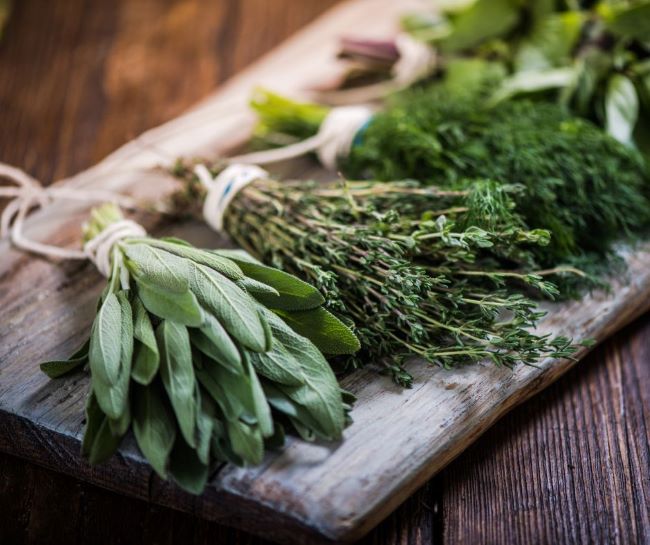
Before you embark on the drying process, it is essential to prepare your herbs properly. Start by harvesting your herbs in the morning when their essential oils are at their peak. Avoid washing the herbs unless they are particularly dirty, as excess moisture can hinder the drying process. Instead, gently shake off any dirt or bugs and pat them dry with a paper towel if necessary. Remove any damaged or discolored leaves and separate the individual sprigs or leaves from the main stem. Once your herbs are clean and prepped, you are ready to begin the drying process.
Different methods of drying herbs
There are several methods you can use to dry herbs, each with its own advantages and considerations. The method you choose will depend on your available resources, time constraints, and personal preference.
Air Drying
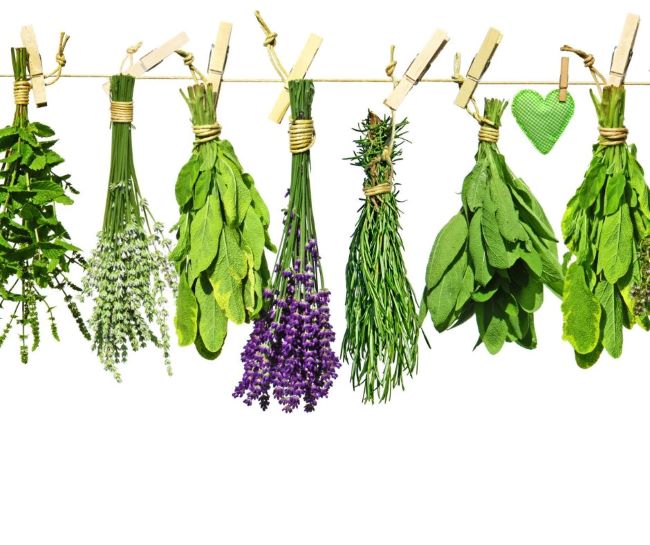
Air drying is the most traditional and straightforward method of drying herbs. To air dry your herbs, tie them in small bundles and hang them upside down in a warm, well-ventilated area away from direct sunlight. This method works best for herbs with low moisture content, such as rosemary, thyme, and sage. The drying process can take anywhere from a few days to a few weeks, depending on the herb and environmental conditions. Once the herbs are completely dry and brittle, remove the leaves from the stems and store them in airtight containers in a cool, dark place.
Oven Drying
If you need to speed up the drying process, oven drying is a great option. This method is particularly useful for herbs with higher moisture content, such as basil and mint. To oven dry your herbs, spread them out in a single layer on a baking sheet lined with parchment paper. Place the baking sheet in an oven set to the lowest temperature (usually around 150°F/65°C) and leave the oven door slightly ajar to allow moisture to escape. Keep a close eye on the herbs to prevent them from burning, and stir them occasionally for even drying. Once the herbs are dry and crumbly to the touch, remove them from the oven and let them cool before storing.
Using a Dehydrator
If you have a dehydrator, drying herbs becomes even easier. Dehydrators provide a controlled environment with consistent airflow, resulting in efficient and even drying. Simply spread the herbs out on the dehydrator trays, making sure to leave enough space for air circulation. Set the dehydrator to a low temperature (around 95°F/35°C) and let it run until the herbs are completely dry. The drying time will vary depending on the herb and moisture content, but it generally ranges from a few hours to overnight. Once the herbs are dry, remove them from the trays and store them in airtight containers.
How to Store Dried Herbs
Proper storage is crucial to preserve the flavor, color, and aroma of your dried herbs. After the herbs are completely dry, remove any remaining stems or debris and crumble them into small pieces. Transfer the herbs to airtight containers, such as glass jars or resealable bags, and store them in a cool, dark place away from direct sunlight and moisture. Label the containers with the name of the herb and the date of drying to ensure freshness. When stored correctly, dried herbs can retain their quality for up to a year, allowing you to enjoy their flavors long after the growing season has ended.
How to Use Dried Herbs in Your Recipes
Dried herbs are incredibly versatile and can be used in a wide range of culinary creations. They can be added directly to soups, stews, and sauces, providing a burst of flavor that complements the other ingredients. When using dried herbs in recipes, remember that their flavors are more concentrated than fresh herbs, so you will need less. As a general rule, use about one-third of the amount of dried herbs called for in a recipe compared to fresh herbs. However, taste as you go and adjust accordingly to achieve the desired flavor.
In addition to savory dishes, dried herbs can also enhance the flavors of baked goods. Add a sprinkle of dried rosemary to a loaf of bread, infuse dried lavender into a batch of shortbread cookies, or incorporate dried basil into homemade pizza dough. The possibilities are endless, and experimenting with different combinations of herbs can lead to exciting and unique flavor profiles.
Quick Overview For Successful Herb Drying
To ensure the best results when drying herbs, keep these tips and tricks in mind:
1. Harvest herbs in the morning when their essential oils are at their peak for maximum flavor.
2. Use only clean and undamaged herbs for drying.
3. Avoid washing the herbs unless necessary, as excess moisture can hinder the drying process.
4. Choose the appropriate drying method based on the herb’s moisture content and your available resources.
5. Monitor the drying process closely to prevent herbs from burning or over-drying.
6. Store dried herbs in airtight containers in a cool, dark place away from direct sunlight and moisture.
7. Label containers with the name of the herb and the date of drying for easy identification.
Save This Pin For Later
Popular Herbs for Drying and Their Culinary Uses
While nearly any herb can be dried, some are more commonly used in cooking. Here are a few easy to grow herbs for drying and their culinary uses:
– Rosemary: Known for its robust and pine-like flavor, dried rosemary is a staple in Mediterranean cuisine. Use it to season roasted meats, potatoes, and vegetables or infuse it into olive oil for a fragrant dipping sauce.
– Thyme: With its earthy and slightly minty flavor, dried thyme adds depth to soups, stews, and roasted meats. It pairs well with other herbs like rosemary and sage and is a key ingredient in classic French dishes like coq au vin and bouquet garni.
– Oregano: Dried oregano is a must-have herb for Italian and Greek cuisine. Its pungent and slightly bitter flavor makes it perfect for tomato-based sauces, pizza, and grilled vegetables. Sprinkle it on top of homemade focaccia or mix it into meatballs for an authentic Mediterranean taste.
– Sage: Dried sage has a warm and savory flavor that complements poultry dishes, stuffing, and creamy sauces. It can also be used to make flavorful compound butter or infused into vinegar for a unique salad dressing.
– Basil: While basil is traditionally used fresh in dishes like caprese salad and pesto, dried basil can still be used to add a hint of its distinctive flavor to sauces, soups, and marinades. It pairs well with tomatoes, garlic, and olive oil, making it a go-to herb in Italian cuisine.
Drying herbs is a simple yet transformative process that allows you to enjoy the flavors of your garden throughout the year. Whether you choose to air dry, oven dry, or use a dehydrator, the end result will be a collection of aromatic and flavorful herbs that can help elevate your culinary creations to new heights. From rosemary and thyme to oregano and sage, the possibilities for using dried herbs in cooking and baking are endless. So, why not bring the garden to your pantry and savor the incredible taste of home-dried herbs? Start your herb drying journey today and unlock a world of culinary delights.
To Learn More About How To Use Herbs (Both Fresh & Dried) In Your Cooking
What is A Lemon Verbena Infusion?

Disclosure: Some of the links in this post are affiliate links, meaning, at no additional cost to you, I will earn a small commission if you click through and make a purchase. The opinions here are all my own. It helps me to continue to bring to you DIY and projects on my blog.
Please see my disclosure page for more information.
This is such a great tutorial for drying herbs properly. I need to try the lemon verbena infusion asap!
You will love the lemon verbena infusion! Thank you for visiting the blog today!
Such great information! I’d love to make my own tea doing this. Thanks!
Thank you, Amy! Creating your own herbal tea blends is a great way to get started! Thanks for stopping by!
Thanks for the great guide!! I tossed all my herbs from the garden this fall and now I know better!!!
In all honesty, I should have published this post about 2 months ago! But, you can save the information for next year! Thanks for stopping by!
I love all of this info!! I’ve finally managed to keep a basil plant alive, and now I am about to start trying to actually GROW some other herbs. Thank you for all of these tips!!
I am so glad you found the information helpful! I love to grow and dry my own herbs! Thanks for stopping by!
Thank you for sharing such a clear step by step guide!
You are so welcome! So glad you found it helpful! Thanks for stopping by!
Thank you for all these great tips! I haven’t tried drying my own herbs yet but would love to try air-drying rosemary & thyme in the near future.
Thank you , Elaina for stopping by! I am so glad you found the post helpful! I think you will enjoy drying your own rosemary and thyme! It is so easy!
congrats Kimberly on KA feature in thistlekeeping!
Thank you, Laura! It is always an honor to have her feature one of my posts!